In recent years, the trend of mini desserts has taken the culinary world by storm. These delightful, bite-sized treats not only satisfy sweet cravings but also add a touch of elegance and fun to any gathering. Whether it’s a birthday party, a holiday celebration, or simply a cozy evening at home, mini desserts have become the go-to choice for those looking to impress guests or indulge in a little self-care. Among these mini wonders, mini cherry cheesecake bites stand out as a quintessential crowd-pleaser.
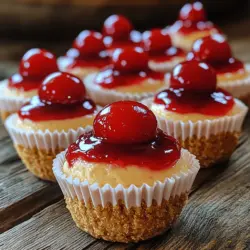
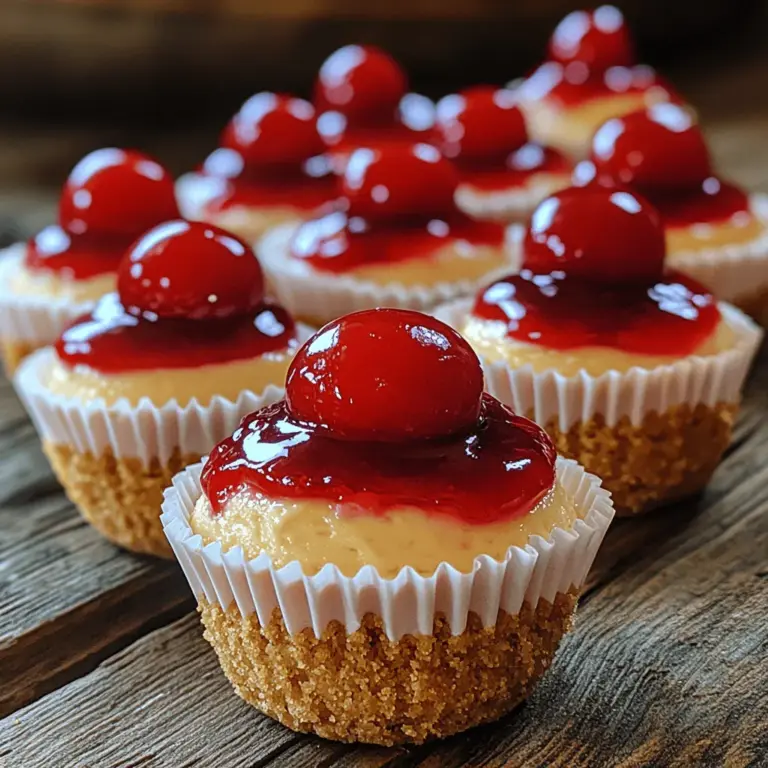
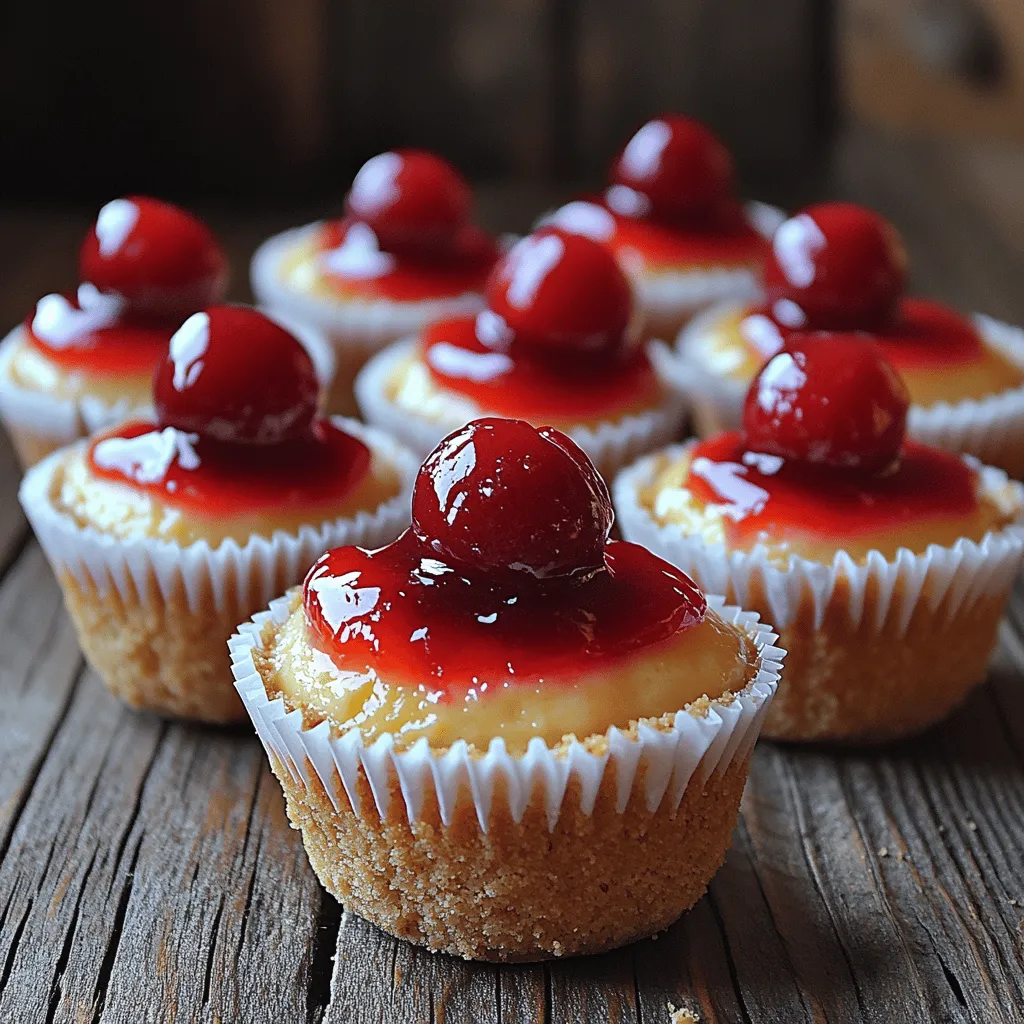
The appeal of mini cherry cheesecake bites lies in their harmonious combination of flavors and textures. Imagine a creamy cheesecake filling nestled on top of a buttery graham cracker crust, all crowned with a luscious cherry topping that adds a burst of sweetness and tartness. This delightful trifecta makes mini cherry cheesecake bites not just a treat for the palate but also a feast for the eyes. Their petite size allows for guilt-free indulgence, making them an ideal dessert for any occasion.
Understanding the Components of Mini Cherry Cheesecake Bites
To create these irresistible mini cherry cheesecake bites, it’s essential to understand the key components that come together to form this delicious treat. The three main components are the crust, the cheesecake filling, and the cherry topping. Each of these elements plays a crucial role in the overall flavor and texture of the bites.
The Crust: A Solid Foundation for Your Cheesecake Bites
The crust serves as the cornerstone of the mini cherry cheesecake bites, providing a sturdy yet flavorful base. Typically made from graham cracker crumbs, this crust adds a delightful crunch that contrasts beautifully with the creamy filling. When selecting graham crackers, opt for those without added sugars or flavors to ensure a balanced taste.
To make the crust, unsalted butter is melted and combined with the graham cracker crumbs. This mixture binds the crumbs together, creating a cohesive base that holds its shape during baking. Melting the butter is a simple yet essential step; it ensures even distribution throughout the crumb mixture, leading to a perfectly textured crust.
Step-by-Step Instructions for Preparing the Crust
1. Gather Your Ingredients: You will need 1 ½ cups of graham cracker crumbs, ½ cup of unsalted butter, melted, and ¼ cup of granulated sugar.
2. Preheat the Oven: Start by preheating your oven to 350°F (175°C). This ensures that the crust will bake evenly.
3. Mix the Ingredients: In a mixing bowl, combine the graham cracker crumbs, melted butter, and sugar. Use a fork or a spatula to mix until the crumbs are fully coated and the mixture resembles wet sand.
4. Prepare the Muffin Tin: Line a muffin tin with paper liners or lightly grease the cups to prevent sticking. This will make it easier to remove the cheesecake bites after baking.
5. Press the Mixture into the Muffin Cups: Take about a tablespoon of the crumb mixture and press it firmly into the bottom of each muffin cup. Use the back of a small measuring cup or your fingers to ensure an even layer.
6. Bake the Crust: Place the muffin tin in the preheated oven and bake for 8-10 minutes, or until the crust is lightly golden. This step is crucial as it helps to set the crust and enhances its flavor.
7. Cool the Crust: Once baked, remove the crust from the oven and let it cool while you prepare the cheesecake filling.
Creating the Creamy Cheesecake Filling
With the crust ready to go, it’s time to focus on the star of the show: the cheesecake filling. The key to a smooth and creamy filling is to start with softened cream cheese. Softening the cream cheese allows it to blend seamlessly with the other ingredients, resulting in a rich and velvety texture.
The Ingredients for the Cheesecake Filling
For the cheesecake filling, you will need:
– 16 ounces of cream cheese (softened)
– ½ cup of granulated sugar
– 1 teaspoon of vanilla extract
– 1 large egg
– ½ cup of sour cream
Each of these ingredients plays a vital role in enhancing the flavor and creaminess of the filling. The sugar adds sweetness, while the vanilla extract provides a warm, aromatic note. The egg is crucial for binding the mixture together, and the sour cream adds a touch of tanginess that balances the sweetness of the cheesecake.
Detailed Instructions on Preparing the Cheesecake Filling
1. Soften the Cream Cheese: If you haven’t done so already, take your cream cheese out of the refrigerator and allow it to sit at room temperature for about 30 minutes. This will make it easier to mix.
2. Combine the Ingredients: In a large mixing bowl, add the softened cream cheese, granulated sugar, and vanilla extract. Using an electric mixer on medium speed, beat the mixture until it is smooth and creamy, taking care to scrape down the sides of the bowl as needed.
3. Add the Egg: Once the cream cheese mixture is smooth, add the egg. Continue mixing until just combined. Be careful not to overmix, as this can introduce too much air into the batter.
4. Incorporate the Sour Cream: Finally, add the sour cream and mix until fully incorporated. This will give your cheesecake filling that signature creaminess and flavor.
5. Fill the Muffin Cups: Carefully spoon the cheesecake filling into each muffin cup, filling them about three-quarters full. This will allow room for the filling to puff up slightly during baking.
Perfecting the Baking Process
Baking the mini cherry cheesecake bites is the final step that brings all the components together. The baking time is crucial, as it determines the texture of the cheesecake filling.
To achieve a perfectly baked cheesecake, it’s essential to monitor the bites closely. They should be set around the edges but slightly jiggle in the center when you gently shake the muffin tin. This slight jiggle indicates that the cheesecake is perfectly creamy and will firm up as it cools.
Incorporating these elements into your mini cherry cheesecake bites will create a delicious treat that is sure to impress at any gathering. The combination of a buttery graham cracker crust, a rich and creamy cheesecake filling, and a sweet cherry topping will have everyone reaching for seconds.
Stay tuned for the next part of this article, where we will dive into the cherry topping, tips for serving, and answer some common questions about making mini cherry cheesecake bites.
Importance of Preheating the Oven and Using Mini Cupcake Liners
Preheating your oven is a crucial step in baking, especially for delicate items like cheesecake bites. By preheating, you ensure that the cheesecake bakes evenly and thoroughly from the moment it enters the oven. A properly preheated oven helps to set the structure of the cheesecake quickly, which is essential for achieving that creamy texture without overcooking. Aim to preheat your oven to 325°F (163°C) at least 15 minutes before you plan to bake your mini cheesecakes.
Using mini cupcake liners is equally important for this recipe. These liners not only help with easy removal but also ensure that the cheesecake bites maintain their shape. When using liners, you can skip the hassle of greasing muffin tins, and they provide a neat and attractive presentation for your desserts. Make sure to choose high-quality liners that can withstand the baking temperature without collapsing.
Detailed Baking Instructions
Once your oven is preheated, it’s time to bake your mini cherry cheesecake bites. Begin by carefully pouring the cheesecake mixture into each cupcake liner, filling them about three-quarters full to allow for some rising. This will typically yield around 24 mini cheesecake bites, depending on the size of your liners.
Bake in the preheated oven for about 18-20 minutes. You’ll know they are done when the edges are set, and the centers still have a slight jiggle. The visual cue of a lightly golden edge combined with the soft center indicates that the cheesecakes are perfectly baked. Avoid overbaking, as this can lead to a dry texture rather than the creamy, smooth finish we desire.
Once done, remove the cheesecake bites from the oven and allow them to cool in the muffin tin for about 10 minutes. This resting time is essential as it allows the cheesecakes to stabilize. After that, carefully transfer them to a wire rack to cool completely at room temperature.
Cooling Process and Its Impact on the Final Texture of the Cheesecake Bites
Cooling is a critical phase that impacts the final texture of your mini cherry cheesecake bites. Allowing them to cool completely ensures that they set properly, achieving the creamy, rich texture that is signature to cheesecakes. If you were to chill them immediately in the refrigerator after baking, the sudden temperature drop could cause cracks or an uneven texture.
Once cooled at room temperature for about an hour, transfer the cheesecake bites to the refrigerator and chill for at least 2-4 hours, or overnight if time allows. This chilling process solidifies their structure and enhances the flavors, making them taste even better. Remember, patience pays off in the world of cheesecakes!
Topping Your Cheesecake Bites
When it comes to topping your mini cheesecakes, cherry pie filling is a popular choice due to its convenience. You can easily find pre-made cherry pie filling in grocery stores, which saves time without compromising flavor. However, if you’re feeling adventurous and want a fresher taste, consider making your own cherry topping using fresh or frozen cherries, sugar, and a bit of cornstarch to thicken.
For a beautiful presentation, fresh cherries can be an excellent garnish. Not only do they add visual appeal, but they also enhance the overall flavor of the cheesecake bites. The tartness of fresh cherries contrasts beautifully with the creamy sweetness of the cheesecake.
Step-by-Step Instructions to Properly Top the Cheesecake Bites
1. Prepare the Topping: If using cherry pie filling, open the can and stir gently to mix the cherries and syrup. If making your own, cook cherries with sugar over medium heat until they soften, then mix in cornstarch dissolved in water to thicken.
2. Top the Cheesecakes: Once your cheesecake bites have cooled and set, carefully spoon a generous dollop of cherry filling onto each cheesecake. Aim for a full covering to ensure every bite has that delightful cherry flavor.
3. Garnish: If using fresh cherries, slice them in half and place one half on top of the filling for an elegant touch. Alternatively, you could add a sprig of mint for a pop of color and freshness.
4. Chill Again: After topping, return the mini cheesecakes to the refrigerator for at least 30 minutes. This helps the topping set slightly and melds the flavors together.
Serving Suggestions and Pairing Ideas
Presenting your mini cherry cheesecake bites can elevate your dessert experience, making them perfect for various occasions. For a casual gathering, you can simply arrange them on a platter, allowing guests to grab them as they please. For more formal events, consider using a tiered dessert stand for an attractive display. Adding a drizzle of chocolate or a dusting of powdered sugar can also enhance their visual appeal.
When it comes to pairing, these cheesecake bites are versatile. A rich cup of coffee complements the sweetness of the cheesecake, while a glass of dessert wine, such as a late-harvest Riesling or a sparkling dessert wine, can enhance the flavors beautifully. If you’re serving these at a summer gathering, consider pairing them with iced tea or lemonade for a refreshing contrast.
Nutritional Information and Serving Size
Understanding the nutritional value of your mini cherry cheesecake bites is essential, especially if you are mindful of dietary restrictions. Each cheesecake bite is typically around 100 calories, depending on the specific ingredients used. They contain a mix of carbohydrates, fats, and protein, making them a balanced dessert option when enjoyed in moderation.
Since these bites are smaller than traditional cheesecake slices, they offer a great way to satisfy a sweet tooth without overindulging. Portion control is easier with mini desserts, allowing you to enjoy a treat while keeping your diet in check.
Conclusion
The delightful experience of making and enjoying mini cherry cheesecake bites is one that you won’t soon forget. The process not only brings out the baker in you but also culminates in a deliciously creamy treat that is sure to impress anyone who tastes them. Whether you’re preparing them for a special event, a cozy family gathering, or simply as a sweet indulgence at home, these cheesecake bites are guaranteed to be a hit.
Encourage your friends and family to join in the fun of creating these delightful mini desserts. Share the recipe, host a baking night, or surprise someone special with a batch. Homemade desserts have a unique charm, and there’s nothing quite like sharing a sweet treat made with love. Enjoy the joy of baking and the happiness that comes from sharing delicious food with loved ones.