Introduction
Garlic bread is a beloved classic that graces dinner tables around the world, often serving as a comforting side dish that elevates any meal. Its warm, buttery goodness, combined with the aromatic allure of garlic, makes it a go-to for family dinners, gatherings, and even cozy nights in. But what if there was a way to take this culinary favorite to new heights? Enter garlic bread bowls—an innovative twist that transforms traditional garlic bread into an edible vessel, perfect for holding your favorite fillings.
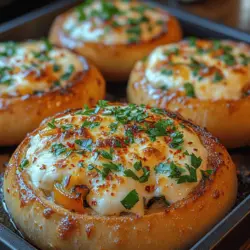
Garlic bread bowls are not only visually appealing but also incredibly versatile. They can be filled with a plethora of ingredients, making them an excellent choice for entertaining guests or simply enjoying a delightful snack at home. Imagine a crunchy, buttery bowl made of freshly baked garlic bread, overflowing with a delicious mixture of cheeses, vegetables, and perhaps a savory sauce. This recipe is sure to impress anyone who tries it, making it a standout dish for any occasion.
In this article, we’ll explore the background of garlic bread bowls, delve into the ingredients that make them a culinary delight, and provide you with detailed step-by-step instructions to create your very own garlic bread bowls at home. Whether you’re hosting a party or looking for a fun dinner idea, this recipe is sure to satisfy your cravings and leave your taste buds singing.
Understanding Garlic Bread Bowls
So, what exactly are garlic bread bowls? At their core, garlic bread bowls are hollowed-out loaves of bread infused with the rich and fragrant flavors of garlic and butter. They serve as a delicious alternative to traditional serving dishes, offering a unique combination of crunch and flavor in every bite. The bread itself is crispy on the outside while remaining soft on the inside, creating the perfect contrast to the savory fillings nestled within.
One of the most appealing aspects of garlic bread bowls is their versatility. You can customize them to suit your taste preferences or dietary needs. Whether you prefer a classic cheese and herb filling, a hearty vegetable medley, or a more indulgent creamy dip, the possibilities are virtually endless. This adaptability makes garlic bread bowls an excellent choice for different occasions, allowing you to cater to various guest preferences.
Culturally, garlic bread finds its roots in Italian cuisine, where the practice of toasting bread with garlic and olive oil has been a staple for centuries. Variations exist across many cultures, from the French baguette topped with garlic butter to the American-style garlic knots. Garlic bread bowls take inspiration from these traditions while adding a modern twist that appeals to contemporary palates. They encapsulate the essence of comfort food, making them a perfect fit for any gathering or family meal.
Ingredients Breakdown
Sourdough or Artisan Bread Loaves
When it comes to selecting the right bread for your garlic bread bowls, sourdough or artisan bread loaves are ideal choices. These types of bread are characterized by their robust crusts and chewy interiors, which provide the structural integrity needed for hollowing out the loaf without compromising its shape. Sourdough, in particular, brings a distinctive tanginess that complements the richness of the garlic butter and the savory fillings.
The textures and flavors of sourdough and artisan bread contribute significantly to the overall taste of your garlic bread bowls. The crust becomes wonderfully crispy when baked, while the inside remains soft, making each bite a satisfying experience. The natural fermentation process of sourdough also enhances the bread’s flavor profile, adding depth that elevates the dish beyond a simple side.
Garlic Butter Mixture
The heart and soul of garlic bread bowls lie in the garlic butter mixture. This blend of ingredients not only coats the bread but also infuses it with robust flavors. Here’s a closer look at the key components:
– Unsalted Butter: The base of your garlic butter, unsalted butter allows you to control the saltiness of the dish. It melts beautifully, soaking into the bread and creating that irresistible buttery essence.
– Minced Garlic: Freshly minced garlic is essential for achieving that vibrant garlic flavor. It releases its oils when cooked, which adds a rich aroma and taste that complements the butter perfectly.
– Dried Parsley: This herb adds a touch of color and a mild, fresh flavor. It balances the richness of the butter and garlic, enhancing the overall taste without overpowering the other ingredients.
– Dried Oregano: Oregano brings a warm, earthy flavor that pairs exceptionally well with garlic. It adds a hint of Mediterranean flair, making your garlic bread bowls feel like a culinary journey.
– Red Pepper Flakes: For those who enjoy a bit of heat, red pepper flakes are an excellent addition. They contribute a subtle kick, elevating the flavor profile and adding complexity to the dish.
– Salt and Black Pepper: These basic seasonings are crucial for enhancing the flavors of the garlic butter. A pinch of salt brings out the inherent sweetness of the garlic, while black pepper adds depth and warmth.
Together, these ingredients create a garlic butter mixture that coats the bread and fills it with flavor, setting the stage for the delicious fillings to come.
Cheese and Vegetable Filling
When it comes to filling your garlic bread bowls, the sky’s the limit. Cheese is a natural choice, as it melts beautifully and adds a creamy texture. Here are some suggestions for different types of cheeses and their flavor profiles:
– Mozzarella: Known for its stretchy texture, mozzarella is a classic choice that offers a mild, creamy flavor. It pairs well with a variety of fillings and is perfect for those looking for a gooey, melty experience.
– Cheddar: For a sharper flavor, consider using cheddar cheese. Its rich taste adds depth to the filling, and it melts wonderfully, creating a delightful contrast to the crunchy bread.
– Parmesan: A sprinkle of grated Parmesan can elevate the dish with its nutty, salty flavor. It’s best used in combination with other cheeses for a more complex taste.
In addition to cheese, incorporating seasonal vegetables can add freshness and nutrition to your garlic bread bowls. Here are some popular options:
– Spinach: This leafy green is a fantastic choice, as it wilts down to a tender texture and adds a mild flavor that balances the richness of the cheese.
– Bell Peppers: With their sweet, crisp nature, bell peppers add color and crunch to your filling. They can be used raw for a fresh bite or sautéed for a softer texture.
– Mushrooms: Earthy and savory, mushrooms bring a unique umami flavor to the mix. Sautéing them beforehand enhances their taste and ensures they blend well with the other ingredients.
When filling your garlic bread bowls, it’s crucial to season the mixture properly. A well-seasoned filling will elevate the entire dish and create a harmonious flavor profile. Consider adding a touch of salt, pepper, or even a splash of balsamic vinegar to brighten the flavors and tie everything together.
Step-by-Step Instructions
Preparing the Bread Loaves
The first step in creating your garlic bread bowls is preparing the bread loaves. Follow these detailed instructions to ensure your loaves are ready for filling:
1. Select Your Loaves: Choose high-quality sourdough or artisan bread loaves, as mentioned earlier. Aim for loaves that are round or oval in shape, which will be easier to hollow out.
2. Cutting the Top Off: Using a sharp serrated knife, carefully slice the top off each loaf to create a lid. Aim for about a 1-inch cut to allow enough space for filling, while also leaving a sturdy base to hold everything together.
3. Scooping Out the Inside: Using your fingers or a spoon, gently scoop out the bread from the center of the loaf, leaving about a half-inch border around the edges. Be cautious not to puncture the sides or bottom, as you want your bowl to hold its shape.
4. Saving the Bread: Don’t discard the bread you scooped out! This can be reserved for other uses, such as making croutons or breadcrumbs. Simply tear it into small pieces and store it for later.
5. Brushing with Garlic Butter: Once your loaves are hollowed out, brush the inside of each loaf generously with the prepared garlic butter mixture. This will infuse the bread with flavor and ensure a deliciously garlicky bite.
6. Preparing for Baking: Place the bread bowls on a baking sheet, ready to be filled and baked. Preheat your oven according to the recipe instructions, as this will help create that golden, crispy exterior when baked.
By following these steps, you’ll have perfectly prepared garlic bread bowls, ready to be filled with your favorite ingredients.
Stay tuned for the next part of this article, where we will delve deeper into the filling process, baking instructions, and tips for serving these delectable garlic bread bowls at your next gathering.
Creating the Garlic Butter Mixture
To kick off our garlic bread bowls, the first step is crafting a delectable garlic butter mixture. This flavorful spread is the heart of the dish and will ensure every bite of your bread bowls is infused with rich garlic flavor.
Mixing the Garlic Butter
To make the garlic butter, start with 1 cup (2 sticks) of unsalted butter, softened at room temperature. In a mixing bowl, combine this with 6-8 cloves of freshly minced garlic. The more garlic, the stronger the flavor, so adjust according to your preference.
Next, add 1 teaspoon of salt and 1 teaspoon of freshly ground black pepper for seasoning. If you wish to elevate the flavor profile, consider including 1 tablespoon of fresh parsley, finely chopped, or 1 teaspoon of dried Italian herbs like oregano, thyme, or basil. These additions will not only enhance the flavor but also add a touch of color to your garlic butter.
Using a fork or a hand mixer, blend the ingredients until they are well combined and the butter is smooth. You want a spreadable consistency; if your butter is too soft, it may ooze out of the bread. Conversely, if it’s too hard, it won’t coat the bread effectively. Aim for a creamy texture that holds together well.
Coating the Bread Bowls
Once your garlic butter is ready, it’s time to coat the bread bowls. This step is crucial for ensuring that every bite is packed with flavor.
Techniques for Even Coating
Using a butter knife or a pastry brush, generously spread the garlic butter mixture over the inside and outside of each bread bowl. Make sure to use enough butter to create a good layer without overwhelming the bread.
Start by coating the inside of the bowl first, ensuring that the garlic butter seeps into any crevices. This not only flavors the bread but also helps to create a barrier that prevents the filling from making the bread soggy. Next, coat the outside of the bread bowl, making sure to cover all surfaces evenly.
Importance of Comprehensive Coating
Remember, the key to maximum flavor lies in coating both the inside and the outside. This dual approach allows the garlic butter to impart its rich taste throughout the entire bowl, providing a satisfying bite no matter where you’re munching. Don’t rush this process; thorough coating is essential for achieving that signature garlic bread flavor.
Baking the Bowls
Now that your bread bowls are coated with garlic butter, it’s time to bake them to golden perfection. Baking transforms the bread, enhancing its texture and flavor.
Baking Process and Temperature
Preheat your oven to 375°F (190°C). Once the oven is hot, place your garlic butter-coated bread bowls on a baking sheet lined with parchment paper. This not only prevents sticking but also makes cleanup easier.
Bake the bowls for 15-20 minutes, checking periodically. You’re looking for a lovely golden brown color on the outside. The bread should feel firm to the touch and slightly crispy. If you notice they are browning too quickly, you can tent them with aluminum foil to prevent burning while ensuring they cook through.
Signs of Perfectly Baked Bread
To ensure your bread bowls are perfectly baked, look for a few key indicators:
– A deep golden-brown exterior
– A firm and slightly crisp texture on the outside
– A warm, fluffy interior that feels light when pressed
Once baked, remove the bowls from the oven and allow them to cool slightly before filling.
Filling the Bowls
Now comes the fun part—filling your garlic bread bowls! This is where you can get creative with your choice of filling.
Tips for Preparing and Packing the Filling
Before filling, prepare your desired filling. Options abound, from creamy cheese mixtures to hearty soups or savory dips. If you’re using a cheesy filling, like a mixture of cream cheese, cheddar, and herbs, make sure it’s soft enough to spoon easily into the bowls.
When filling the bowls, start by adding a layer of your filling to the bottom of the bowl. This ensures a good base and helps keep the filling from leaking out. Then, pack the filling carefully, avoiding overfilling to prevent spillage during the second bake.
Layering for Optimal Taste
For layered fillings, alternate between different flavors. For instance, if you’re making a cheese and spinach filling, you might add a layer of cheese, followed by a layer of sautéed spinach, and then another layer of cheese. This layering technique not only enhances flavor but also adds visual appeal.
Final Bake
After filling your bowls, it’s time for the final bake. This step is crucial for achieving that bubbly, golden cheese topping that makes garlic bread bowls so irresistible.
Importance of the Second Baking Phase
Return the filled garlic bread bowls to the oven and bake at 375°F (190°C) for an additional 10-15 minutes. This will allow the filling to heat through and any cheese to melt beautifully.
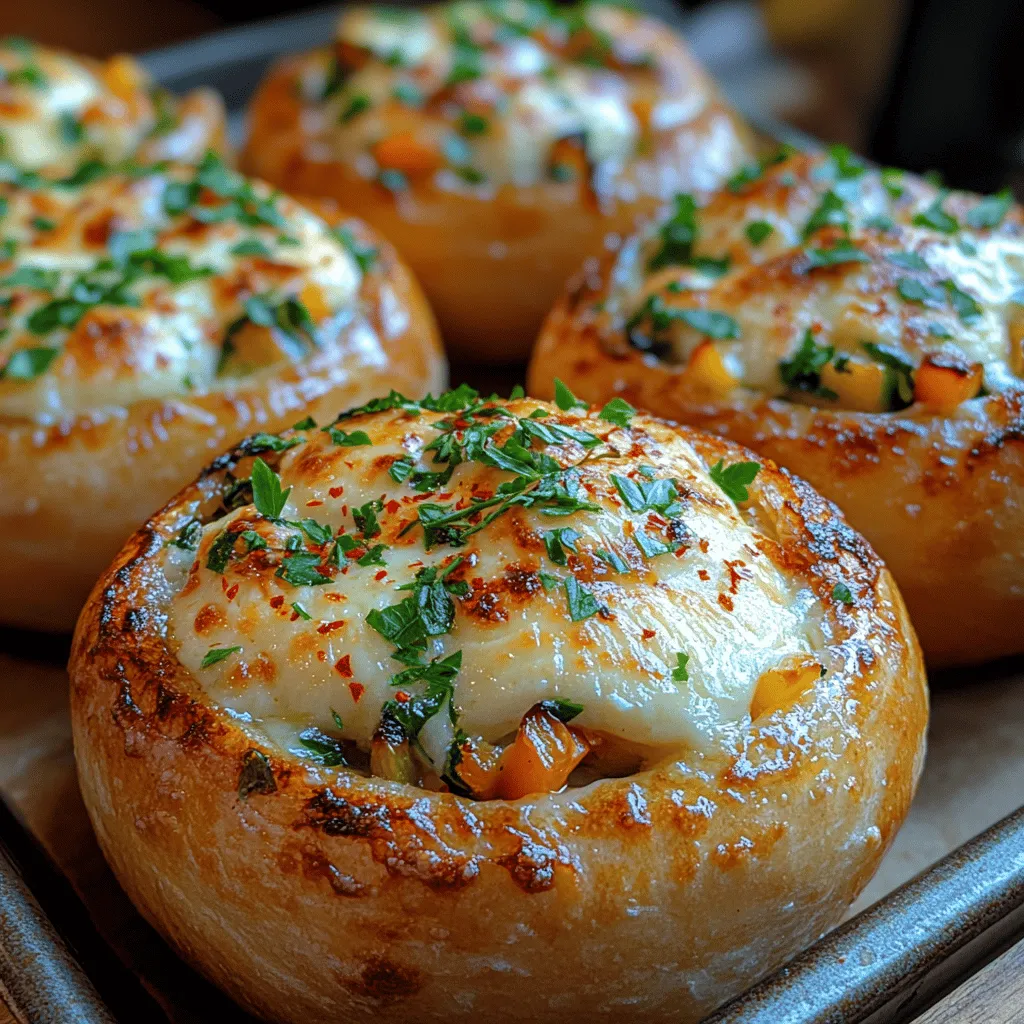
Visual Cues for Readiness
Keep an eye on the bowls during this final baking phase. You’ll know they are ready when:
– The cheese is melted and bubbling
– The edges of the bread are crispy and brown
– A delightful aroma fills your kitchen
Once they’re ready, remove them from the oven and let them cool for a few minutes before serving.
Serving Suggestions
Garlic bread bowls are not only delicious but also visually appealing, making them a hit at any gathering.
Presentation Ideas
Serve your garlic bread bowls on a large platter, garnished with fresh herbs like parsley or basil. For an added touch, you can drizzle a bit of olive oil or balsamic reduction around the platter for a beautiful presentation.
Pairing Suggestions
To complement your garlic bread bowls, consider serving them with dips or sauces. Marinara sauce, a creamy ranch dressing, or a zesty vinaigrette can enhance the flavors and provide a delightful contrast to the rich garlic butter. You might even serve them alongside a fresh salad for a complete meal.
Nutritional Information
While garlic bread bowls are a treat, it’s important to be mindful of their nutritional content.
Overview of Nutritional Benefits
The primary ingredients—bread, garlic, and butter—offer a range of benefits. Garlic is known for its health properties, including its potential to boost the immune system and lower blood pressure. Whole grain bread can provide fiber and essential nutrients, while butter adds a rich flavor and necessary fats.
Portion Sizes and Healthier Options
When serving garlic bread bowls, consider portion sizes. Depending on the filling, one bowl can serve as a hearty meal or a substantial appetizer. If you’re looking to make this dish healthier, consider using whole grain or gluten-free bread options and reducing the amount of butter in the garlic mixture. You can also substitute some of the butter with olive oil for a heart-healthier alternative.
Conclusion
In summary, garlic bread bowls are a delightful fusion of flavor and comfort. With their crispy, buttery exterior and a variety of filling options, they can be tailored to suit any palate or occasion.
Don’t hesitate to experiment with different fillings, whether that’s a classic cheesy mixture, a savory veggie medley, or even a warming soup. The joy of cooking lies in the ability to share your creations with family and friends, and garlic bread bowls are sure to be a crowd-pleaser.
So gather your loved ones, whip up a batch of these heavenly garlic bread bowls, and enjoy the process of cooking and sharing comfort food together. Your kitchen will be filled with warmth, and your hearts will be filled with joy—what more could you ask for?