Introduction
If you’re searching for the perfect dessert that combines the creamy richness of cheesecake with the beloved taste of Oreo cookies, look no further than the decadent no-bake Oreo cheesecake. This delightful treat is not only a feast for the eyes but also a crowd-pleaser, making it an ideal choice for various occasions, from casual family get-togethers to elegant dinner parties. The beauty of this recipe lies in its simplicity; it requires no baking, allowing you to whip up a delicious dessert without the heat of the oven.
No-bake desserts have gained immense popularity in recent years, and for good reason. They are incredibly easy to prepare, often requiring minimal ingredients and effort. This Oreo cheesecake stands out among its peers due to its unique combination of flavors and textures, all while being incredibly satisfying. The rich creaminess of the cheesecake filling, combined with the iconic crunch of Oreo cookies, creates a dessert that is both indulgent and comforting. Whether you’re an experienced baker or a novice in the kitchen, this recipe promises great results with little fuss.
Understanding the Ingredients
To create the perfect no-bake Oreo cheesecake, it’s essential to understand the role of each ingredient. Each component not only adds flavor but also contributes to the overall texture and structure of the dessert.
The Star of the Show: Oreo Cookies
At the heart of this recipe are the iconic Oreo cookies, known for their distinctive chocolate wafer and creamy filling. Their unique flavor profile is both sweet and slightly bitter, making them the ideal choice for this cheesecake. The Oreos serve a dual purpose in this recipe: they form the crust and are also blended into the cheesecake filling. The cookies’ crumbly texture adds a delightful crunch that contrasts beautifully with the smoothness of the cheesecake, creating a harmonious balance that is sure to satisfy any sweet tooth.
Creamy Base: Cream Cheese and Sour Cream
The creamy base of the cheesecake is made with a combination of cream cheese and sour cream. Cream cheese is essential for achieving that rich and velvety texture that is characteristic of traditional cheesecakes. It provides a dense and creamy mouthfeel that is both luxurious and satisfying. Sour cream, on the other hand, adds a subtle tanginess that cuts through the richness of the cream cheese, creating a more balanced flavor profile. Together, these two ingredients work in harmony to create a cheesecake that is not only creamy but also has a depth of flavor that will keep your guests coming back for more.
Sweetness Factor: Powdered Sugar
When it comes to sweetening the cheesecake, powdered sugar is the preferred choice over granulated sugar. The fine texture of powdered sugar allows it to blend smoothly into the cream cheese and sour cream mixture, ensuring an even distribution of sweetness throughout the cheesecake. This is particularly important in cheesecake recipes, as any granulated sugar that remains undissolved can create a gritty texture, which is not desirable in a smooth, creamy cheesecake. The use of powdered sugar results in a well-sweetened dessert that maintains the silky consistency we all love in cheesecakes.
The Role of Heavy Cream
Heavy cream plays a crucial role in the overall texture of the no-bake Oreo cheesecake. When whipped, heavy cream incorporates air, which adds lightness and volume to the cheesecake filling. This whipped cream not only enhances the texture of the cheesecake but also contributes to a luxurious mouthfeel. The airy quality of the whipped cream helps to create a dessert that feels indulgent yet surprisingly light, allowing you to savor every bite without feeling overwhelmed.
Optional Ingredients
While the core ingredients of the no-bake Oreo cheesecake create a fantastic dessert, there are optional additions that can elevate the flavor even further. One such ingredient is lemon juice. Adding a splash of lemon juice can enhance the cheesecake’s flavor profile by introducing a hint of acidity. This acidity cuts through the richness of the cream cheese and sour cream, adding brightness to the overall taste. If you’re a fan of citrus, a little lemon juice can make a significant difference, providing a refreshing contrast to the sweetness of the dessert.
Step-by-Step Preparation Guide
Now that we’ve covered the essential ingredients, let’s dive into the step-by-step preparation of the decadent no-bake Oreo cheesecake. This guide will break down each stage of the process, ensuring clarity and ease as you create this delightful dessert.
Preparing the Crust
The crust of the no-bake Oreo cheesecake is a vital component that sets the stage for the rich filling. Here’s how to prepare it:
Crushing the Oreos: Techniques for Achieving the Perfect Crumb Texture
Start by taking a package of Oreo cookies and removing the cream filling if you prefer a more intense chocolate flavor in your crust. However, many choose to keep the filling intact for added sweetness and creaminess. Place the Oreos in a food processor and pulse until you achieve a fine crumb texture. If you don’t have a food processor, you can place the cookies in a zip-top bag and crush them with a rolling pin. Aim for a texture that resembles sand; this will ensure that your crust holds together well.
Mixing with Butter: Importance of Achieving the Right Consistency for a Sturdy Crust
Once you have your Oreo crumbs ready, transfer them to a mixing bowl and add melted butter. The butter acts as a binding agent, helping the crumbs stick together. Use a fork or your hands to mix the crumbs and butter thoroughly until the mixture resembles wet sand. The right consistency is crucial; if the mixture is too dry, the crust will crumble when sliced, while too much butter will make it overly greasy. You want a balance that allows the crust to hold its shape while still being rich and flavorful.
Setting the Crust: Why Chilling is Necessary Before Adding the Filling
After mixing the crumbs and butter, press the mixture firmly into the bottom of a springform pan, creating an even layer. Use the back of a measuring cup or your hands to pack it down tightly. This step is essential for ensuring that your crust holds together when the cheesecake is served. Once pressed, place the crust in the refrigerator for at least 20-30 minutes to set. Chilling the crust allows the butter to firm up, making it sturdier and easier to slice once the cheesecake is assembled.
Crafting the Cheesecake Filling
With the crust prepared and chilling, it’s time to move on to the cheesecake filling. This step is where the magic happens, transforming simple ingredients into a rich and creamy dessert.
Beating the Cream Cheese: Tips for Achieving a Smooth Mixture
Begin by placing the softened cream cheese in a large mixing bowl. It’s crucial that the cream cheese is at room temperature to avoid lumps in your filling. Using an electric mixer, beat the cream cheese on medium speed until it becomes smooth and creamy, which usually takes about 2-3 minutes. Scrape down the sides of the bowl with a spatula to ensure that all the cream cheese is well incorporated. This step is vital for creating a lump-free filling that will yield a beautifully smooth cheesecake.
Incorporating Sweetness: Gradual Mixing Techniques for Even Sweetness Distribution
Once the cream cheese is smooth, gradually add the powdered sugar while continuing to mix on low speed. This gradual addition helps to prevent a sugar cloud from forming and ensures that the sugar is evenly distributed throughout the mixture. Increase the speed to medium once all the sugar is added and continue to mix until fully combined, which should take no more than a minute. The mixture should be thick and creamy at this point.
Folding in Sour Cream: The Gentle Process of Incorporating Ingredients Without Deflation
To finish off the filling, gently fold in the sour cream. Use a spatula to carefully incorporate the sour cream into the cream cheese mixture, being cautious not to deflate the whipped air that has built up. Folding is a technique that allows you to combine ingredients without losing the lightness that is essential for this cheesecake. Once the sour cream is fully incorporated, your filling will be ready for the next step.
With the crust set and the filling prepared, you are well on your way to creating a decadent no-bake Oreo cheesecake that will impress your family and friends. Stay tuned for the next part, where we will detail the final assembly and presentation of this delightful dessert.
Whipping the Cream
To achieve a luscious, fluffy texture in your Decadent No Bake Oreo Cheesecake, whipping the cream correctly is crucial. Here’s how to get it just right.
Achieving Stiff Peaks
When whipping cream, the goal is to reach stiff peaks. This means that when you lift the whisk or beaters out of the cream, it should hold its shape and not droop. The key indicators for perfect whipped cream include:
– Texture: The cream should appear thick and fluffy.
– Volume: You’ll notice it expands significantly as air is incorporated.
– Stiff Peaks: When you remove the whisk, the peaks should stand upright without collapsing.
To achieve this, start with cold heavy cream and use a chilled bowl and beaters if possible. This helps maintain the temperature and allows for better whipping. Whipping on medium speed will ensure that you don’t over-whip the cream too quickly.
Importance of Not Over-Whipping
While it’s essential to whip your cream to the right consistency, over-whipping can lead to a grainy texture and can even turn your cream into butter. To avoid this, keep a close eye on the cream as it whips and stop as soon as you see stiff peaks forming. If you accidentally over-whip it, you can try to salvage it by gently folding in a bit of unwhipped cream to restore some smoothness.
Combining the Mixtures
Now that your cream is whipped to perfection, it’s time to combine it with the other elements of your cheesecake filling. This step is crucial for maintaining the light, airy texture of your dessert.
Techniques for Folding
Folding is a gentle technique used to combine mixtures without deflating the whipped cream. To fold effectively:
– Use a Rubber Spatula: This tool is ideal for scraping the sides of the bowl and lifting the mixture from the bottom.
– Turn the Bowl: Rotate the bowl as you fold, moving the spatula from the bottom to the top in a circular motion.
– Be Gentle but Thorough: Aim for a uniform mixture without losing the airiness of the whipped cream.
This technique ensures that your cheesecake will be light and fluffy, giving it that melt-in-your-mouth quality.
Adding Crushed Oreos
To achieve an even distribution of flavor throughout your cheesecake, it’s essential to incorporate the crushed Oreos properly. Gently fold the crushed cookies into the cream cheese mixture after you’ve combined the whipped cream. This will ensure that every bite of your cheesecake is packed with that signature Oreo flavor.
Assembling the Cheesecake
With all your components prepared, it’s time to assemble your Decadent No Bake Oreo Cheesecake.
Pouring the Filling
Carefully pour the Oreo cheesecake filling into the prepared crust. Use a spatula to spread it evenly across the surface. For a smooth finish, you can tap the pan gently on the countertop to remove any air bubbles that may have formed during mixing, creating a seamless top.
Covering and Chilling
Once your filling is in place, cover the cheesecake with plastic wrap or aluminum foil. This step is crucial; chilling allows the flavors to meld and the cheesecake to set properly. You should refrigerate the cheesecake for at least 4 hours, though overnight is ideal for the best texture and flavor.
Presentation and Serving Suggestions
Presenting your Decadent No Bake Oreo Cheesecake is just as important as making it. Here are some ideas for serving that will enhance its visual appeal.
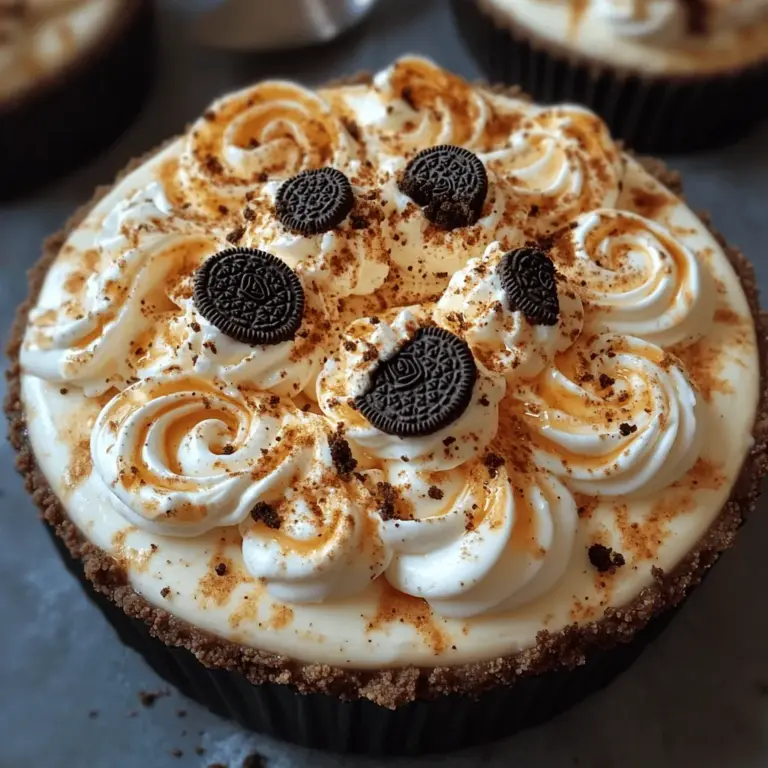
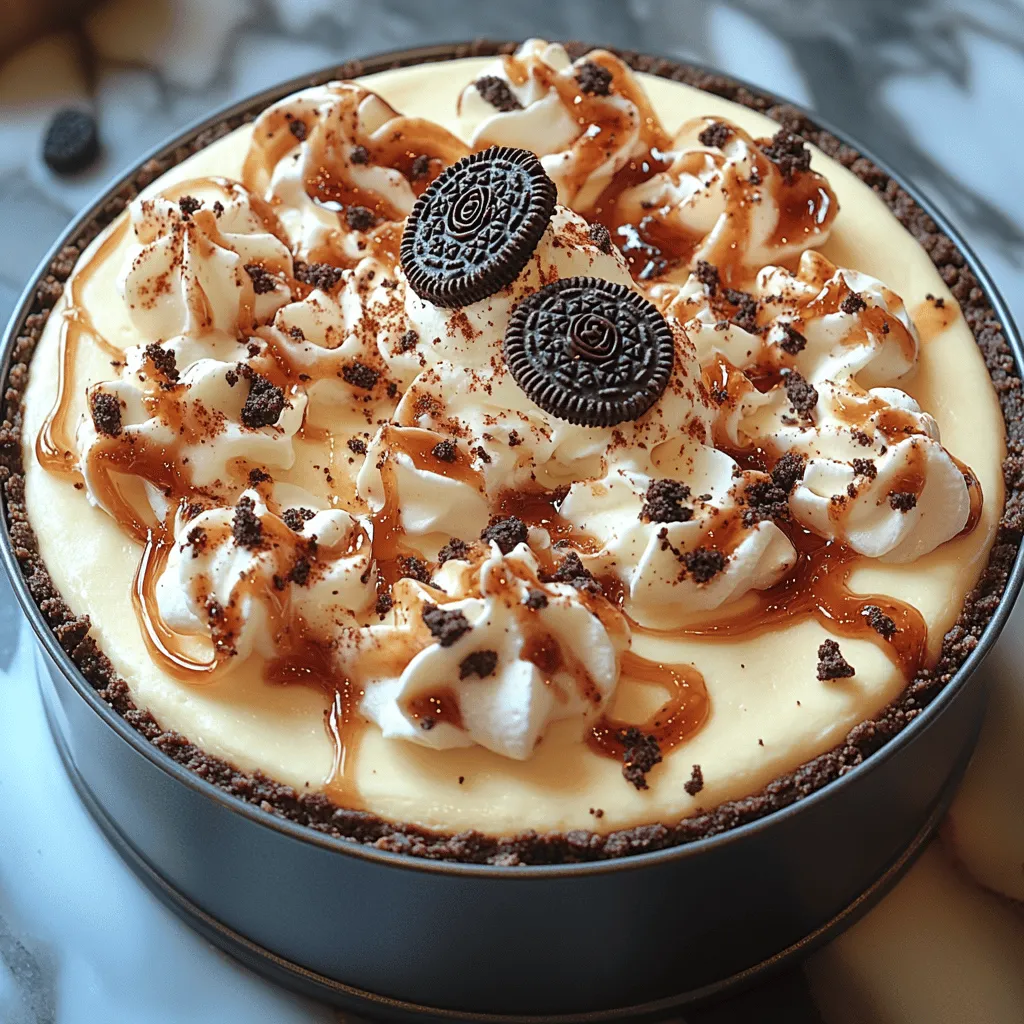
Garnishing Ideas
– Using Extra Oreos: Crushed or whole Oreos can serve as a perfect garnish. You can sprinkle crushed Oreos over the top or arrange whole cookies around the edges for a delightful touch.
– Whipped Cream Accents: Adding dollops of whipped cream on top not only adds an elegant touch but also complements the cheesecake’s flavors beautifully. Consider using a piping bag for a decorative swirl.
Serving Temperature
To maximize the flavor and texture of your cheesecake, serve it chilled but not too cold. Allow it to sit at room temperature for about 10-15 minutes before slicing. This will enhance the creaminess and make it easier to cut, ensuring perfect slices for your guests.
Nutritional Information
Understanding the nutritional aspects of your Decadent No Bake Oreo Cheesecake can help you enjoy it more mindfully.
Caloric Breakdown
Each slice of this cheesecake is indulgent, typically containing around 350-400 calories, depending on portion size and specific ingredients used. While it’s a treat, it can fit into a balanced diet when enjoyed in moderation.
Ingredient Substitutions
For those with dietary restrictions, there are several substitutions you can make to cater to different needs:
– Gluten-Free Oreos: Use gluten-free Oreo cookies for a celiac-friendly version of this dessert.
– Non-Dairy Cream Cheese: If you’re lactose intolerant or vegan, opt for a dairy-free cream cheese and coconut whipped cream.
– Sugar Alternatives: You can replace granulated sugar with alternatives like stevia or erythritol for a lower-calorie option.
Conclusion
The Decadent No Bake Oreo Cheesecake is more than just a dessert; it’s a celebration of flavor and texture that is incredibly easy to prepare. Its creamy filling combined with the crunch of Oreos creates a delightful experience that will satisfy any sweet tooth. Perfect for gatherings, special occasions, or just a cozy night in, this cheesecake is sure to impress both novice and experienced bakers alike.
By bringing people together around the table with this dessert, you’re not just serving a treat; you’re creating sweet memories. Whether you’re enjoying it on a special occasion or crafting it for your family dinner, this cheesecake is bound to become a favorite in your recipe collection. So, roll up your sleeves, gather your ingredients, and indulge in the joy of creating this delightful treat that everyone will love.
