Decadent No-Bake Brownie Batter Truffles: An Introduction
Indulging in a sweet treat doesn’t have to come with a side of guilt, especially when you can whip up a batch of Decadent No-Bake Brownie Batter Truffles. This recipe beautifully marries the rich, chocolatey goodness of brownie batter with the simplicity of no-bake preparation. This makes it a perfect choice for both novice bakers and seasoned kitchen connoisseurs looking to satisfy their sweet tooth without spending hours in the kitchen.
The concept of no-bake desserts has gained tremendous popularity over the years, largely due to their convenience and the delightful flavors they offer. Unlike traditional baking, which can require precise temperatures and long waiting times, no-bake recipes present an accessible alternative that allows you to create delicious treats with minimal effort. The Decadent No-Bake Brownie Batter Truffles are not only quick to prepare but also provide an opportunity to enjoy the luscious taste of brownie batter without the need for an oven.
In this article, we will explore the origins of brownie batter treats, dissect the ingredients that make these truffles a healthier alternative, and guide you through the step-by-step process of creating these delightful bites.
Understanding No-Bake Treats
Defining No-Bake Desserts
No-bake desserts are defined by their simplicity; they require no baking, which means no preheating the oven or delicate timing. This category of desserts includes a wide variety of treats, from cheesecakes and mousse to energy balls and, of course, brownie batter truffles. The appeal of no-bake recipes lies in their ease of preparation. Most can be made in a matter of minutes, allowing you to whip up a delicious treat at a moment’s notice.
Exploring the Appeal of No-Bake Recipes
The allure of no-bake recipes often stems from their versatility. They can be made in various flavors, textures, and forms, and they often cater to dietary restrictions, such as gluten-free or vegan diets. The lack of baking also means that these desserts can be enjoyed immediately after preparation, making them an ideal option for last-minute gatherings or cravings.
Benefits of No-Bake Desserts
One of the most significant advantages of no-bake desserts is their quick preparation time. With just a few simple steps, you can create a delicious treat that satisfies your sweet cravings. Additionally, no-bake recipes typically require minimal clean-up since you won’t be dealing with mixing bowls, baking sheets, and all the associated kitchen mess. This convenience makes no-bake desserts a favorite among busy individuals and families.
The Allure of Brownie Batter
The Origin of Brownies
Brownies have a rich history that dates back to the late 19th century. They were first introduced in the United States, with various recipes emerging in cookbooks throughout the years. Initially, brownies were baked as a single-layer cake, but over time, they evolved into the fudgy, chewy, and often gooey dessert we know and love today. Their popularity can be attributed to their versatility and the sheer enjoyment of consuming chocolate in a dense, decadent form.
Why Brownie Batter is a Popular Choice for Desserts
The appeal of brownie batter as a dessert option lies in its indulgent flavor and creamy texture. Many people adore the taste of raw brownie batter, which is rich and chocolatey, often causing a nostalgic yearning for the days of licking the mixing bowl clean. This love for brownie batter has led to an array of dessert innovations, including brownie batter milkshakes, dips, and of course, the no-bake truffles we are about to create. By focusing on the batter itself, we can enjoy the essence of brownies without the need for baking.
Ingredients Breakdown
To create Decadent No-Bake Brownie Batter Truffles, it’s essential to understand the ingredients that elevate this treat. Each component plays a crucial role in achieving the right flavor, texture, and nutritional profile.
Exploring the Key Ingredients
1. Almond Flour: As a gluten-free alternative to traditional flour, almond flour is a fantastic choice for those looking to avoid gluten without sacrificing taste or texture. It adds a nutty flavor while offering healthy fats and protein.
2. Cocoa Powder: The heart of chocolate flavor in our truffles, cocoa powder not only provides that rich chocolate taste but also contains antioxidants that can be beneficial for health.
3. Maple Syrup vs. Honey: Both maple syrup and honey serve as natural sweeteners in this recipe. Maple syrup has a distinct flavor and a lower glycemic index, making it a great option for those watching their sugar intake. Honey, on the other hand, is a classic sweetener that brings a unique floral note to the truffles.
4. Coconut Oil: Known for its health benefits, coconut oil contributes to the smooth texture of the truffles while adding a hint of tropical flavor. It also helps bind the ingredients together.
5. Vanilla Extract: A key flavor enhancer, vanilla extract elevates the overall taste profile of the truffles, adding a warm, aromatic note that complements the chocolate.
6. Salt: While it may seem counterintuitive, a pinch of salt is essential in sweet recipes. It helps balance the sweetness and enhances the flavors of the other ingredients.
7. Chocolate Chips and Optional Add-Ins: The inclusion of chocolate chips adds an extra layer of decadence to the truffles. You can also customize your truffles by adding nuts, dried fruits, or even a sprinkle of sea salt for an added crunch.
Step-by-Step Recipe Guide
Now that we’ve explored the delightful world of no-bake treats and the ingredients that make our Decadent No-Bake Brownie Batter Truffles so special, it’s time to dive into the kitchen and start preparing for success.
Essential Kitchen Tools and Equipment Needed
Before you begin, gather the necessary tools to ensure a smooth preparation process. You will need:
– Mixing bowls
– A whisk or spatula for combining ingredients
– A measuring cup and spoons
– A baking sheet lined with parchment paper (for chilling the truffles)
– An airtight container for storage
Tips for Selecting High-Quality Ingredients
To achieve the best flavor and texture in your truffles, opt for high-quality ingredients. Look for unsweetened cocoa powder that is rich in flavor, pure maple syrup or honey without additives, and organic coconut oil. When it comes to chocolate chips, choose dark or semi-sweet varieties to enhance the chocolatey richness of the truffles.
Combining the Dry Ingredients
Start by measuring out the almond flour and cocoa powder into a mixing bowl. Whisk them together until they are well combined. This step is crucial, as it ensures an even distribution of flavors and prevents clumping. The dry ingredients form the base of your truffles, so taking the time to mix them properly will lead to a more delicious final product.
Mixing the Wet Ingredients
Next, in a separate bowl, combine the maple syrup (or honey), melted coconut oil, and vanilla extract. Whisk these ingredients together until they are well blended. The wet mixture will help bind the dry ingredients, so it’s important to ensure they are fully incorporated before combining the two mixtures.
With this foundational knowledge and the first steps in place, you’re well on your way to creating your own batch of these indulgent Decadent No-Bake Brownie Batter Truffles. Stay tuned for the next part of this guide, where we’ll delve deeper into the mixing process and how to shape your truffles into bite-sized delights.
Achieving the Perfect Consistency with Coconut Oil
Coconut oil is a crucial ingredient in this recipe, as it helps bind the truffle mixture while adding a subtle flavor. To achieve the perfect consistency, ensure you gently melt the coconut oil until it’s in a liquid state but not too hot, as high temperatures can alter its properties. The ideal temperature for melting coconut oil is around 76°F (24°C). This way, it will mix seamlessly with the other ingredients, allowing the truffles to maintain a creamy texture without being overly oily.
Creating the Batter
Once your coconut oil is ready, it’s time to create the batter. In a large mixing bowl, combine your dry ingredients first. Start with 1 cup of almond flour and ½ cup of unsweetened cocoa powder. Mix these together thoroughly to ensure an even distribution of cocoa throughout the flour. Next, add in your sweeteners—1/3 cup of maple syrup or honey, and a pinch of salt to enhance the flavors.
Now, pour the melted coconut oil into the bowl and mix until the ingredients start to come together, forming a thick batter. You may want to use a spatula or your hands to ensure that everything is well incorporated. The batter should be thick enough to hold its shape but soft enough to mold into truffles.
How to Know When Your Mixture is Ready
To determine if your batter is ready, perform a simple test: take a small amount of the mixture and roll it between your palms. If it holds together without crumbling or falling apart, you are good to go! The texture should be slightly sticky but not overly wet. If the mixture seems too dry, add a teaspoon of water or additional melted coconut oil, mixing until you reach the desired consistency.
Incorporating Chocolate Chips and Nuts
Once your batter is well mixed, it’s time to elevate the flavor profile by incorporating your favorite mix-ins. Fold in ½ cup of chocolate chips—dark, milk, or even vegan chocolate chips work wonderfully—and, if desired, ¼ cup of finely chopped nuts, such as walnuts or pecans. These additions not only enhance the sweetness but also add a delightful crunch and texture to your truffles. Mix gently, ensuring the chips and nuts are evenly distributed throughout the batter.
Balancing Flavors and Textures in Your Truffles
Creating the perfect truffle is all about balance. The sweetness from the maple syrup or honey should complement the rich cocoa flavor, while the nuts add a satisfying crunch. If you prefer a sweeter truffle, feel free to adjust the amount of sweetener to your liking. You can also experiment with different kinds of extracts, such as vanilla or almond, to add an additional layer of flavor. A small splash can make a big difference in the overall taste.
Shaping the Truffles
With your batter ready, it’s time to shape the truffles. Using a melon baller or your hands, scoop out small amounts of the batter, roughly the size of a tablespoon. Roll the batter into smooth balls between your palms. This not only creates a uniform shape but also helps to warm the mixture slightly, making it easier to form.
Expert Techniques for Uniform Truffle Sizes
For perfectly shaped truffles, consider using a cookie scoop or measuring spoon. This will ensure each truffle is of equal size, making for a more polished presentation. If you want to get creative, you can also use molds or silicone ice cube trays to create fun shapes. Regardless of the method, uniformity will help in even chilling and serving.
Chilling for Perfection
After shaping your truffles, it’s time to chill them. Place them on a parchment-lined baking sheet and put them in the refrigerator for at least 30 minutes. Chilling is crucial for the texture and taste of your truffles. It allows the coconut oil to solidify, giving the truffles a firmer structure and enhancing the overall flavor as the ingredients meld together.
Why Chilling is Crucial for Texture and Taste
The chilling process not only helps with the consistency but also intensifies the flavors. As the truffles chill, the cocoa and sweetener meld, creating a more harmonious taste. If you skip this step, you may find the truffles too soft or overly sweet, lacking the depth of flavor you desire.
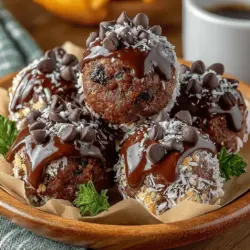
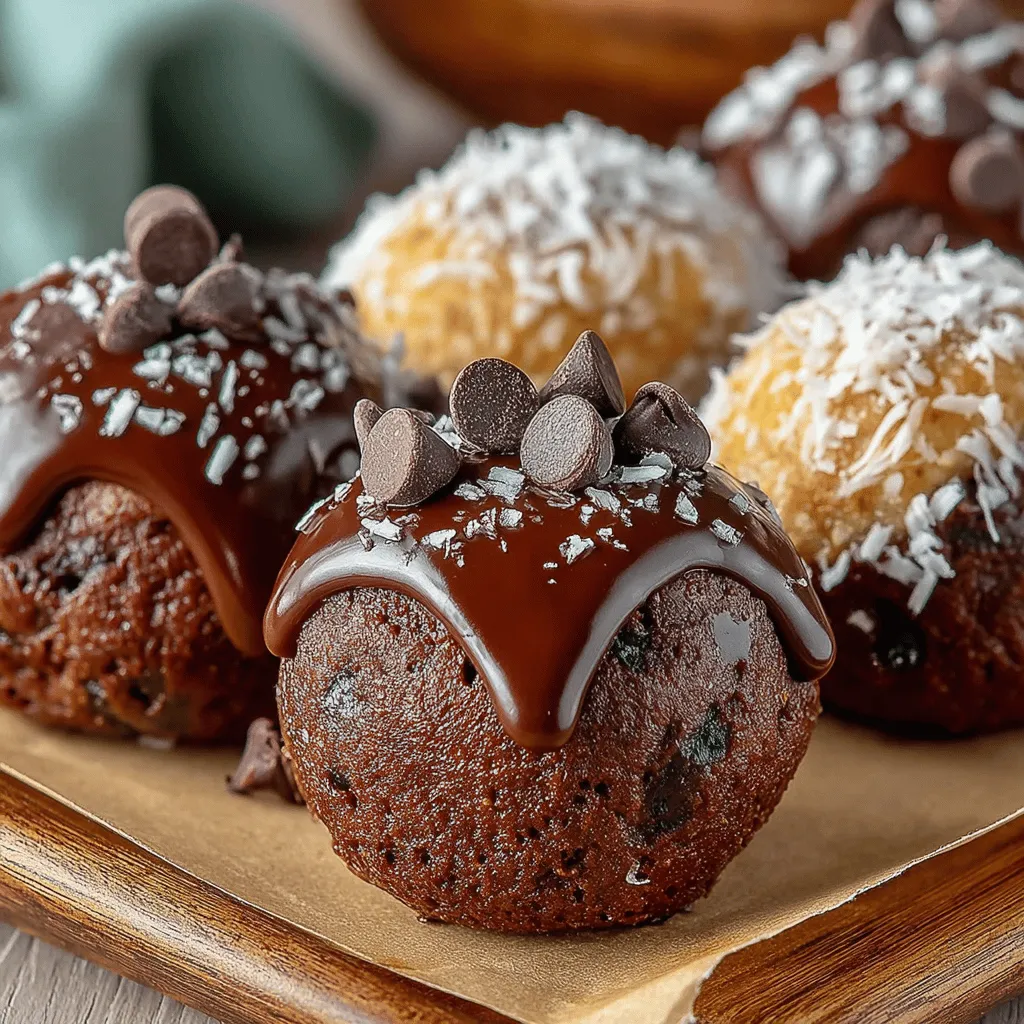
Optional Coconut Rolling
For an added layer of flavor and a beautiful presentation, consider rolling your chilled truffles in shredded coconut. This step is entirely optional, but it can enhance both the taste and look of your truffles. Use unsweetened shredded coconut for a healthier option. Simply place the shredded coconut in a shallow dish, and roll each truffle in it until fully coated. This not only gives your truffles a tropical twist but also adds a delightful chewiness.
Serving Suggestions
Creative Ways to Enjoy No-Bake Brownie Batter Truffles
These No-Bake Brownie Batter Truffles are incredibly versatile and can be enjoyed in numerous ways. Serve them as a sweet treat for a casual movie night or as a decadent dessert at a dinner party. They can also be a delightful addition to a dessert platter alongside fruits, cheeses, or even other homemade sweets.
Pairing Ideas: Coffee, Tea, or Dessert Wines
For a truly indulgent experience, pair your truffles with a rich cup of coffee or a sweet dessert wine. The bitterness of coffee complements the sweetness of the truffles, creating a well-rounded treat. Alternatively, a cup of herbal tea can add a refreshing contrast.
Presentation Tips for Parties or Gatherings
When serving these truffles at gatherings, consider placing them in decorative mini cupcake liners for an elegant touch. Arrange them on a beautiful platter and garnish with fresh mint leaves or edible flowers for an eye-catching presentation. This not only makes them more appealing but also invites guests to indulge in a delightful treat.
Nutritional Benefits
Understanding the Health Aspects of Each Ingredient
While these truffles are a dessert, they also incorporate healthy ingredients that offer several nutritional benefits.
Almond Flour and Its Protein Content
Almond flour is a fantastic gluten-free alternative to regular flour and is packed with protein, healthy fats, and fiber. This makes it a great choice for those looking to maintain energy levels without the crash associated with traditional sweets.
The Antioxidant Properties of Cocoa Powder
Cocoa powder is rich in antioxidants, particularly flavonoids, which can improve heart health and enhance mood. Using unsweetened cocoa powder not only reduces sugar content but also maximizes these health benefits.
Natural Sweeteners and Their Impact on Blood Sugar
Using natural sweeteners like maple syrup or honey allows you to control the sweetness while providing some essential nutrients. These sweeteners have a lower glycemic index compared to refined sugars, making them a better option for maintaining stable blood sugar levels.
Storage and Shelf Life
How to Store Your Truffles
To keep your No-Bake Brownie Batter Truffles fresh, store them in an airtight container in the refrigerator. This will help maintain their texture and flavor while preventing them from absorbing any odors from other foods.
Optimal Conditions for Keeping Truffles Fresh
For the best taste, consume the truffles within one week. Keeping them chilled will also help them retain their firmness. If you need to store them longer, consider freezing them in a single layer and then transferring them to a freezer-safe container. They will remain tasty for up to three months in the freezer.
Understanding Shelf Life and When to Consume
When stored properly, the truffles can be enjoyed for several days. However, for optimal flavor and texture, it’s best to consume them within a week of making them. If you notice any off smells or changes in texture, it’s time to discard them.
Conclusion
Decadent No-Bake Brownie Batter Truffles are not only a deliciously satisfying treat but also a healthier alternative to traditional sweets. With their rich flavor, easy preparation, and customizable nature, these truffles are perfect for any occasion, from casual snacking to festive celebrations. Whether enjoyed chilled or at room temperature, they offer a guilt-free indulgence that everyone can appreciate.
Embracing the world of no-bake desserts opens up a realm of possibilities, inviting you to experiment with flavors and ingredients while keeping your sweet cravings in check. With each bite, you can revel in the knowledge that you’re enjoying a treat that is as nutritious as it is delicious. So gather your ingredients, roll up your sleeves, and get ready to enjoy these delightful no-bake truffles that are sure to become a favorite in your dessert repertoire.