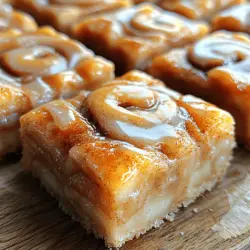
Experience the delightful fusion of classic cinnamon rolls and a convenient bar format with our Cinnamon Roll Bliss Bars. This indulgent treat captures the warm, comforting flavors of cinnamon and sugar, making it an ideal dessert for any occasion. The nostalgic aroma of cinnamon wafting through your kitchen is sure to evoke fond memories, whether it’s a family gathering, a holiday celebration, or a cozy afternoon snack. These bliss bars are not only delicious but also incredibly easy to make, catering to both novice bakers and seasoned pastry chefs alike.
Join us as we delve deeper into the preparation, baking process, and the joy of savoring these delicious bars that bring a modern twist to a beloved classic.
Understanding Cinnamon Roll Bliss Bars
Exploring the History of Cinnamon Rolls
To truly appreciate the Cinnamon Roll Bliss Bars, it’s worth exploring the rich history of cinnamon rolls themselves. Originating in Northern Europe, the cinnamon roll has roots that trace back to the early 17th century. These delightful pastries were initially enjoyed in Sweden, where they were known as “kanelbullar.” The Swedish version typically features a buttery dough rolled with cinnamon and sugar, often topped with pearl sugar.
As the cinnamon roll gained popularity, it made its way across the globe, adapting to various regional tastes and preferences. In the United States, the cinnamon roll evolved further, often being glazed with frosting or icing, making it a staple in bakeries and brunch menus. The cultural significance of cinnamon rolls can be seen in their presence during festive occasions and family gatherings, where they serve as a warm, comforting treat enjoyed by all.
The Appeal of Cinnamon Roll Bliss Bars
Cinnamon Roll Bliss Bars offer a modern twist on the traditional cinnamon roll, presenting the same beloved flavors in a more convenient format. The bar format allows for easy serving and sharing, making them ideal for gatherings, potlucks, and family events. No need for slicing individual rolls—simply cut the pan into squares, and you have a beautifully presented dessert that’s ready to enjoy.
Additionally, the bliss bars retain the same soft, gooey texture and cinnamon-sugar flavor that makes cinnamon rolls so irresistible. Whether you’re hosting a brunch or looking for an easy dessert to whip up on a busy weeknight, these bars cater to all occasions. Their versatility also means they can be enjoyed warm out of the oven or at room temperature, making them a delightful treat for any time of day.
Ingredients Breakdown
Essential Ingredients Overview
To create the perfect Cinnamon Roll Bliss Bars, it’s essential to understand the role each ingredient plays in the recipe. Here’s a breakdown of the key components:
– All-Purpose Flour: This is the foundation of the bars, providing structure and stability. The right amount of flour ensures that the bars hold together while still remaining soft and tender.
– Sugars (Brown and Granulated): Both types of sugar contribute sweetness, but they also play different roles. Granulated sugar adds sweetness and helps with the texture, while brown sugar introduces moisture and a rich caramel flavor due to its molasses content.
– Unsalted Butter: Butter adds richness and flavor to the bars. Using unsalted butter allows you to control the salt content in the recipe, which is vital for achieving a balanced flavor.
– Eggs: Acting as a binding agent, eggs help to hold the ingredients together and provide structure. They also contribute to the moisture and richness of the bars.
– Baking Powder and Baking Soda: These leavening agents work together to create a light and fluffy texture. Baking soda will react with the acidity of the brown sugar, while baking powder ensures adequate lift.
– Ground Cinnamon: As the star flavor, cinnamon brings warmth and spice to the bars, elevating them from ordinary to extraordinary. The aroma alone is enough to make any kitchen feel like home.
– Powdered Sugar: This ingredient is used for the sweet icing that finishes off the bars, adding a touch of sweetness and a beautiful presentation.
Substitutions and Variations
For those with dietary restrictions or specific preferences, there are several substitutions and variations you can consider:
– Gluten-Free Alternatives for Flour: If you’re looking to make these bars gluten-free, substitute all-purpose flour with a gluten-free flour blend. Be sure to check that the blend contains xanthan gum, which helps mimic the elasticity of gluten.
– Dairy-Free Options for Butter and Milk: For a dairy-free version, you can use plant-based butter or coconut oil in place of unsalted butter. Additionally, substitute whole milk with almond milk or any other non-dairy milk.
– Flavor Variations: While the classic cinnamon flavor is delightful on its own, feel free to experiment by adding nuts like pecans or walnuts for a crunchy texture. You can also include chocolate chips or cream cheese swirls for an additional layer of flavor.
Step-by-Step Preparation Guide
Preheating the Oven: The First Step to Success
Before diving into the mixing and baking, one of the most crucial steps is preheating your oven. Set your oven to 350°F (175°C). Proper temperature is vital for achieving the right texture in your bars; an oven that’s too cool can result in dense, undercooked bars, while an overly hot oven can cause them to rise too quickly and then collapse.
Additionally, prepare your baking pan by greasing it lightly or lining it with parchment paper. If you choose to line the pan, allow some overhang to make it easier to lift the bars out once they are baked. This step not only prevents sticking but also ensures that you can serve the bars neatly.
Creating the Batter: Mixing Techniques
Once your oven is preheated and your pan is ready, it’s time to create the batter. The mixing method you use can greatly affect the texture of your bars.
1. Creaming Method: Start by creaming together the unsalted butter and sugars in a large mixing bowl. This process involves beating the butter until it’s light and fluffy, usually about 2-3 minutes. The goal here is to incorporate air into the mixture, which will help the bars achieve a light texture.
2. Incorporating Eggs and Vanilla: After your butter and sugar mixture is adequately creamed, add in the eggs one at a time, mixing well after each addition. This helps to ensure that the eggs are fully integrated into the batter. Don’t forget to add a splash of vanilla extract; this will enhance the flavor profile and complement the cinnamon beautifully.
As you mix, pay attention to the texture. The batter should be thick but not dry. If it appears too crumbly, you might need to adjust with a splash of milk. The key is to achieve a consistency that will hold together but still be soft enough to create those desirable gooey bars.
With these initial steps completed, you’re well on your way to creating your Cinnamon Roll Bliss Bars. The excitement of pulling these warm, fragrant bars out of the oven awaits, and soon you’ll be indulging in a delightful treat that embodies the comforting essence of cinnamon rolls in a convenient bar format. Stay tuned for the next part, where we will guide you through the baking process and finishing touches that will make these bars a true delight.

Combining Dry Ingredients: Ensuring Even Distribution
The foundation of any good baked good starts with the dry ingredients. For our Cinnamon Roll Bliss Bars, it’s crucial to ensure that the flour, sugar, baking powder, cinnamon, and salt are evenly distributed. This not only enhances the flavor profile but also ensures a consistent texture throughout the bars.
To achieve this, begin by sifting your dry ingredients together in a large mixing bowl. Sifting helps break up any clumps in the flour, ensuring that it combines smoothly with the other ingredients. After sifting, use a whisk to mix the ingredients further. Whisking is essential because it aerates the mixture, preventing clumps from forming, which can lead to uneven baking. Aim for a uniform blend where the cinnamon is evenly distributed throughout the flour mixture.
Spreading the Batter: Achieving an Even Base
Once your dry ingredients are combined, it’s time to add the wet ingredients and create your batter. When it comes to spreading the batter in the baking pan, achieving an even surface is key to ensuring that your bars bake uniformly.
To spread the batter evenly, start by dolloping spoonfuls of batter across the base of your greased baking pan. Using an offset spatula or a rubber spatula, gently spread the batter from the center outwards towards the edges. This method helps prevent air pockets and ensures that the batter reaches all corners of the pan. If you find the batter is too thick to spread easily, you can lightly dampen the spatula with water or oil to help it glide over the surface smoothly.
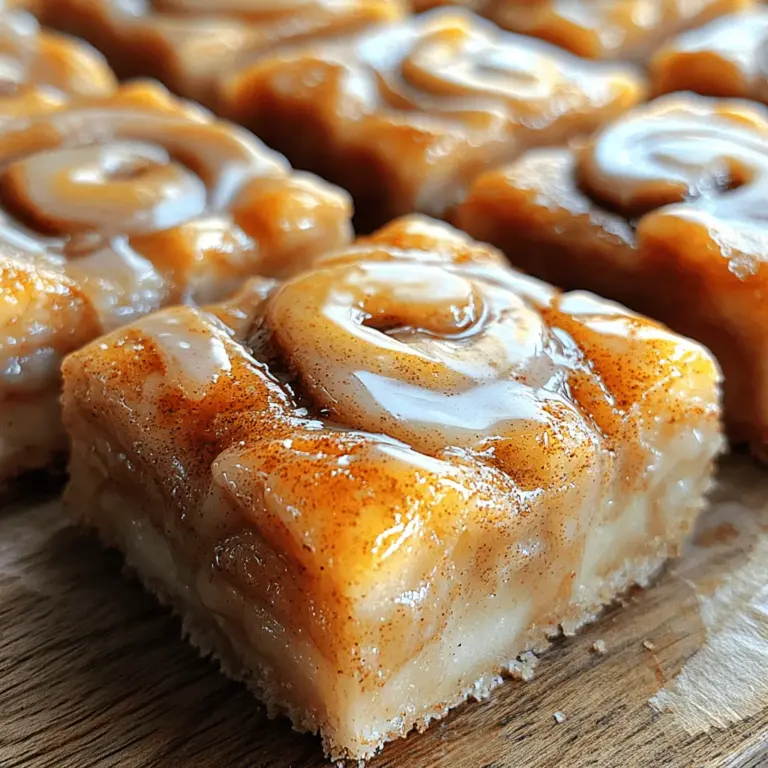
Crafting the Cinnamon Swirl: The Signature Touch
The cinnamon swirl is what truly elevates these bliss bars, giving them that signature cinnamon roll flavor. To create the perfect swirl, follow these simple steps:
1. Create the Swirl Mixture: In a small bowl, mix together a combination of brown sugar and cinnamon. This mixture is what you’ll drizzle over the batter before creating the swirl.
2. Drizzle the Mixture: Once your batter is spread out evenly, sprinkle the cinnamon-sugar mixture over the top. Use a spoon to create an even layer, ensuring that every bite will have that delicious cinnamon flavor.
3. Swirling Technique: With a knife or a skewer, gently swirl through the batter and cinnamon-sugar mixture. Start at one edge of the pan and work your way to the other side, making sure to create a swirling motion. Be careful not to over-mix, as you want distinct swirls for visual appeal and flavor balance. The goal here is to combine the flavors without losing the beautiful layers.
4. Balancing Sweetness and Spice: Adjust the amount of cinnamon and sugar according to your preference. If you enjoy a more robust cinnamon flavor, feel free to add a touch more cinnamon to your swirl mixture. However, be cautious not to overpower the sweetness of the bars, ensuring a perfect balance that delights the palate.
Baking the Bars
Now that your batter and cinnamon swirl are ready, it’s time to bake the bars.
Ideal Baking Conditions
Understanding how your oven works is crucial for successful baking. Preheat your oven to 350°F (175°C) and make sure it reaches this temperature before placing your bars inside. This helps ensure even baking from the start.
Once the oven is preheated, place the pan in the center of the oven. Baking times can vary based on your oven’s specifics, but typically, the bars will need about 25 to 30 minutes. Keep an eye on them, as baking times can differ.
Signs of Doneness in Baked Goods
To check for doneness, insert a toothpick into the center of the bars. If it comes out clean or with a few moist crumbs, your bars are ready to come out of the oven. Avoid overbaking, as this can lead to dry bars. The edges should be lightly golden, and the center should feel set but slightly soft when touched.
Cooling Process: Why It Matters
After baking, allow the bars to cool in the pan for about 10 minutes. This cooling period is essential as it allows the bars to firm up slightly, making them easier to cut. If you attempt to cut them too soon, they may crumble or fall apart. After the initial cooling in the pan, transfer the bars to a wire rack to cool completely. This prevents the bottoms from becoming soggy and helps maintain a delightful texture.
Making the Icing
An essential component of Cinnamon Roll Bliss Bars is the sweet icing that ties everything together.
Preparing the Icing: Achieving the Perfect Consistency
To prepare your icing, you will need powdered sugar and milk. Here’s a step-by-step guide:
1. Mix the Ingredients: In a medium bowl, combine 1 cup of powdered sugar with about 2 tablespoons of milk. Use a whisk to combine until smooth.
2. Adjusting Thickness for Drizzling: The ideal consistency for icing should be thick enough to hold its shape but thin enough to drizzle. If your icing is too thick, add a little more milk, a teaspoon at a time, until you reach your desired consistency. Conversely, if it becomes too thin, add more powdered sugar to thicken it up.
Drizzling Techniques: Aesthetic Presentation
Once your icing is prepared, it’s time to drizzle it over the cooled bars. You can use a spoon for a rustic look, or for a more polished appearance, pour the icing into a piping bag or a zip-top bag with a corner snipped off. This allows for more control over the drizzle.
1. Even Distribution: Start at one edge of the bars and move back and forth across the surface in a zigzag motion. This method ensures an even coating of icing over the entire surface.
2. Optional Garnishes for Added Flair: For an extra touch, consider garnishing with a sprinkle of cinnamon or chopped nuts, such as pecans or walnuts, over the icing. This not only enhances the visual appeal but also adds texture to each bite.
Serving Suggestions
Cinnamon Roll Bliss Bars can be enjoyed in various ways, making them a versatile treat for any occasion.
Best Ways to Enjoy Cinnamon Roll Bliss Bars
These bars can be served warm or at room temperature, depending on your preference. Warm bars offer a delightful gooeyness, while room-temperature bars are easy to handle and enjoy at gatherings.
When serving, consider pairing your bars with a warm drink such as coffee, tea, or a glass of milk. The combination of flavors complements the sweetness of the bars perfectly, enhancing the overall experience.
Storage Tips
To keep your Cinnamon Roll Bliss Bars fresh, store them in an airtight container at room temperature for up to three days. If you’d like to extend their shelf life, freezing is an excellent option. Simply wrap individual bars in plastic wrap and place them in a freezer-safe container or bag. They can be frozen for up to two months. When you’re ready to enjoy them, let them thaw at room temperature or warm them in the microwave for a few seconds for that fresh-out-of-the-oven taste.
Conclusion: The Joy of Cinnamon Roll Bliss Bars
Cinnamon Roll Bliss Bars are more than just a dessert; they are a celebration of flavor and comfort. With their delightful cinnamon swirl and sweet icing, these bars are sure to please anyone who tries them. Whether you’re baking for a special occasion or simply treating yourself, this recipe is a wonderful addition to your dessert repertoire. Embrace the joy of baking and the satisfaction of sharing these delicious treats with friends and family. The aroma of cinnamon wafting through your kitchen will bring nostalgia and warmth, making every bite of these bliss bars a moment to cherish. So gather your ingredients, follow these simple steps, and indulge in the bliss of homemade cinnamon roll bars that are sure to delight your taste buds.