In the vast universe of baking, few combinations resonate as deeply and delightfully as peanut butter and banana. The moment these two ingredients come together, magic happens. The result? Peanut Butter Banana Bliss Cookies—a treat that not only satisfies your sweet cravings but also serves as a nutritious snack option that is surprisingly easy to prepare. Imagine biting into a warm, chewy cookie that envelops your senses in a rich, nutty flavor while delivering a subtle sweetness that comes from ripe bananas. Whether you’re a seasoned baker or just beginning your culinary journey, this recipe promises to be a joyful experience.
In this article, we will explore the delightful aspects of these cookies, including their health benefits, ingredient insights, and step-by-step instructions that ensure success for bakers of all levels. Let’s dive into this deliciously wholesome recipe!
The Allure of Peanut Butter and Banana: A Flavor Profile
Understanding the classic combination of peanut butter and banana is essential to appreciating these cookies.
Nutty and Sweet Harmony
The flavor profile of Peanut Butter Banana Bliss Cookies is a harmonious blend of nutty and sweet. Creamy peanut butter, with its rich and velvety texture, complements the natural sweetness of ripe bananas perfectly. This pairing not only creates a delightful taste but also results in a cookie that is soft and chewy, making it an inviting treat for both children and adults alike. The nutty undertones of peanut butter are beautifully enhanced by the fruity notes of banana, creating a satisfying balance that leaves you reaching for just one more cookie.
Nutritional Benefits
Beyond their delightful taste, peanut butter and bananas offer a host of nutritional benefits that make these cookies a guilt-free indulgence. Peanut butter is a powerhouse of protein, providing essential amino acids that contribute to muscle repair and overall health. Additionally, it contains healthy fats that are beneficial for heart health. On the other hand, bananas are a fantastic source of potassium, an essential mineral that helps maintain healthy blood pressure and proper muscle function.
Together, these ingredients not only satisfy your sweet tooth but also fuel your body with energy and nutrition. So, whether you’re enjoying them as an afternoon snack or a post-workout treat, you can feel good about indulging in Peanut Butter Banana Bliss Cookies.
Ingredients Breakdown: What Makes These Cookies Special
A close examination of each ingredient reveals how they contribute to the flavor and texture of the cookies. Understanding the role of each component will help you appreciate the care that goes into crafting these delicious bites.
Rolled Oats
One of the standout ingredients in Peanut Butter Banana Bliss Cookies is rolled oats. Not only do oats add a chewy texture to the cookies, but they also provide a significant boost in fiber. Fiber is essential for digestive health, helping to keep you feeling full and satisfied. Additionally, oats are a good source of vitamins and minerals, making them a wholesome addition to your baking repertoire. They also lend structure to the cookies, ensuring that they hold together beautifully while still maintaining a soft bite.
Ripe Banana
The significance of using a ripe banana cannot be overstated. Ripe bananas are naturally sweeter and contain more moisture than their less ripe counterparts. This natural sweetness eliminates the need for excessive added sugars, allowing the flavors of the peanut butter and oats to shine through. Additionally, the moisture from the ripe banana contributes to the cookies’ delightful texture, ensuring they remain soft and chewy even after baking. The perfect banana for this recipe is one that is speckled with brown spots, indicating optimal ripeness for sweetness and flavor.
Natural Peanut Butter
When it comes to peanut butter, opting for a natural variety is crucial for achieving the best results. Natural peanut butter is made from just peanuts (and sometimes a pinch of salt), without any added sugars, hydrogenated oils, or preservatives. This choice not only enhances the flavor of the cookies but also ensures that they remain a healthier option. The creaminess of natural peanut butter contributes to the cookies’ chewy texture while providing a rich, nutty flavor that pairs beautifully with the banana.
Honey vs. Maple Syrup
Sweeteners play a pivotal role in baking, and in this recipe, you can choose between honey and maple syrup. While both options add sweetness, they also impart distinct flavors to the cookies. Honey has a floral, warm taste that complements the nuttiness of peanut butter, while maple syrup offers a richer, woodsy flavor. Both sweeteners provide a moisture component that helps keep the cookies soft, but they do have slightly different impacts on the final texture. Experimenting with both can yield delicious results, so feel free to choose based on your personal taste preference or dietary considerations.
Optional Add-ins
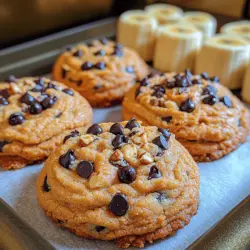
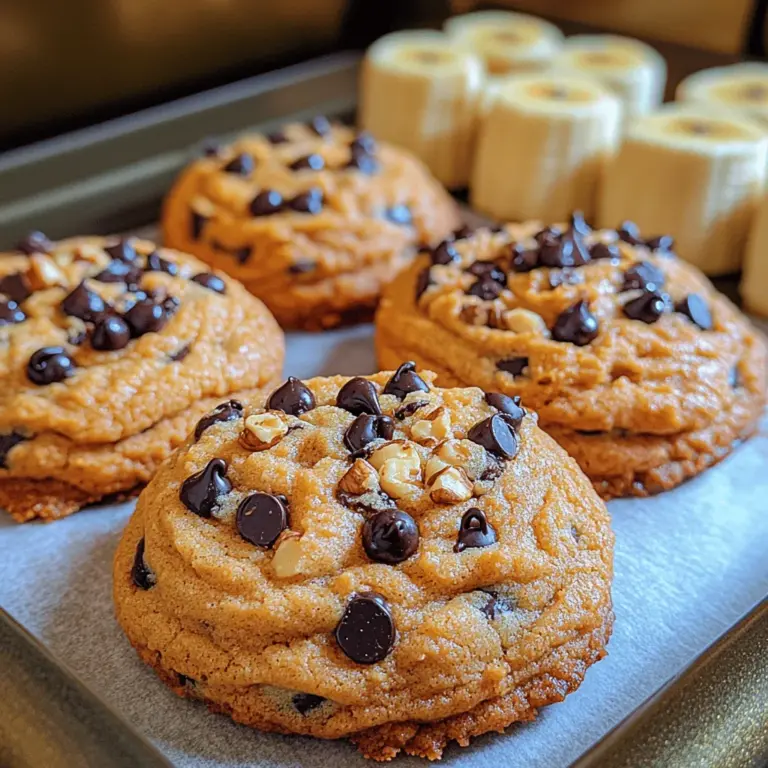
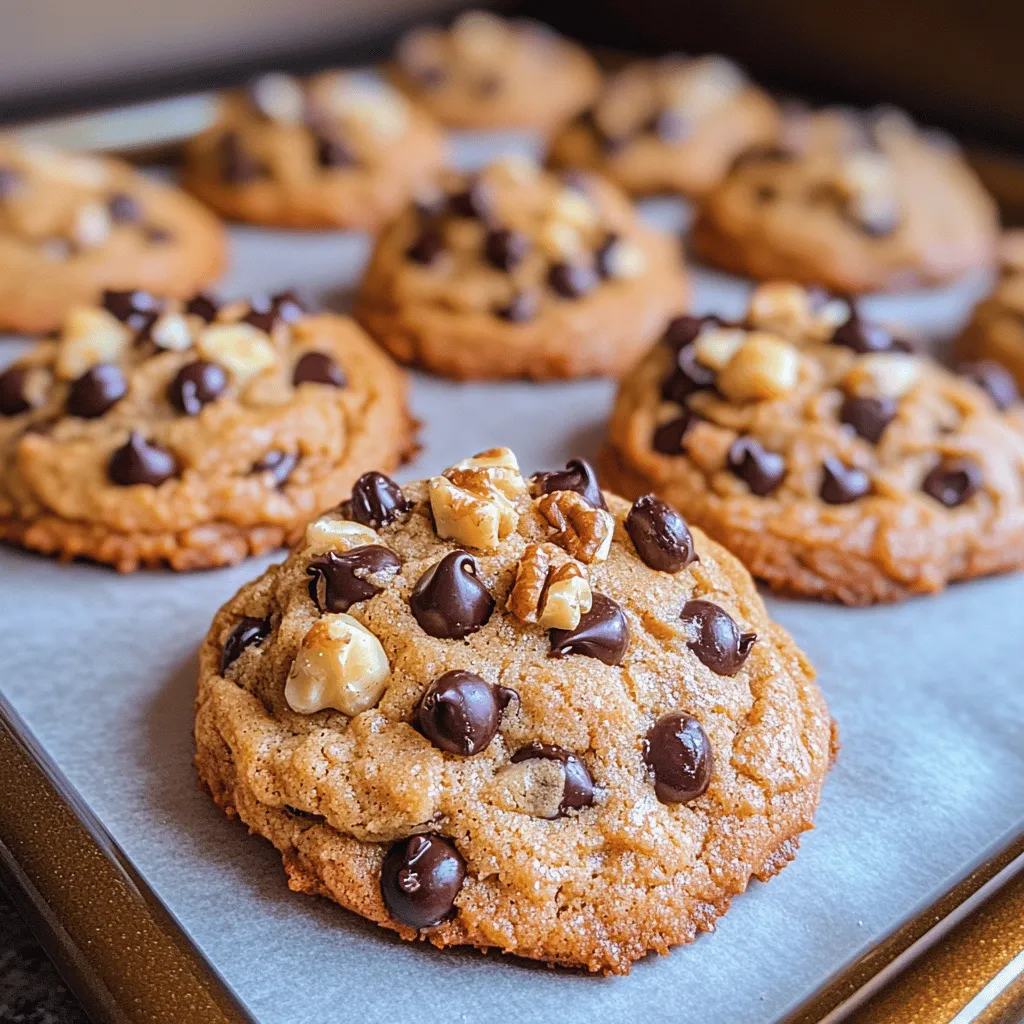
To elevate your Peanut Butter Banana Bliss Cookies, consider adding some optional mix-ins. Dark chocolate chips are a popular choice, providing a decadent contrast to the sweetness of the banana and the nuttiness of the peanut butter. Not only do they add a rich flavor, but dark chocolate also brings antioxidants to the table, making your cookies even more enticing. If you prefer a bit of crunch, chopped nuts such as walnuts or pecans can be a great addition, enhancing the cookies’ texture and nutritional value. These optional add-ins allow you to customize the cookies to your liking, creating a unique version that suits your taste buds.
Preparation Steps: Crafting the Perfect Peanut Butter Banana Bliss Cookies
Now that we’ve explored the delightful ingredients that make up these cookies, let’s dive into the preparation steps. Each step is designed to guide you through the baking process, ensuring that your Peanut Butter Banana Bliss Cookies turn out perfectly every time.
Preheating the Oven
The first step in any baking endeavor is to preheat the oven. This crucial step ensures that your cookies bake evenly and at the correct temperature from the moment they go in the oven. For Peanut Butter Banana Bliss Cookies, set your oven to 350°F (175°C). This moderate temperature allows the cookies to cook through without burning, resulting in a soft and chewy texture that is simply irresistible.
By taking the time to preheat your oven, you set the stage for baking success, allowing the flavors of peanut butter and banana to meld beautifully as they bake. Once your oven reaches the desired temperature, you’ll be ready to assemble your ingredients and start mixing.
The journey to creating Peanut Butter Banana Bliss Cookies is not only about the final product but also about the joy of baking itself. As you gather your ingredients and prepare to combine them, you’ll find that the process is just as rewarding as the delicious cookies you’ll soon enjoy.
Stay tuned for the next sections of this article, where we will delve deeper into the step-by-step instructions for making these delightful cookies, along with tips for ensuring the best results. Prepare to indulge in a baking adventure that will fill your kitchen with the warm, inviting aroma of peanut butter and banana—a combination that is sure to bring smiles to everyone who takes a bite.
Combining Wet Ingredients
To create the perfect Peanut Butter Banana Bliss Cookies, the first step is to properly combine the wet ingredients. The primary wet ingredients in this recipe include ripe bananas, creamy peanut butter, and any additional liquids such as vanilla extract or maple syrup.
Techniques for Achieving a Smooth Mixture
1. Use Ripe Bananas: The riper the bananas, the sweeter and easier they are to mash. Look for bananas with brown spots, as they will blend more smoothly.
2. Mash Thoroughly: In a mixing bowl, use a fork or potato masher to thoroughly mash the bananas until you achieve a smooth consistency. This prevents any lumps from forming in the final cookie dough.
3. Mixing Tools: For combining the peanut butter with the mashed bananas, a hand mixer or stand mixer can be very effective. Start on a low speed to avoid splattering, then gradually increase to medium. This will ensure a uniform blend without any clumps of peanut butter.
4. Incorporate Other Wet Ingredients: Add in the vanilla extract and any sweeteners you’re using. Beat the mixture on medium speed for about 30 seconds until it’s fully combined and creamy.
Mixing Dry Ingredients
Now that your wet ingredients are well-combined, it’s time to focus on the dry ingredients. This includes rolled oats, flour, baking powder, baking soda, and salt.
Best Practices for Incorporating Dry Ingredients
1. Sift When Necessary: If you’re using all-purpose flour, consider sifting it with the baking powder, baking soda, and salt. This helps to aerate the flour and ensures even distribution of the leavening agents.
2. Use a Separate Bowl: Mix the dry ingredients in a separate bowl before combining them with the wet ingredients. This helps to prevent clumping and ensures all dry components are evenly mixed.
3. Stir Gently: When incorporating dry ingredients into the wet mixture, use a spatula or wooden spoon to gently fold them together. Avoid over-mixing, as this can lead to tough cookies. Just mix until you see no dry flour.
Combining Mixtures
With your wet and dry mixtures prepared, it’s time to combine them. This step is crucial for achieving the right texture and ensuring that the flavors meld beautifully.
Tips for Even Distribution of Ingredients
1. Folding Technique: Use a folding motion to combine the mixtures—this involves gently lifting the mixture from the bottom of the bowl and turning it over the top. This technique helps maintain the airiness of the mixture.
2. Add-Ins: If you’re including chocolate chips, nuts, or dried fruit, fold them in at the end to ensure they are evenly distributed without overworking the dough.
3. Consistency Check: The final dough should be thick but still slightly sticky. If it feels too dry, you can add a splash of almond milk or water to achieve the desired consistency.
Shaping the Cookies
Once your dough is well combined, it’s time to shape the cookies. This step will influence their final appearance and texture.
Techniques for Forming Cookies That Hold Their Shape
1. Use a Cookie Scoop: A medium cookie scoop or two spoons will help you portion out even amounts of dough, ensuring uniform cookies.
2. Shape by Hand: If you prefer a more rustic look, you can roll the dough into balls with your hands. This also helps to warm the dough slightly, making it easier to form.
3. Flatten Slightly: For cookies that hold their shape, slightly flatten each ball of dough before baking. This helps them spread evenly while baking without losing their shape entirely.
Baking Process
Baking is where the magic happens, transforming your dough into delicious cookies.
Understanding Baking Times and Signs of Doneness
1. Preheat Your Oven: Always preheat your oven to the recommended temperature (350°F). This ensures even baking.
2. Bake in Batches: Place the cookies on a lined baking sheet, leaving enough space between each cookie to allow for some spreading.
3. Timing: Bake for 10-12 minutes, or until the edges are golden brown and the centers appear set. The cookies will continue to firm up as they cool, so don’t worry if they look slightly underbaked in the center.
4. Check for Doneness: A good sign that your cookies are done baking is a slight golden color on the edges and a soft, puffy center.
Cooling Tips
Cooling is an often-overlooked step that greatly affects the final texture of your cookies.
Explanation of Why Cooling is Crucial for Texture
1. Preventing Sogginess: Allowing cookies to cool on the baking sheet for about 5 minutes before transferring them to a wire rack helps them set and prevents sogginess.
2. Texture Development: As cookies cool, they firm up and develop their final texture. If you move them too soon, they may fall apart.
3. Optimal Cooling Time: Let the cookies cool completely on the wire rack. This can take about 30 minutes, depending on the ambient temperature. The cookies will become firmer as they cool.
Nutritional Information: A Healthier Treat Option
Peanut Butter Banana Bliss Cookies are not only delicious but also packed with nutrients.
Caloric Content
Each cookie contains approximately 100 calories, making them a guilt-free indulgence compared to many traditional cookies.
Macronutrient Analysis
– Protein: With the inclusion of peanut butter and oats, each cookie offers about 3 grams of protein, helping to keep you satiated.
– Carbohydrates: Each cookie has around 15 grams of carbohydrates, primarily from the oats and bananas, providing a quick energy source.
– Fats: Each cookie contains about 4 grams of fat, most of which comes from the healthy fats in peanut butter.
Vitamins and Minerals
These cookies boast several health benefits due to their wholesome ingredients:
– Potassium: Bananas are rich in potassium, which supports heart health and proper muscle function.
– Fiber: The oats provide dietary fiber, promoting digestive health.
– Vitamin E: Peanut butter adds vitamin E, an antioxidant that helps protect your cells from damage.
Storing Your Cookies: Maintaining Freshness and Flavor
Proper storage is key to enjoying your Peanut Butter Banana Bliss Cookies at their best.
Room Temperature Storage
To keep your cookies fresh at room temperature, store them in an airtight container. They will stay delicious for up to a week. To maintain their soft texture, consider placing a slice of bread in the container with the cookies; this will help retain moisture.
Freezing Tips
If you want to extend the shelf life of your cookies, freezing is an excellent option.
1. Flash Freezing: Place shaped cookie dough balls on a baking sheet in the freezer for about 1-2 hours until solid. This prevents them from sticking together.
2. Storage: Once frozen, transfer the cookie dough balls to a freezer-safe bag or container. They can be stored for up to three months.
3. Baking from Frozen: When you’re ready to bake, no need to thaw. Simply add an extra 1-2 minutes to the baking time.
Conclusion: Embracing the Joy of Baking with Peanut Butter Banana Bliss Cookies
In conclusion, Peanut Butter Banana Bliss Cookies are not just a delicious treat; they embody a wholesome, nutritious option that can be enjoyed without guilt. Their delightful taste, coupled with simple preparation methods, makes them perfect for any occasion, be it an after-school snack or a healthy dessert.
Baking these cookies is not just about satisfying your sweet tooth; it’s about embracing the joy of creating something wholesome and nourishing. So gather your ingredients, invite some friends or family into the kitchen, and indulge in the blissful experience of baking. These cookies are sure to become a cherished favorite in your household, bringing smiles and satisfaction with every bite.