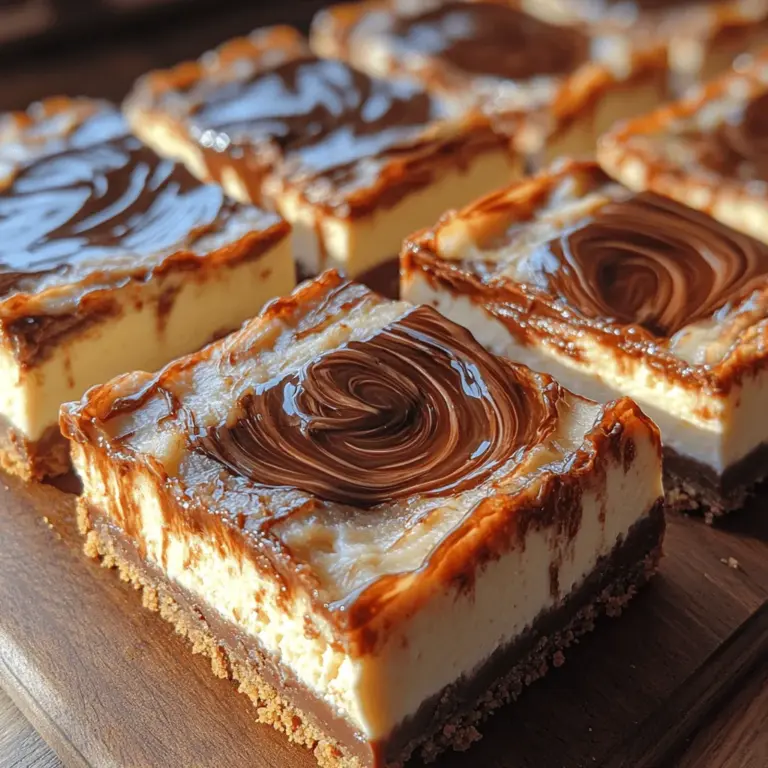
Indulging in a dessert that combines the creaminess of cheesecake with the rich, chocolatey goodness of Nutella is a dream for many dessert lovers. Nutella Heaven Cheesecake Bars are a delightful creation that brings together these beloved flavors in a harmonious blend. Imagine a buttery graham cracker crust that serves as the perfect foundation, topped with a luscious cheesecake filling swirled with Nutella. These bars are not just a treat for the taste buds but also a feast for the eyes, making them an excellent choice for any occasion.
Whether you’re hosting a gathering, celebrating a special moment, or simply craving a sweet treat to enjoy at home, these cheesecake bars are sure to impress. Their creamy texture and rich flavor are bound to win over friends and family, making them a superb addition to your dessert repertoire. In this blog post, we will provide a comprehensive guide to making these decadent bars, along with insights into their ingredients, preparation techniques, and perfect serving suggestions.
Understanding the Ingredients
Before diving into the recipe, it’s crucial to understand the key components that make Nutella Heaven Cheesecake Bars truly special. Each ingredient plays a vital role in achieving the perfect flavor and texture, and knowing how they work together can elevate your baking game.
The Crust: A Foundation of Flavor
The crust of the Nutella Heaven Cheesecake Bars is not just a base; it’s an essential part of the overall flavor profile. A well-made crust adds depth and texture, providing a contrast to the creamy filling.
– Graham Cracker Crumbs: The cornerstone of this crust, graham cracker crumbs provide a sweet, slightly nutty flavor and a satisfying crunch. For optimal texture, it’s important to use fresh crumbs. Consider crushing whole graham crackers in a food processor for the best results, ensuring that the crumbs are fine and evenly textured. This will help the crust hold together and create a consistent base for the cheesecake filling.
– Unsalted Butter: Butter is crucial in enhancing flavor and binding the crust ingredients together. Using unsalted butter allows you to control the saltiness of the crust, which can be important in balancing the overall sweetness of the dessert. Make sure the butter is melted and slightly cooled before mixing it with the graham cracker crumbs to ensure an even distribution.
– Granulated Sugar and Salt: Sugar adds sweetness to the crust, while a pinch of salt elevates the flavor, creating a well-rounded taste. The combination of these ingredients ensures that the crust is not overly sweet, allowing the cheesecake filling to shine.
The Cheesecake Filling: Creamy and Dreamy
Moving on to the star of the show—the cheesecake filling. This mixture is what transforms simple ingredients into a rich, creamy delight.
– Cream Cheese: The primary ingredient in any cheesecake, softened cream cheese is essential for achieving a smooth, velvety texture. Be sure to use full-fat cream cheese for the best flavor and consistency. It’s important to let the cream cheese soften at room temperature for about 30 minutes before mixing, as this will help eliminate lumps and create a creamy filling.
– Granulated Sugar: Just like in the crust, sugar plays a crucial role in the filling. It adds sweetness and balances the tanginess of the cream cheese and sour cream. The sugar should be mixed well with the cream cheese to ensure that the filling is smooth and sweetened to perfection.
– Eggs: Eggs are vital in binding the filling together and providing structure. They help the cheesecake set during baking, ensuring that the bars hold their shape when cut. It’s best to use large eggs at room temperature for consistent results.
– Vanilla Extract: Vanilla extract enhances the flavor profile of the cheesecake, adding a warm, aromatic note. It complements the richness of the cream cheese while balancing the overall sweetness. Using pure vanilla extract is recommended for the best flavor.
– Sour Cream: Sour cream adds an extra layer of creaminess and a slight tang to the filling, which enhances the overall flavor. It also contributes to the cheesecake’s luscious texture. If you don’t have sour cream on hand, Greek yogurt can be a suitable substitute.
– Nutella: Of course, we can’t forget Nutella! This beloved hazelnut spread not only adds a rich chocolate flavor but also creates beautiful swirls that make these cheesecake bars visually appealing. The key is to gently swirl the Nutella into the filling just before baking, allowing it to create marbled patterns throughout.
Preparation Steps: Crafting the Perfect Bars
Now that we understand the ingredients, let’s dive into the preparation steps for creating Nutella Heaven Cheesecake Bars from scratch. These steps will guide you through the process, ensuring that your bars turn out perfectly every time.
Prepping the Oven and Baking Dish
Before you begin mixing ingredients, it’s essential to prepare your baking environment.
– Oven Temperature: Preheating your oven to 325°F (160°C) is crucial for ensuring even baking. An adequately heated oven helps the cheesecake bars set properly, preventing them from becoming too dense or undercooked in the center. Allow your oven to fully preheat before placing the bars inside.
– Lining the Baking Dish: To make removing the bars easy after baking, line your baking dish with parchment paper. This step not only prevents sticking but also allows you to lift the entire batch out of the dish once they’ve cooled. Cut a piece of parchment paper large enough to hang over the edges of the dish, which will serve as handles when you’re ready to cut the bars.
Creating the Graham Cracker Crust
The first step in making Nutella Heaven Cheesecake Bars is preparing the graham cracker crust. Here’s how to do it:
1. Crush the Graham Crackers: In a food processor, pulse the graham crackers until they reach a fine crumb consistency. If you don’t have a food processor, you can place the crackers in a zip-top bag and crush them with a rolling pin.
2. Mix the Ingredients: In a medium mixing bowl, combine the crushed graham cracker crumbs, melted unsalted butter, granulated sugar, and a pinch of salt. Stir until the mixture is well combined and resembles wet sand.
3. Press into the Baking Dish: Transfer the crust mixture into the prepared baking dish. Using your hands or the back of a measuring cup, firmly press the mixture into an even layer across the bottom of the dish. Ensure that the crust is compact, as this will help it hold together while baking.
4. Pre-bake the Crust: Place the crust in the preheated oven and bake for about 10 minutes, or until it is lightly golden and fragrant. This step helps to set the crust and enhance its flavor, providing a sturdy base for the cheesecake filling.
As you prepare the graham cracker crust, take a moment to savor the aroma filling your kitchen. The smell of baking graham crackers is the first hint of the deliciousness to come. With the crust now ready, you can move on to preparing the creamy cheesecake filling, where the magic of Nutella Heaven Cheesecake Bars truly begins.
Stay tuned for the next section of this article, where we will explore how to create the cheesecake filling and incorporate the Nutella for that heavenly swirl. By following these steps carefully, you will be well on your way to crafting a truly indulgent dessert that will leave everyone asking for seconds.
Mixing Ingredients
When preparing the crust for your Nutella Heaven Cheesecake Bars, the texture of the mixture is crucial. You’ll need to combine the crushed graham crackers, melted butter, and a bit of sugar until the mixture resembles wet sand. This texture is essential for ensuring that the crust binds well together. To achieve this, you can use a food processor to finely crush the graham crackers and mix in the melted butter and sugar until fully incorporated. If you’re mixing by hand, be sure to break up any large clumps of graham cracker to ensure an even consistency. The goal is to create a mixture that holds its shape when pressed together, which will form the perfect base for your cheesecake.
Packing the Crust
Once your crust mixture is ready, it’s time to pack it into the baking pan. Start by lining your pan with parchment paper for easy removal later. Use the back of a measuring cup or a flat-bottomed glass to press the crust mixture evenly across the bottom of the pan. This step is crucial as it ensures your crust is compact and will hold together when baked. Make sure to press firmly on the edges and corners to avoid any loose spots. A well-packed crust will not only support the cheesecake filling but also provide a delightful crunch in every bite.
Baking the Crust
Baking the crust is an essential step that helps set its structure. Preheat your oven to 350°F (175°C). Once the oven is ready, place your packed crust into the oven and bake it for about 8 to 10 minutes. You’ll know the crust is ready when it’s slightly golden and fragrant. Keep an eye on it to prevent over-baking, as a burnt crust can alter the flavor of your cheesecake bars. Once baked, remove the crust from the oven and allow it to cool slightly while you prepare the cheesecake filling.
Mixing the Cheesecake Filling
Now, let’s move on to the star of the show: the cheesecake filling. Start by ensuring your cream cheese is at room temperature; this will make it easier to achieve a smooth texture. Using a hand mixer or a stand mixer, beat the cream cheese on medium speed until it’s creamy and free from lumps. This step is vital because any lumps in the cream cheese will remain in your final product, ruining the silky texture of your cheesecake bars.
Achieving Smoothness
To prevent lumps, beat the cream cheese for about 2 to 3 minutes. Scrape down the sides of the bowl regularly to ensure all the cream cheese is well incorporated. Once you have a smooth base, you can proceed to the next step.
Incorporating Eggs
When adding eggs to your cheesecake filling, it’s crucial to do so one at a time. This technique helps to maintain the structure of the filling and ensures a uniform mixture. After adding each egg, mix just until combined. Overmixing at this stage can incorporate too much air, leading to cracking during baking.
Adding Nutella
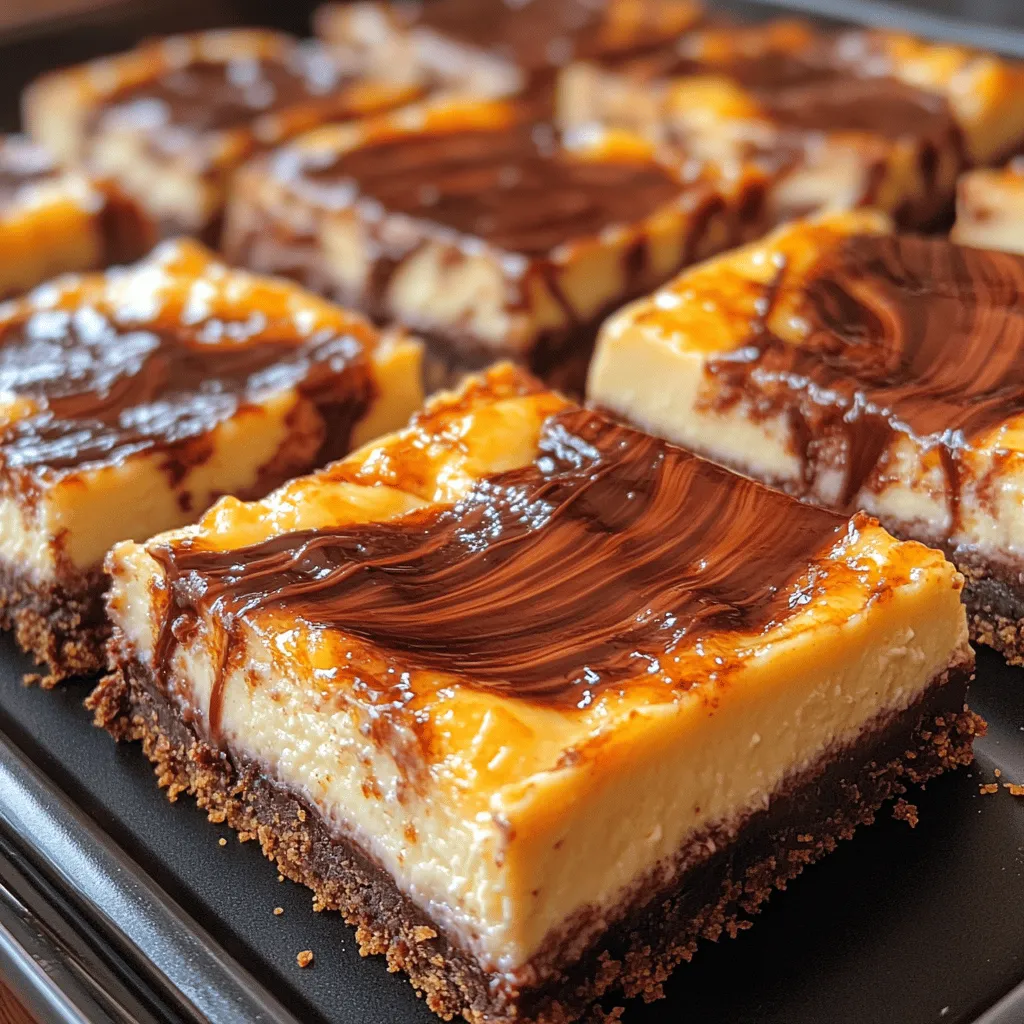
The addition of Nutella is where the magic happens! Gently fold in the Nutella into the cheesecake mixture. To achieve the signature swirl that makes these bars visually appealing, use a spatula to create gentle folds rather than stirring vigorously. This method will give you beautiful ribbons of Nutella throughout the creamy filling, enhancing both the flavor and presentation of your cheesecake bars.
Baking and Cooling the Cheesecake Bars
With your filling prepared, it’s time to pour it over the cooled crust. Spread the cheesecake mixture evenly, ensuring it reaches the edges of the pan. Bake in the preheated oven at 350°F (175°C) for 25 to 30 minutes. You’ll know your cheesecake bars are ready when the edges are set, and the center has a slight jiggle. This jiggle is important; overbaking can lead to a dry cheesecake.
Cooling Process
Once out of the oven, allow the cheesecake bars to cool in the pan at room temperature for about an hour. Afterward, transfer them to the refrigerator to chill for at least 4 hours, or overnight if you can wait. This chilling process allows the flavors to meld beautifully and helps the bars set up perfectly for cutting.
Serving Suggestions
When it’s time to serve your Nutella Heaven Cheesecake Bars, consider how you want to impress your guests or treat yourself. Cut the bars into squares for easy serving, and place them on a decorative platter. For an extra touch, you can drizzle additional Nutella over the top or sprinkle with crushed hazelnuts for added texture and flavor.
Presentation Tips
When it comes to cutting the bars, use a sharp knife for clean cuts. To ensure your knife remains clean, dip it in hot water before each cut and wipe it dry. This technique prevents the creamy filling from sticking to the knife, resulting in beautifully presented squares.
Garnishing with Nutella
A simple drizzle of Nutella over the top not only enhances the appearance of your cheesecake bars but also adds an indulgent touch that Nutella lovers will appreciate. You can use a squeeze bottle or a spoon to create artistic patterns on each bar, making them look as good as they taste.
Pairing Suggestions
These Nutella Heaven Cheesecake Bars pair wonderfully with various beverages. For a classic combination, serve them alongside a cup of fresh-brewed coffee or espresso; the bitterness complements the sweetness of the dessert. If you prefer something sweeter, consider a glass of dessert wine like a late harvest Riesling, which balances the rich flavors of the cheesecake.
Serving Occasions
These cheesecake bars are versatile enough to fit into any occasion. Whether you’re hosting a birthday party, a holiday gathering, or simply indulging in a quiet night at home, they are sure to impress. They also make excellent treats for potlucks or bake sales, as they are easy to transport and serve.
Nutritional Information
While these Nutella Heaven Cheesecake Bars are a decadent treat, it’s helpful to be aware of their nutritional aspects. Each bar is rich in calories, primarily due to the cream cheese, Nutella, and sugar. A typical serving may contain around 250-300 calories, depending on the size and ingredients used. Keep in mind that moderation is key when enjoying this delightful dessert.
Conclusion
Nutella Heaven Cheesecake Bars are a delightful dessert that combines rich flavors and creamy textures, making them a favorite for any occasion. With a simple yet effective recipe, anyone can create these indulgent treats at home. By understanding the ingredients, following the preparation steps, and exploring serving options, you can enjoy a slice of heaven in every bite. Whether you’re sharing them with friends or savoring them alone, these cheesecake bars promise to satisfy your sweet tooth. Indulge in the creamy goodness, and let every bite transport you to a paradise of flavor and satisfaction.
