Introduction
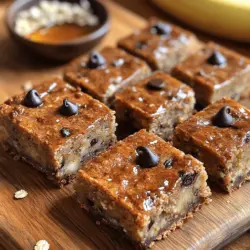
Peanut Butter Banana Oat Bars are the ideal solution for anyone seeking a healthy and delicious snack or breakfast option. These bars are not only easy to prepare but also packed with nutrients, making them a perfect choice for busy mornings or a post-workout snack. The combination of creamy peanut butter, naturally sweet bananas, and wholesome oats creates a satisfying treat that can be enjoyed by everyone, from kids to adults.
The appeal of Peanut Butter Banana Oat Bars lies in their simplicity and versatility. They can be customized to suit various dietary preferences and can easily be made gluten-free, vegan, or nut-free by swapping out ingredients. These bars are perfect for meal prep, as they can be stored in the fridge or freezer, ready to be enjoyed anytime you need a quick energy boost.
The Nutritional Benefits of Peanut Butter Banana Oat Bars
Health Benefits of Bananas
Bananas are often hailed as a superfood due to their impressive nutritional profile. Rich in potassium, they help maintain healthy blood pressure levels and support muscle function. Bananas are also a great source of dietary fiber, which aids digestion and can help keep you feeling full longer. Additionally, they contain essential vitamins like vitamin C and B6, contributing to overall health and wellness.
In the context of Peanut Butter Banana Oat Bars, ripe bananas not only provide natural sweetness but also act as a binding agent, ensuring the bars hold together without the need for excessive added sugars.
Advantages of Peanut Butter and Alternatives
Peanut butter is a key ingredient in these oat bars, and for good reason. It is packed with protein, healthy fats, and essential nutrients like magnesium and vitamin E. This makes it an excellent choice for fueling your body and maintaining energy levels throughout the day. However, for those with peanut allergies or preferring a different flavor, alternatives like almond butter or cashew butter can be used. These nut butters offer similar health benefits and can provide unique flavor profiles to your oat bars.
When choosing nut butter, it’s essential to look for natural options without added sugars or hydrogenated oils. This ensures you’re getting the most nutritional benefit from your ingredients.
Nutritional Value of Oats and Whole Wheat Flour
Oats are another powerhouse ingredient in Peanut Butter Banana Oat Bars. They are a great source of complex carbohydrates, providing sustained energy while helping to keep blood sugar levels stable. Oats are also high in beta-glucans, a type of soluble fiber that can help lower cholesterol levels and improve heart health.
If you’re looking to increase the nutritional value even further, consider using whole wheat flour in your recipe. Whole wheat flour is less processed than white flour, retaining more nutrients and fiber. This not only enhances the health benefits but also contributes to a more robust flavor in your bars.
Sweetness Options: Honey vs. Maple Syrup
To sweeten your Peanut Butter Banana Oat Bars, you can choose between honey or maple syrup. Honey is a natural sweetener known for its antimicrobial properties and antioxidants. However, it is not suitable for vegans. On the other hand, maple syrup is also a natural sweetener and can be used as a vegan alternative. Both options provide a delicious flavor and can be adjusted according to your taste preferences.
When selecting a sweetener, consider the flavor profile you desire and any dietary restrictions you might have. Either option will enhance the deliciousness of your bars while providing a touch of sweetness without the need for refined sugar.
Gathering Your Ingredients
Before diving into the preparation of your Peanut Butter Banana Oat Bars, it’s crucial to gather all the necessary ingredients. Here’s a detailed breakdown of each component and some suggestions for substitutions.
Ingredient List
1. Ripe Bananas: About 2-3 medium-sized bananas are needed. The riper the bananas, the sweeter they will be, so look for bananas that are speckled with brown spots.
2. Peanut Butter: Use 1 cup of creamy or crunchy peanut butter. Ensure it’s a natural variety without added sugars or oils for the healthiest option.
3. Rolled Oats: Use 2 cups of rolled oats. Quick oats can also be used, but rolled oats typically provide a better texture.
4. Whole Wheat Flour: You will need 1 cup of whole wheat flour. If gluten-free is your goal, consider using almond flour or a gluten-free flour blend.
5. Honey or Maple Syrup: Use 1/3 cup of honey or maple syrup to sweeten your bars.
6. Baking Powder: A teaspoon of baking powder will help the bars rise slightly, creating a softer texture.
7. Salt: A pinch of salt will enhance the flavors of the other ingredients.
Suggestions for Ingredient Substitutions
– Nut Butters: If you have a nut allergy, sunflower seed butter or tahini can be excellent alternatives to peanut butter.
– Sweeteners: Agave nectar or coconut sugar can also be used as substitutes for honey or maple syrup, allowing for flexibility depending on your dietary needs.
– Add-ins: Feel free to customize your bars by adding in extras such as chocolate chips, dried fruits, or nuts. These enhancements can add flavor and texture, making your bars even more enjoyable.
Importance of Using Ripe Bananas for Natural Sweetness
Choosing the right bananas is crucial for this recipe. Ripe bananas not only provide natural sweetness but also contribute to the moisture of the bars, ensuring they don’t become dry and crumbly. The natural sugars in ripe bananas mean you can reduce the amount of added sweeteners without sacrificing flavor, making your bars healthier overall.
Step-by-Step Instructions for Making Peanut Butter Banana Oat Bars
Preheating the Oven: Why This Step is Crucial for Baking
Before diving into the mixing process, it’s essential to preheat your oven to 350°F (175°C). Preheating ensures that your bars cook evenly and thoroughly. Starting with a hot oven allows the baking powder to activate at the right time, helping your bars rise appropriately.
Mixing the Wet Ingredients: Importance of Proper Blending
1. Mash the Ripe Bananas: In a large mixing bowl, start by mashing the ripe bananas with a fork or a potato masher until they reach a smooth consistency. This will take only a minute or two. The more thoroughly you mash them, the better they will incorporate into the other ingredients.
2. Add Peanut Butter and Sweetener: Next, add the peanut butter and honey or maple syrup to the mashed bananas. Using a hand mixer or a whisk, blend the mixture until smooth and creamy. It’s important to mix well to ensure that the peanut butter and sweetener are evenly distributed, as this will affect the texture and flavor of your bars.
3. Combine with Dry Ingredients: After you’ve blended the wet ingredients, it’s time to combine them with the dry ingredients. In a separate bowl, stir together the rolled oats, whole wheat flour, baking powder, and salt. Gradually fold the dry ingredients into the wet mixture, using a spatula or wooden spoon to combine until just mixed. Avoid over-mixing, as this can lead to denser bars.
This initial mixing process is critical, setting the stage for the perfect Peanut Butter Banana Oat Bars. As we move through the recipe, each step will build on this foundation, resulting in a delicious and nutritious treat that’s sure to please.
Stay tuned for the next part of the article, where we will dive into the final steps of creating these delightful bars, including baking instructions, cooling tips, and serving suggestions.
Combining Dry Ingredients: Tips for Achieving the Right Texture
The foundation of delicious Peanut Butter Banana Oat Bars lies in the proper blending of dry ingredients. Start with rolled oats, which should be the main base for your bars. They provide the necessary structure and chewiness. When measuring oats, ensure you use the right type. Old-fashioned rolled oats are ideal because they maintain their texture during baking, whereas quick oats may lead to a mushy result.
Next, add your flour. Whole wheat flour is a popular choice for its added nutrients and fiber, but you can also use almond flour for a gluten-free option. To enhance the flavor, incorporate a pinch of salt and a teaspoon of baking powder. The baking powder will help the bars rise slightly, creating a light and airy texture. To combine these ingredients, whisk them in a large mixing bowl until they are well blended and free of clumps. This step is crucial as it ensures even distribution of the leavening agent throughout the mixture, promoting uniform baking.
Another essential tip is to sift the dry ingredients together. Sifting helps to aerate the flour and prevents any lumps from forming, leading to a smoother batter. When the dry ingredients are ready, you’ll be set to incorporate the wet ingredients, which will bring the mixture together beautifully.
Incorporating Optional Ingredients: Enhancing Flavor with Chocolate Chips and Nuts
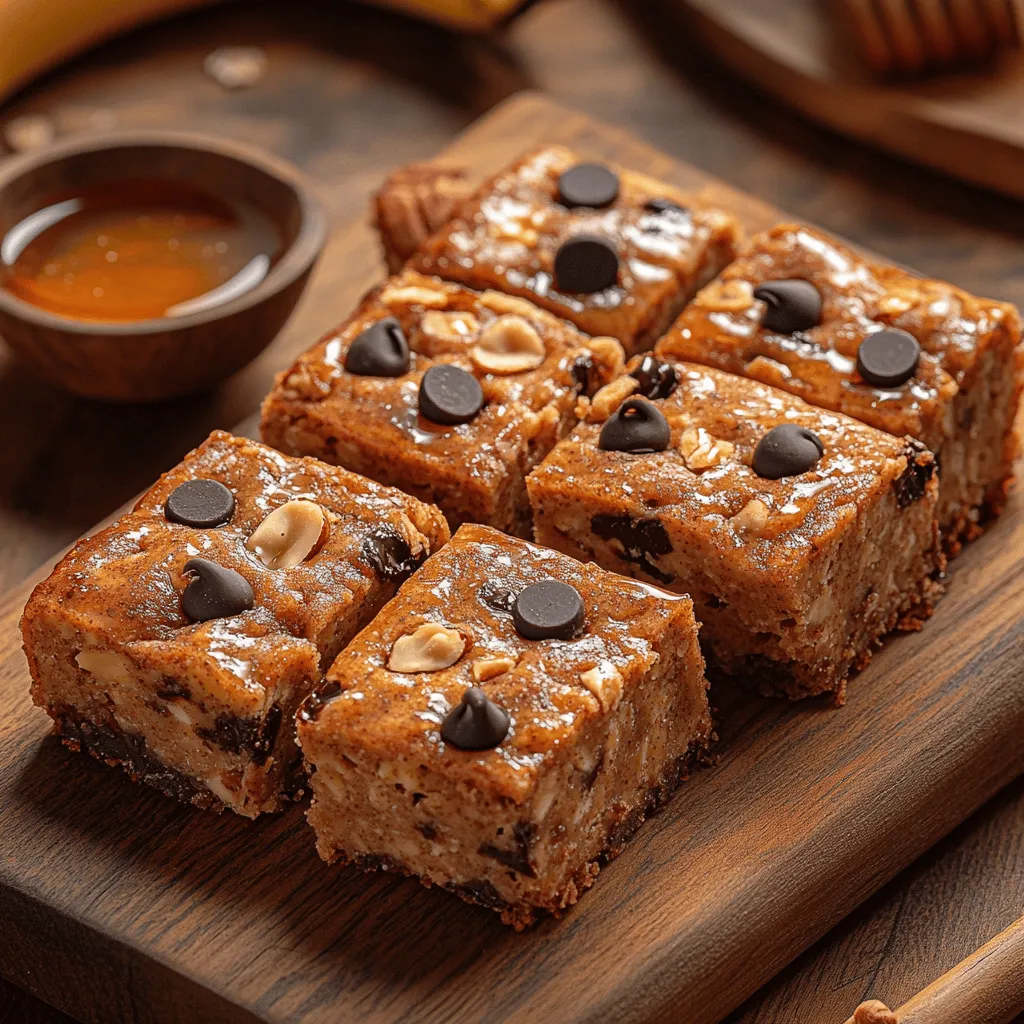
While the base Peanut Butter Banana Oat Bars are delightful on their own, adding optional ingredients can elevate their flavor and texture. Chocolate chips are a popular addition, introducing a sweet, melty contrast to the nutty and fruity flavors. Use dark or semi-sweet chocolate chips for a richer taste, or opt for dairy-free chips if you’re following a vegan diet.
Nuts, such as chopped walnuts or pecans, can provide a satisfying crunch. They are also rich in healthy fats and proteins, making your bars more filling. If you choose to add nuts, chop them roughly before folding them into the mixture to ensure even distribution throughout the bars.
For those looking for a unique twist, consider incorporating dried fruits, such as cranberries or raisins. These not only add natural sweetness but also bring additional chewiness to the bars. However, be mindful of the overall moisture content; if you add too many wet ingredients, you may need to adjust the baking time.
Preparing the Baking Pan: Ensuring Easy Removal of Bars
The next step in the process is preparing your baking pan. Use an 8×8 inch or 9×9 inch square baking pan for ideal bar thickness. Start by greasing the pan with a light coat of cooking spray or a thin layer of coconut oil. This helps prevent sticking and facilitates easy removal once the bars have cooled.
For an even more foolproof method, consider lining the pan with parchment paper. Cut the parchment paper to fit the bottom of the pan, leaving a bit of overhang on the edges. This overhang will serve as handles, making it easy to lift the entire batch of bars out once baked. Be sure to grease the parchment as well for added assurance against sticking.
Baking Process Explained
What to Look for During the Baking Phase
Once your mixture is prepared and your pan is ready, pour the oat mixture into the pan, spreading it evenly with a spatula. Preheat your oven to 350°F (175°C) before placing the pan inside. The baking process usually takes about 25 to 30 minutes. During this time, keep an eye on the bars. They should become golden brown around the edges, which is a good sign that they are done.
Another way to check for doneness is to gently press the center of the bars with your finger. If they bounce back, they are likely ready. If they feel too soft or leave an indentation, they may need a few more minutes in the oven. Remember that every oven is different, so it’s essential to use your judgment based on these indicators.
Understanding the Cooling Process: Why It’s Important for Consistency
After baking, remove the pan from the oven and allow the bars to cool in the pan for about 10-15 minutes. This cooling period is crucial; it allows the bars to firm up and makes them easier to cut. If you attempt to cut them while they are still warm, they may crumble and fall apart.
Once they have cooled slightly, use the parchment overhang to lift the bars out of the pan. Transfer them to a cutting board and allow them to cool completely before slicing. This cooling process ensures that the bars retain their structure, resulting in a chewy, satisfying texture.
Serving Suggestions
Peanut Butter Banana Oat Bars are versatile and can be enjoyed in various ways. They make an excellent snack, providing a quick energy boost during the day. For breakfast, pair them with a dollop of yogurt and fresh fruit to create a balanced meal. This combination not only enhances the nutritional content of your breakfast but also adds delightful flavors and textures.
For a sweet treat, consider drizzling the bars with a bit of melted dark chocolate or serving them alongside a scoop of ice cream. This will transform your healthy bars into a dessert that everyone will love. The creamy texture of the ice cream contrasts beautifully with the chewy bars, making for a delightful indulgence.
Storage Options: How to Keep Bars Fresh
To keep your Peanut Butter Banana Oat Bars fresh, store them in an airtight container at room temperature for up to five days. If you want to extend their shelf life, consider refrigerating them, where they can last for up to two weeks. For even longer storage, these bars freeze exceptionally well. Simply wrap them individually in plastic wrap or aluminum foil and place them in a freezer-safe bag. They can be frozen for up to three months. When you’re ready to enjoy them, just thaw at room temperature or microwave for a few seconds until warmed through.
Creative Variations of Peanut Butter Banana Oat Bars
One of the best aspects of Peanut Butter Banana Oat Bars is their adaptability. You can easily customize the recipe to suit your taste preferences. For a spiced version, add a teaspoon of cinnamon or nutmeg to the dry ingredients. These warm spices will offer a comforting flavor, perfect for a cozy snack.
If you’re looking to experiment with different nut butters, almond butter or cashew butter can be excellent alternatives to peanut butter. Each nut butter brings its unique flavor profile and nutritional benefits. Additionally, you can swap out the sweetener. Instead of honey or maple syrup, try agave nectar or brown rice syrup for a different sweetness.
Incorporating seeds, such as chia or flaxseeds, can add a nutritious boost and a pleasant crunch. Dried fruits like apricots or figs can also be incorporated for a touch of natural sweetness. These variations not only enhance the flavor but also contribute to a diverse nutrient profile.
Conclusion
In summary, Peanut Butter Banana Oat Bars are not only simple to make but also provide a delightful and nutritious snack that can be enjoyed at any time of the day. With their wholesome ingredients, these bars offer a perfect blend of protein, fiber, and healthy fats, making them a satisfying choice for health-conscious individuals.
The joy of creating these bars at home lies in the ability to customize and adapt the recipe to suit your preferences while ensuring you know exactly what goes into them. Homemade snacks are often healthier and more satisfying than their store-bought counterparts, free from preservatives and artificial ingredients.
So, gather your ingredients, follow these steps, and indulge in the pleasure of making your own Peanut Butter Banana Oat Bars. You’ll find that not only are they delicious, but they also bring a sense of accomplishment that comes with creating something wholesome and delightful from scratch. Enjoy the process and the tasty results!