Introduction
The chocolate chip cookie, a beloved staple of American baking, has a rich history that dates back to the 1930s. Ruth Wakefield, the owner of the Toll House Inn in Massachusetts, is credited with creating this delightful treat by adding chopped chocolate to her butter cookie recipe. The cookies quickly gained popularity, leading to the creation of the Toll House chocolate chip cookie recipe, which was later published in a cookbook. Since then, the chocolate chip cookie has become synonymous with comfort, nostalgia, and the joy of baking.
Despite its humble beginnings, the chocolate chip cookie has evolved into countless variations, tantalizing the taste buds of cookie lovers around the world. What sets a perfect chocolate chip cookie apart from the rest? It ultimately boils down to the quality of ingredients, the techniques used, and the attention to detail during the baking process. From the rich flavor of the chocolate chips to the chewy texture of the cookie, every element plays a crucial role in creating the ultimate chocolate chip experience.
In this guide, we will explore the essential ingredients that contribute to a perfect chocolate chip cookie, the science behind baking, and provide a step-by-step recipe that will empower you to create these delectable treats in your very own kitchen. Get ready to embark on a baking journey that will lead you to the perfect batch of homemade chocolate chip cookies.
Understanding the Ingredients
The Role of Flour in Cookie Texture
Flour is the backbone of any cookie recipe, providing the structure and texture that we associate with baked goods. When it comes to chocolate chip cookies, the type of flour used can significantly impact the outcome. All-purpose flour is the most commonly used flour in cookie recipes due to its balanced protein content, which helps create a chewy yet tender texture.
On the other hand, cake flour, with its lower protein content, produces a lighter and more delicate cookie. While cake flour may be ideal for certain cookie variations, using all-purpose flour is generally preferred for classic chocolate chip cookies. The choice of flour can also affect gluten development, which plays a vital role in the cookie’s chewiness.
Types of Flour: All-Purpose vs. Cake Flour
Understanding the differences between all-purpose flour and cake flour is essential for achieving the desired cookie texture. All-purpose flour is versatile, suitable for a variety of baked goods, including cookies, cakes, and breads, while cake flour is specifically designed for lighter baked goods.
When you mix flour with moisture, gluten proteins form, contributing to the cookie’s structure. However, too much gluten development can lead to tough cookies. For chocolate chip cookies, we want just enough gluten to provide structure without sacrificing tenderness. Therefore, stick with all-purpose flour for that classic chocolate chip cookie texture.
The Importance of Sugar
Sugar is not just a sweetener; it’s a crucial ingredient that influences the flavor, texture, and appearance of cookies. In chocolate chip cookies, sugar serves multiple purposes. It not only adds sweetness but also contributes to browning and caramelization, resulting in a rich flavor.
There are different types of sugar used in baking, each with unique properties. Granulated sugar provides sweetness and helps cookies spread during baking, while brown sugar, which contains molasses, adds moisture, chewiness, and a deeper flavor profile. Powdered sugar, on the other hand, is typically used in icings or dusting, not in traditional cookie recipes.
Different Types of Sugar: Granulated, Brown, and Powdered
The choice of sugar can significantly affect the final product. While granulated sugar is essential for sweetness and spread, using a combination of both granulated and brown sugar is a common practice in chocolate chip cookie recipes. This combination enhances the overall flavor and texture of the cookies, yielding a perfect balance between chewiness and crispness.
Brown sugar, with its moisture content, helps keep cookies soft and chewy, while granulated sugar promotes a slight crunch on the edges. Experimenting with different ratios of these sugars can lead to personalized cookie results, allowing bakers to find their ideal cookie texture and flavor.
How Sugar Impacts Flavor and Texture
The type and amount of sugar in your cookie dough will directly impact the final outcome. A higher ratio of brown sugar to granulated sugar will yield a softer, chewier cookie, while more granulated sugar will create a crisper texture. Additionally, the caramelization of sugar during baking contributes to the cookies’ golden-brown color and enhances their flavor.
Butter vs. Margarine: What to Choose
When it comes to the fat used in chocolate chip cookies, the choice between butter and margarine can significantly impact the flavor and texture of the final product. Butter is the traditional choice for baking, imparting a rich, creamy flavor that is hard to replicate with margarine.
Butter contains water, which turns to steam during baking, helping cookies to rise and develop a tender crumb. Margarine, on the other hand, may contain a higher water content and can lead to cookies that are less flavorful and have a different texture. For the best results, opt for unsalted butter to have full control over the salt content in your recipe.
The Science of Fat in Baking
Fat plays a crucial role in the baking process, affecting the texture and flavor of cookies. When creamed together with sugar, butter traps air, creating a light and fluffy mixture that contributes to the leavening process. This means that the way you cream your butter and sugar can greatly influence the texture of your cookies.
Additionally, fat contributes to the overall richness and mouthfeel of the cookies. The melting of fat during baking creates a tender crumb and enhances the overall flavor. Understanding the role of fat in baking will help you achieve the perfect chocolate chip cookie every time.
How Temperature Affects Cookie Dough
The temperature of your ingredients matters significantly in baking. For chocolate chip cookies, using softened butter is crucial for proper creaming. If the butter is too cold, it won’t blend well with the sugars, resulting in a dense and heavy cookie. Conversely, if the butter is too warm, it can lead to overly spread-out cookies.
Additionally, chilling the cookie dough before baking can help control spread and enhance flavor. Cold dough tends to spread less during baking, resulting in thicker cookies with a chewy texture. Consider chilling your dough for at least 30 minutes before baking for optimal results.
The Magic of Eggs
Eggs are essential binding agents in cookie recipes, providing structure and moisture. The proteins in eggs coagulate during baking, helping cookies maintain their shape. The number of eggs used can also affect the texture; for example, using more egg yolks can create a richer, denser cookie, while additional egg whites can lead to a lighter texture.
Binding Agents and Moisture
In addition to eggs, other binding agents in cookie recipes, such as nut butters or applesauce, can add both moisture and flavor. These ingredients can also help to create a softer cookie, making them ideal for those who prefer a chewy texture. Understanding how these ingredients interact will allow you to customize your chocolate chip cookies to your liking.
The Impact of Egg Size on the Recipe
When following a recipe, it’s important to note that egg size can impact the final outcome. Most recipes call for large eggs, which typically weigh about 50 grams each. Using a different size egg can alter the moisture content of your dough, leading to cookies that are either too dry or too wet. Be sure to use the correct size of eggs as specified in the recipe for consistent results.
Chocolate Choices: Chips, Chunks, or Bars?
When it comes to chocolate in chocolate chip cookies, the choice between chips, chunks, or bars can dramatically influence the cookie’s overall flavor and texture. Chocolate chips are convenient and designed to hold their shape during baking, while chocolate chunks or bars can create delightful melty pockets of chocolate.
Consider using a combination of different chocolate types to elevate your cookies. For example, semi-sweet chips paired with dark chocolate chunks can provide a complex flavor profile that enhances the overall experience.
Varieties of Chocolate: Semi-Sweet, Dark, and Milk
The variety of chocolate you choose plays a significant role in the flavor of your cookies. Semi-sweet chocolate is the classic choice for chocolate chip cookies, delivering a well-balanced sweetness. Dark chocolate offers a more intense flavor, while milk chocolate provides a sweeter, creamier alternative. Depending on your personal preference, you can mix and match these chocolate varieties to create cookies tailored to your taste.
How Chocolate Affects the Overall Flavor
The type of chocolate used in your cookies can greatly influence the final flavor. Dark chocolate provides a rich, slightly bitter contrast to the sweetness of the cookie, while milk chocolate adds creaminess. Experimenting with different chocolate varieties allows bakers to create unique flavor combinations that cater to their preferences.
Essential Baking Tools
Before diving into the step-by-step chocolate chip cookie recipe, it’s essential to equip your kitchen with the right tools. Having the right tools on hand will make the baking process smoother and more enjoyable, ensuring that your cookies turn out perfectly every time.
Must-Have Kitchen Tools for Cookie Baking
1. Mixing Bowls: A set of mixing bowls in various sizes is essential for combining ingredients. Choose bowls that are sturdy and easy to clean.
2. Spatulas: Silicone or rubber spatulas are ideal for scraping down the sides of bowls and folding in ingredients without overmixing.
3. Measuring Cups and Spoons: Accurate measurements are crucial in baking. Invest in a good set of measuring cups and spoons to ensure consistency in your recipes.
4. Whisk: A whisk is useful for mixing dry ingredients and incorporating air into your dough.
5. Rolling Pin: Although not always necessary for chocolate chip cookies, a rolling pin can be handy for rolling out dough for different cookie shapes.
The Importance of a Reliable Oven and Baking Sheets
A reliable oven is a cornerstone of successful baking. Make sure your oven is calibrated correctly and maintains an even temperature. Investing in high-quality baking sheets will also make a significant difference. Look for heavy-duty, non-stick baking sheets that promote even baking and prevent cookies from sticking.
Optional Tools That Can Enhance Your Baking Experience
While not strictly necessary, certain tools can enhance your baking experience:
– Silicone Baking Mats: These mats provide a non-stick surface for baking and promote even heat distribution.
– Cookie Scoops: A cookie scoop helps ensure uniform cookie sizes, resulting in evenly baked cookies.
– Cooling Racks: Allowing cookies to cool on a wire rack prevents them from becoming soggy and ensures they maintain their desired texture.
Equipped with the right tools and knowledge, you’re ready to create the ultimate chocolate chip cookie. In the next section, we will walk through the step-by-step process of making these delicious treats from scratch. Get ready to prepare your workspace and dive into the delightful world of cookie baking!
Suggestions for Nuts, Dried Fruit, or Spices
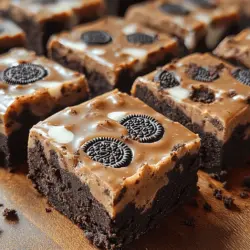
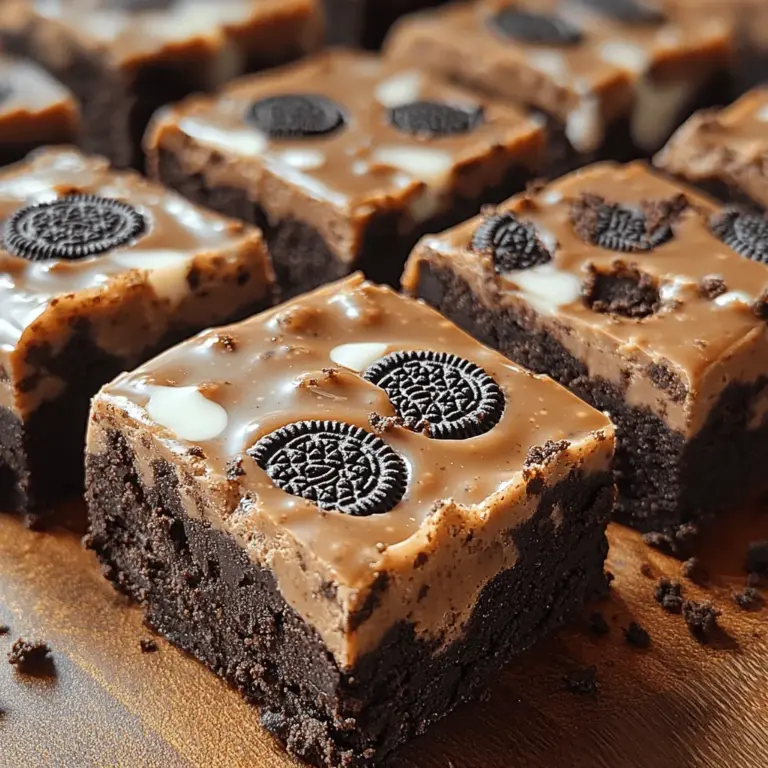
When it comes to enhancing your Decadent Oreo Fudge Squares, consider adding nuts, dried fruits, or spices to elevate the flavor profile and texture. Here are some delightful options to consider:
– Nuts: Chopped walnuts, pecans, or almonds can provide a lovely crunch and a nutty flavor that complements the sweetness of the fudge. Toasting the nuts lightly before adding them to the mixture can enhance their flavor even further.
– Dried Fruit: For a chewy contrast to the rich chocolate, try adding dried cranberries, cherries, or even chopped apricots. The tartness of these fruits balances the sweetness of the fudge and adds a unique twist.
– Spices: A pinch of cinnamon or espresso powder can deepen the flavor of your fudge squares. These spices can bring out the chocolate even more and create a warm, comforting aroma while baking.
Chilling the Dough: Why It Matters
Chilling the dough is a crucial step when making Decadent Oreo Fudge Squares. By allowing the dough to rest in the refrigerator, you not only make it easier to handle but also improve the overall flavor and texture of the finished product.
– Effects on Flavor and Texture: Chilling allows the ingredients to meld together, enhancing the flavors. Additionally, it helps to firm up the butter in the dough, which can prevent excessive spreading during baking. This results in a denser and chewier fudge square, which is exactly what you want.
– Recommended Chilling Time: Aim to chill the dough for at least 30 minutes before baking. For even better results, consider chilling it for 1-2 hours. If you’re short on time, 30 minutes is adequate, but longer chilling will yield superior texture and flavor.
Baking the Cookies
Preheating the Oven: Best Practices
Before you start baking your Decadent Oreo Fudge Squares, it’s essential to preheat your oven. This ensures that the squares bake evenly and achieve the perfect texture. Preheat your oven to 350°F (175°C) and allow it to come to temperature fully before placing your squares inside. This step is vital for achieving the best rise and texture in your baked goods.
How to Portion and Shape the Dough
Once the dough has chilled, it’s time to portion and shape it. Use a cookie scoop or spoon to measure out even amounts of dough. This will help ensure that your fudge squares bake uniformly, resulting in an even texture throughout.
– Techniques for Uniform Cookies: If you want your fudge squares to be perfectly uniform, consider using a kitchen scale to weigh each portion of dough. This can be particularly helpful if you’re making a large batch.
– Tips for Achieving the Desired Thickness: When shaping the dough, aim for about 1-inch thickness for your fudge squares. This thickness will allow for a chewy center with a slightly crisp exterior.
Baking Time and Temperature
Place your shaped dough onto a baking sheet lined with parchment paper, leaving enough space between each square for spreading. Bake them in your preheated oven for 12-15 minutes, keeping an eye on them towards the end of the baking time.
– Understanding Your Oven: Hot Spots and Calibration: Every oven is different, and some may have hot spots that cause uneven baking. It’s a good idea to rotate your baking sheet halfway through the baking time to ensure even cooking. If your cookies are browning too quickly, you may want to lower the oven temperature slightly.
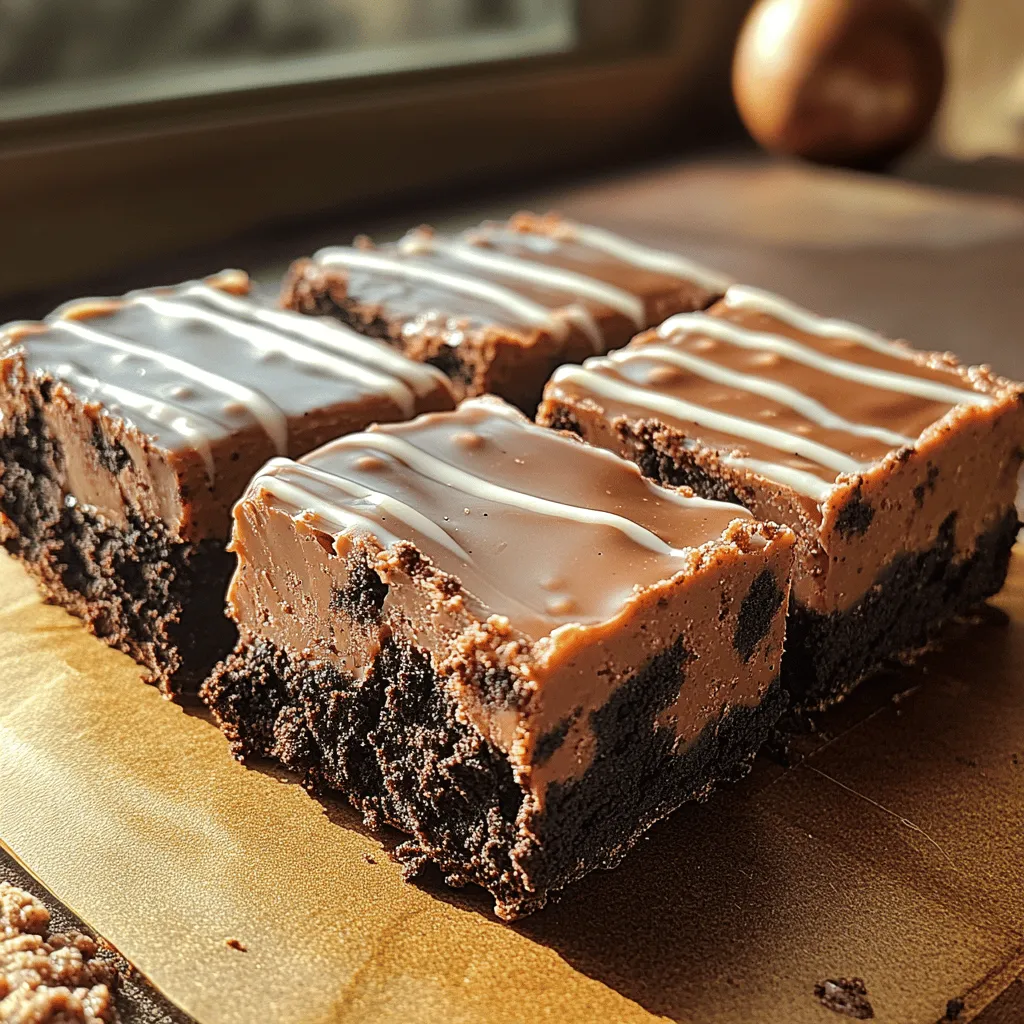
Signs to Look for to Know When Cookies Are Done
How can you tell when your Decadent Oreo Fudge Squares are perfectly baked? Look for the following signs:
– The edges should be set and slightly golden, while the center might still appear soft. This is normal, as they will continue to firm up as they cool.
– If the tops are slightly cracked and the fudge has a glossy sheen, you’re on the right track.
Cooling and Storing Cookies
The Cooling Process: Why It’s Important
Cooling your Decadent Oreo Fudge Squares properly is essential for achieving the desired texture. When cookies are removed from the oven, they continue to cook from residual heat. Allowing them to cool on the baking sheet for a few minutes before transferring them to a wire rack helps to set their structure.
Best Practices for Cooling on Wire Racks
– After letting the squares sit on the baking sheet for about 5-10 minutes, carefully transfer them to a wire rack. This allows air to circulate around the cookies, preventing them from becoming soggy.
– Ensure the wire rack is not overcrowded; spacing them out allows for better cooling and prevents them from sticking together.
How Cooling Affects Texture and Taste
The cooling process allows the fudge squares to firm up and develop their ultimate flavor. If you dig into them too soon, you may find they are too soft and gooey. Patience is key—allow them to cool completely before serving for the best taste and texture.
Storing Your Cookies for Freshness
To keep your fudge squares fresh, store them in an airtight container at room temperature. If you live in a humid environment, it’s best to keep them in the refrigerator to prevent them from becoming too soft.
– Best Methods for Keeping Cookies Soft: To maintain softness, consider placing a slice of bread in the container with your cookies. The bread will absorb excess moisture, keeping your squares soft and chewy.
Freezing Cookies for Later Enjoyment
If you want to make your Decadent Oreo Fudge Squares ahead of time, freezing them is a great option. Allow the squares to cool completely, then wrap them tightly in plastic wrap and place them in a freezer-safe bag or container. They can be frozen for up to three months.
– When you’re ready to enjoy them, simply thaw them at room temperature for a couple of hours or pop them in the microwave for a few seconds to warm them up.
Variations on the Classic Chocolate Chip Cookie
While the Decadent Oreo Fudge Squares are delightful as is, experimenting with variations can yield exciting results. Here are some ideas to consider:
Exploring Different Flavor Profiles
– Adding Spices or Extracts: Vanilla extract is a classic addition, but consider adding a splash of almond extract or a dash of cinnamon for a unique flavor twist.
– Creating Stuffed Cookies: For an indulgent treat, try stuffing your squares with caramel, peanut butter, or even more chocolate. This will create a gooey center that will delight everyone.
Gluten-Free and Vegan Options
– For those with dietary restrictions, consider using gluten-free flour blends and dairy-free chocolate. There are many great options available that maintain the flavor and texture of traditional fudge squares.
– Substitutes for Traditional Ingredients: Swap out regular butter for coconut oil and use flaxseed meal mixed with water as an egg substitute for a vegan version.
Tips for Maintaining Structure and Flavor
When making substitutions, ensure that the ratios are correct to maintain the structure and flavor of your fudge squares. It may require a bit of experimentation, but the results can be incredibly rewarding.
Troubleshooting Common Cookie Issues
Even experienced bakers encounter issues now and then. Here are common problems you may face while making Decadent Oreo Fudge Squares and how to fix them:
Cookies Spread Too Much
If your fudge squares spread excessively during baking, it may be due to too much butter or not enough chilling time. Make sure to follow the chilling instructions closely, and consider reducing the butter slightly in future batches.
Overly Dry or Crumbly Cookies
Dry or crumbly squares can result from overbaking or using too much flour. To adjust moisture levels, ensure you are measuring your flour correctly—scooping flour directly from the bag can lead to too much being used. Instead, spoon the flour into your measuring cup and level it off.
Cookies That Are Too Tough or Chewy
If your fudge squares turn out tough, it might be due to overmixing the dough or baking them for too long. Mix just until combined, and keep an eye on the baking time to ensure they stay soft and chewy.
Conclusion
There’s something truly special about making Decadent Oreo Fudge Squares at home. The joy of combining simple ingredients to create a rich, chocolatey treat is unmatched. These fudge squares are not only a delight to eat but also a great way to experiment with flavors and textures.
Don’t hesitate to add your personal touches or try out the variations suggested. Baking is as much about creativity as it is about following recipes. Whether you stick to the classic or venture into exciting new territory, these fudge squares are sure to become a beloved addition to your dessert repertoire. Enjoy the timeless appeal of this treat and the satisfaction of sharing your creations with friends and family. Happy baking!