Introduction
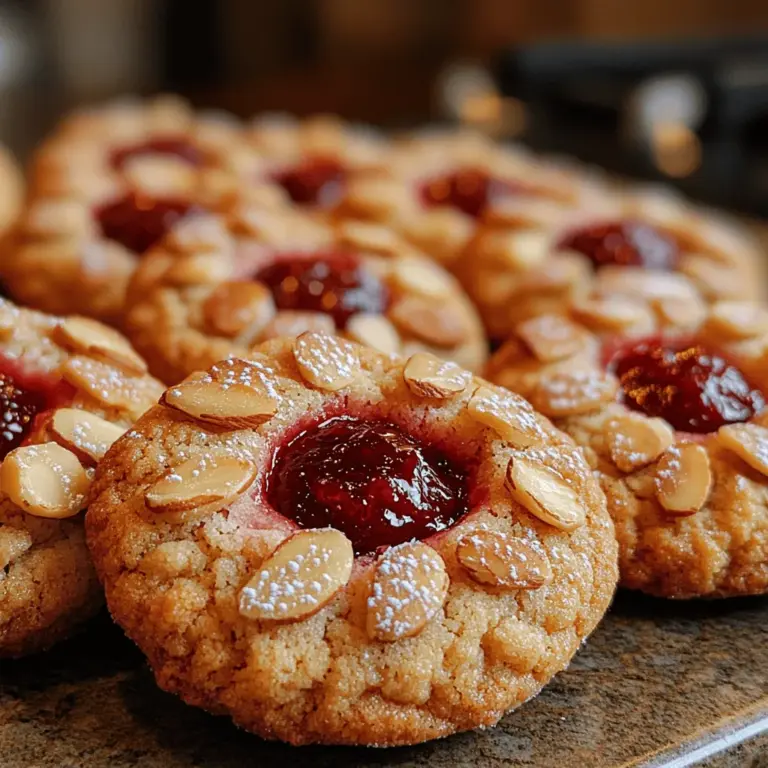
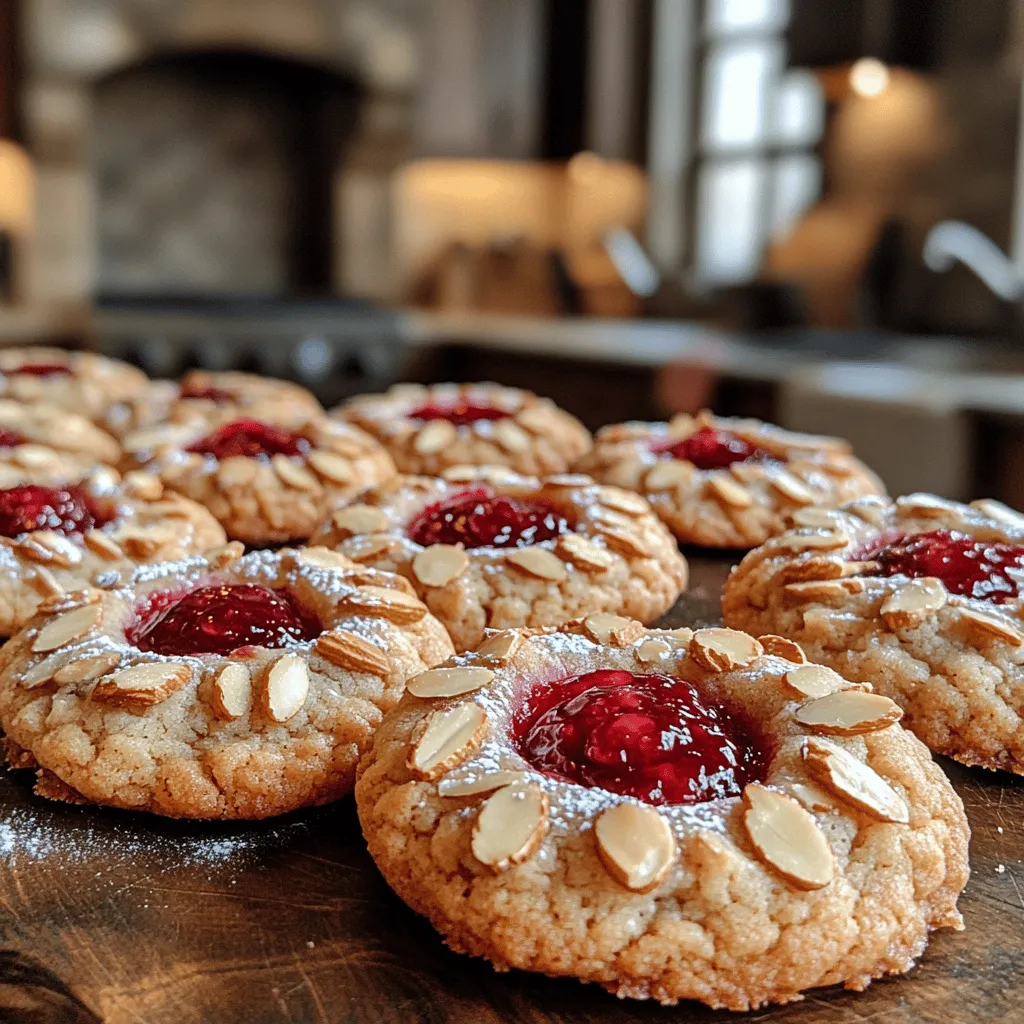
If you’re a fan of cookies, thumbprint cookies likely hold a special place in your heart. These delightful treats, characterized by their signature dimple filled with jam, are perfect for any occasion. Their unique shape and customizable nature make them a staple in many households, especially during the holidays. Among the myriad of flavor combinations, the pairing of raspberry and almond stands out, offering a harmonious blend of sweet and nutty that’s simply irresistible.
Raspberry almond thumbprint cookies are not just a delicious dessert; they represent the essence of homemade baking. The warmth and nostalgia evoked by freshly baked cookies can bring comfort to any gathering, whether it’s a festive celebration or a simple afternoon tea. The act of baking these cookies becomes an experience in itself, filling your kitchen with enticing aromas that beckon friends and family to gather round.
The Allure of Thumbprint Cookies
Thumbprint cookies boast a rich history, believed to have originated in the early 19th century in Sweden. They were often called “hallongrotta,” which translates to “raspberry cave,” and have since become a beloved treat worldwide. As they evolved, bakers began experimenting with various fillings and nut combinations, leading to a plethora of delicious variations. From classic raspberry and almond to chocolate and hazelnut, the possibilities are virtually endless.
What makes thumbprint cookies particularly appealing to both bakers and cookie enthusiasts is their versatility. They can be made with different types of jams, such as apricot, strawberry, or even citrus preserves, allowing for a personalized touch. Additionally, the use of various nuts—such as walnuts, pecans, or hazelnuts—adds another layer of flavor and texture, making each batch unique. Whether you’re baking for a special occasion or simply indulging in a sweet treat, thumbprint cookies are sure to delight.
Ingredients Breakdown
Creating the perfect raspberry almond thumbprint cookies requires a careful selection of ingredients. Each component serves a specific purpose, contributing to the overall flavor and texture of the cookies. Here’s a detailed breakdown of the essential ingredients you’ll need:
Unsalted Butter
Butter is the foundation of any great cookie, providing richness and flavor. Using unsalted butter allows you to control the amount of salt in the recipe, ensuring a balanced taste. The butter should be softened to room temperature, which helps create a light and tender cookie when creamed with sugars.
Granulated and Brown Sugar
Both granulated and brown sugar play crucial roles in this cookie recipe. Granulated sugar contributes to the sweetness and provides a crisp texture, while brown sugar adds moisture and a slight chewiness due to its molasses content. This combination results in a cookie that is both tender and flavorful, with a delightful contrast in texture.
Egg
The egg acts as a binding agent in the dough, helping to hold the ingredients together while providing structure. It also contributes to the cookie’s tenderness. For best results, use a large egg at room temperature, as this helps create a uniform dough that bakes evenly.
Vanilla and Almond Extracts
The inclusion of both vanilla and almond extracts elevates the flavor of the cookies, complementing the raspberry jam beautifully. Vanilla adds warmth and sweetness, while almond extract intensifies the nutty notes, creating a more complex flavor profile that is simply divine.
All-Purpose Flour
All-purpose flour serves as the backbone of the cookie dough. It provides the necessary structure and stability while allowing the cookies to rise and hold their shape. Be sure to measure the flour accurately—using the spoon-and-level method or a kitchen scale—to avoid dense cookies.
Salt
While it may seem counterintuitive to add salt to a sweet recipe, it plays a vital role in enhancing flavors. Salt balances the sweetness of the sugars and highlights the other flavors in the cookies, making them more enjoyable overall.
Sliced Almonds
For a delightful crunch and nutty flavor, sliced almonds are incorporated into the cookie dough. They not only add texture but also complement the almond extract, reinforcing the overall theme of the cookie. You can either toast the almonds for added flavor or use them raw, depending on your preference.
Raspberry Jam
The star of the show, raspberry jam, is what gives these cookies their signature thumbprint. When choosing a jam, opt for a high-quality brand with real fruit for the best flavor. The tartness of the raspberries contrasts beautifully with the sweetness of the cookie, creating a balanced bite that is both refreshing and satisfying.
Optional Powdered Sugar
For those who enjoy a touch of sweetness and aesthetic appeal, a dusting of powdered sugar can be added before serving. This optional ingredient enhances the cookie’s presentation, making them look even more inviting.
Step-by-Step Instructions
Now that you have all your ingredients ready, it’s time to dive into the baking process! Follow these detailed steps to create your sweet bliss raspberry almond thumbprint cookies:
1. Preheat Your Oven: Start by preheating your oven to 350°F (175°C). This ensures that your cookies bake evenly and achieve that perfect golden-brown color.
2. Prepare Your Baking Sheet: Line a baking sheet with parchment paper or a silicone baking mat. This will prevent the cookies from sticking and make for easy cleanup.
3. Cream the Butter and Sugars: In a large mixing bowl, combine the softened unsalted butter, granulated sugar, and brown sugar. Using an electric mixer, beat the mixture on medium speed until it is light and fluffy, which should take about 2-3 minutes. This step is crucial for incorporating air into the dough, resulting in a tender cookie.
4. Add the Egg and Extracts: Once the butter and sugars are well combined, add the egg, vanilla extract, and almond extract to the bowl. Continue mixing until everything is thoroughly combined.
5. Combine the Dry Ingredients: In a separate bowl, whisk together the all-purpose flour and salt. Gradually add the dry ingredients to the wet mixture, mixing on low speed until just combined. Be careful not to overmix, as this can lead to tough cookies.
6. Fold in the Sliced Almonds: Gently fold in the sliced almonds using a spatula or wooden spoon. This will ensure they are evenly distributed throughout the dough.
7. Form the Cookie Dough: Using a tablespoon or cookie scoop, portion out the dough and roll it into balls. Place the dough balls on the prepared baking sheet, spacing them about 2 inches apart.
8. Create the Thumbprint Indentations: Using your thumb or the back of a measuring spoon, gently press down in the center of each dough ball to create a small indentation. Be careful not to press all the way through; you want to create a well for the raspberry jam.
9. Fill with Raspberry Jam: Spoon a small amount of raspberry jam into each indentation, filling it just to the top without overflowing. This will allow the jam to bubble slightly while baking, creating a deliciously gooey center.
10. Bake the Cookies: Place the baking sheet in the preheated oven and bake for 12-15 minutes, or until the edges are lightly golden. Keep an eye on them to avoid overbaking.
As the cookies bake, the aroma of toasted almonds and sweet raspberries will fill your kitchen, setting the stage for a delightful treat. Once they’re out of the oven, let them cool on the baking sheet for a few minutes before transferring them to a wire rack to cool completely.
With these steps, you’re well on your way to creating a batch of sweet bliss raspberry almond thumbprint cookies that will impress family and friends alike. Stay tuned for more tips and tricks to ensure your cookies turn out perfectly every time!
Preheating the Oven: Importance of Temperature for Perfect Baking
Before diving into the delightful process of creating Sweet Bliss Raspberry Almond Thumbprint Cookies, it’s essential to preheat your oven properly. Preheating your oven to the correct temperature—typically 350°F (175°C) for cookies—is crucial for achieving that perfect texture. An oven that isn’t preheated can lead to uneven baking, resulting in cookies that are either too soft or overly browned. Always allow your oven to reach the desired temperature before placing your cookies in; this ensures that they start baking immediately and rise correctly.
Creaming Butter and Sugars: Techniques for Achieving the Right Consistency
The next step in our cookie creation involves creaming together the softened butter and sugars. This step may seem simple, but it’s vital for the texture and flavor of your cookies. Start by using room temperature butter, which should be soft enough to create a smooth mixture.
1. Using a Stand Mixer or Hand Mixer: A stand mixer with a paddle attachment or a handheld mixer will help you achieve a light and fluffy consistency. Beat the butter and sugars (both granulated and brown) together on medium speed until the mixture is light in color and fluffy—this usually takes about 3 to 5 minutes.
2. Scraping Down the Sides: Don’t forget to stop occasionally to scrape down the sides of the bowl to ensure all ingredients are incorporated evenly. This process helps create a uniform dough that will bake evenly.
Incorporating Egg and Extracts: Tips for Blending Wet Ingredients Effectively
Once your butter and sugars are creamed, it’s time to add in the egg and extracts. This step is crucial as it adds moisture and flavor to your cookies.
1. Add Ingredients One at a Time: Start by adding one egg, ensuring it is fully incorporated before adding the almond extract. If you’re using vanilla extract as well, add it in this step. Mixing one ingredient at a time prevents clumping and ensures an even distribution throughout the dough.
2. Mixing Technique: Beat the mixture on low speed until just combined. Overmixing can introduce too much air into the dough, leading to a less chewy texture.
Mixing Dry Ingredients: Best Practices for Combining Flour and Salt
Now that your wet ingredients are perfectly blended, it’s time to focus on the dry ingredients.
1. Sifting the Dry Ingredients: Sift together the all-purpose flour, baking powder, and salt in a separate bowl. Sifting can help remove any lumps and ensures that the baking powder is evenly distributed throughout the flour.
2. Gradual Incorporation: Gradually add the dry mixture to the wet ingredients, mixing on low speed. This helps prevent flour from flying everywhere and allows for a smoother integration. Mix until just combined; it’s important not to overwork the dough at this stage.
Forming the Cookies: Techniques for Uniformity and Shaping
With your dough ready, the next step involves shaping your cookies. Uniformity in size not only ensures even baking but also creates an appealing presentation.
1. Using a Cookie Scoop: A cookie scoop or tablespoon can help you measure out the dough evenly. This tool will allow you to create uniform balls that are approximately 1 inch in diameter.
2. Hand Rolling: If you don’t have a scoop, you can roll the dough into balls between your palms. Aim for a consistent size to avoid uneven baking.
Creating Thumbprints: The Art of Making the Perfect Indentation
Creating the signature thumbprint is where the fun begins.
1. Dough Handling: Gently press your thumb into the center of each cookie ball to create a well for the jam. Be careful not to press too hard, as you want to maintain the structure of the cookie while making a deep enough indentation to hold the filling.
2. Alternatives to Fingers: If you’re concerned about cleanliness or want a more uniform indentation, consider using a round handle of a wooden spoon or a measuring teaspoon to create the thumbprint shape.
Filling with Jam: How to Avoid Overflow and Achieve a Balanced Filling
Filling your thumbprints with raspberry jam is the highlight of this recipe, but it requires a bit of finesse.
1. Jam Selection: Choose a high-quality raspberry jam for the best flavor. You can also experiment with different types of fruit preserves if desired.
2. Filling Technique: Use a teaspoon to scoop a small amount of jam and carefully fill the indentation in each cookie. Aim to fill it just below the top rim to avoid overflow during baking.
Adding Almonds: Techniques for Even Distribution and Presentation
The final touch before baking is adding the almond pieces.
1. Pressing Almonds Gently: After filling each thumbprint with jam, gently press a few chopped almonds into the jam. This not only enhances the visual appeal but also adds a delightful crunch to each bite.
2. Even Distribution: Ensure that the almonds are evenly distributed across all cookies for consistent flavor and texture.
Baking Time and Techniques: What to Look for to Ensure Perfect Cookies
As you prepare to bake your cookies, keep an eye on the timing for optimal results.
1. Baking Time: Place your cookies in the preheated oven and bake for about 12 to 15 minutes, or until the edges are lightly golden. The centers will look soft but will firm up as they cool.
2. Cooling on a Wire Rack: Once baked, allow the cookies to sit on the baking sheet for 5 minutes before transferring them to a wire rack. This helps them maintain their shape and prevents them from breaking apart.
Cooling and Presentation: Importance of Cooling and Tips for Serving
Cooling your cookies properly is crucial for achieving the best texture.
1. Complete Cooling: Let the cookies cool completely on the wire rack. This will allow them to firm up and develop a delightful chewy texture.
2. Presentation Tips: For serving, consider arranging the cookies on a decorative platter or tiered cake stand. A simple dusting of powdered sugar on top can add an elegant touch.
The Science Behind Baking Cookies
Understanding the science behind cookie baking can improve your results significantly.
1. Ingredient Interaction: During baking, the flour and fat interact with sugar and eggs, creating structure and tenderness. The baking powder activates with moisture and heat, allowing the cookies to rise.
2. Role of Temperature and Timing: Temperature affects the spread of cookies; higher temperatures create thinner, crisper cookies, while lower temperatures yield thicker, softer cookies. Timing is also essential; cookies will continue to cook slightly after being removed from the oven due to residual heat.
Flavor Pairings and Serving Suggestions
To elevate your Sweet Bliss Raspberry Almond Thumbprint Cookies, consider these pairing suggestions.
1. Beverage Pairings: These cookies pair beautifully with a hot cup of coffee, a soothing herbal tea, or even a dessert wine. Each drink complements the sweet and nutty flavors of the cookies.
2. Creative Serving Ideas: Serve your cookies on a platter adorned with fresh raspberries and almonds for an inviting presentation. You can also incorporate them into dessert spreads alongside cakes, brownies, and fruit tarts for a delightful assortment.
3. Incorporating Cookies into Larger Dessert Spreads: If hosting a gathering, consider offering a cookie bar where guests can choose from various cookies, including your thumbprints, along with different jams, nuts, and toppings.
Conclusion
Baking Sweet Bliss Raspberry Almond Thumbprint Cookies is more than just a culinary task; it is an experience filled with joy and satisfaction. The process not only fills your home with delightful aromas but also creates delicious treats that can bring people together.
Experimenting with different jams and nuts can lead to a personalized touch that makes these cookies uniquely yours. Homemade treats like these are perfect for celebrations, gatherings, or simply as a sweet indulgence at home. Remember, the best memories are often made around the kitchen, so get baking and enjoy the sweet bliss that these cookies bring!