Deliciously Decadent Frozen Yogurt Peanut Butter Cups

WANT TO SAVE THIS RECIPE?

Introduction

When it comes to satisfying your sweet tooth while maintaining a health-conscious approach, Frozen Yogurt Peanut Butter Cups emerge as an extraordinary choice. These delightful treats combine the rich creaminess of Greek yogurt with the nutty flavor of peanut butter, creating a dessert that is not only indulgent but also packed with nutritional benefits. This recipe is perfect for anyone looking to enjoy a sweet fix without veering off their healthy eating path.

The allure of these frozen yogurt cups lies in their simplicity and versatility. Whether you’re hosting a summer gathering, prepping for a movie night, or simply want a nutritious snack to keep on hand, these frozen treats are easy to whip up and can be customized to suit various tastes. From children to adults, everyone will appreciate the deliciousness of these peanut butter cups, making them a go-to dessert for any occasion.

Understanding the Ingredients

To create the perfect Frozen Yogurt Peanut Butter Cups, it’s essential to understand the ingredients that contribute to their flavor and health benefits. Each component plays a crucial role in crafting this delightful dessert.

Health Benefits of Greek Yogurt

Greek yogurt is the star ingredient in this recipe, known for its thick and creamy texture. It offers an array of health benefits that make it an excellent choice for desserts. Packed with protein, Greek yogurt can help keep you feeling full longer, making it a smart option for those watching their weight. It also contains probiotics, which promote gut health and contribute to overall well-being. Additionally, Greek yogurt is lower in sugar compared to traditional yogurts, making it a healthier alternative without compromising on taste.

Nutritional Value of Peanut Butter

Peanut butter is another key ingredient that not only adds creaminess but also acts as a rich source of protein. This nutty spread is loaded with healthy fats, particularly monounsaturated fats, which are beneficial for heart health. It also provides essential vitamins and minerals, such as vitamin E, magnesium, and potassium. When consumed in moderation, peanut butter can enhance satiety and provide a quick energy boost, making it an ideal addition to your frozen yogurt cups. However, it’s important to choose natural peanut butter with minimal added ingredients to maximize its health benefits.

Sweetening Options: Honey vs. Maple Syrup

When it comes to sweetening your Frozen Yogurt Peanut Butter Cups, both honey and maple syrup are popular choices. Honey is a natural sweetener with antimicrobial properties, which can offer health benefits beyond just sweetness. It’s a great option for those looking for a natural sugar alternative, but keep in mind that it may not be suitable for vegans. On the other hand, maple syrup provides a unique flavor profile and is also packed with antioxidants. It’s a fantastic choice for those who prefer a vegan option. Depending on your taste preferences and dietary needs, you can choose one over the other or even experiment with both to find your ideal sweetness level.

The Importance of Vanilla Extract and Salt

Vanilla extract is a crucial addition to the yogurt base, as it enhances the overall flavor and makes the dessert more aromatic. A splash of vanilla can elevate the taste profile, making your Frozen Yogurt Peanut Butter Cups feel even more indulgent. On the other hand, a pinch of salt plays a vital role in balancing flavors. Salt can enhance the sweetness of the yogurt and peanut butter, creating a more harmonious blend of tastes. Together, these two ingredients can significantly elevate your dessert experience.

Optional Ingredient Spotlight: Dark Chocolate Chips

For those looking to take their Frozen Yogurt Peanut Butter Cups to the next level, consider adding dark chocolate chips. Not only do they provide a delightful crunch and rich flavor, but dark chocolate is also known for its health benefits, including antioxidants and heart-healthy properties. Choosing dark chocolate with at least 70% cocoa can ensure that you’re indulging in a treat that offers both taste and health benefits. The combination of creamy yogurt, nutty peanut butter, and rich chocolate is simply irresistible.

Preparation Process

Now that we’ve explored the fantastic ingredients that come together to create these frozen delights, let’s dive into the preparation process. Making Frozen Yogurt Peanut Butter Cups is straightforward and requires minimal effort, making them an accessible treat for anyone.

Preparing the Molds for the Cups

The first step in your culinary journey is to prepare the molds for your peanut butter cups. Silicone molds work best for this type of recipe, as they allow for easy removal once the cups are frozen. If you don’t have silicone molds, paper cupcake liners can also do the trick, but be sure to grease them lightly to facilitate easy removal. Place your molds on a baking tray to catch any drips and make them easier to handle.

Step-by-Step Breakdown of Mixing the Yogurt Base

Once your molds are ready, it’s time to prepare the yogurt base. In a mixing bowl, add your Greek yogurt, chosen sweetener (honey or maple syrup), vanilla extract, and a pinch of salt. Using a spatula or a whisk, gently mix the ingredients until they are well combined. The goal is to achieve a smooth and creamy consistency; if the mixture seems too thick, you can add a splash of milk (dairy or non-dairy) to loosen it up.

Warming Peanut Butter for Ease of Mixing

Next, we’ll prepare the peanut butter layer. To make it easier to mix, gently warm the peanut butter in the microwave for about 15-20 seconds. This softening will allow you to combine it seamlessly with the yogurt mixture. Just be careful not to overheat it, as you want it to be pourable but not hot. Once warmed, stir the peanut butter with a spoon or spatula until it reaches a smooth consistency.

Importance of Layering for Presentation and Taste

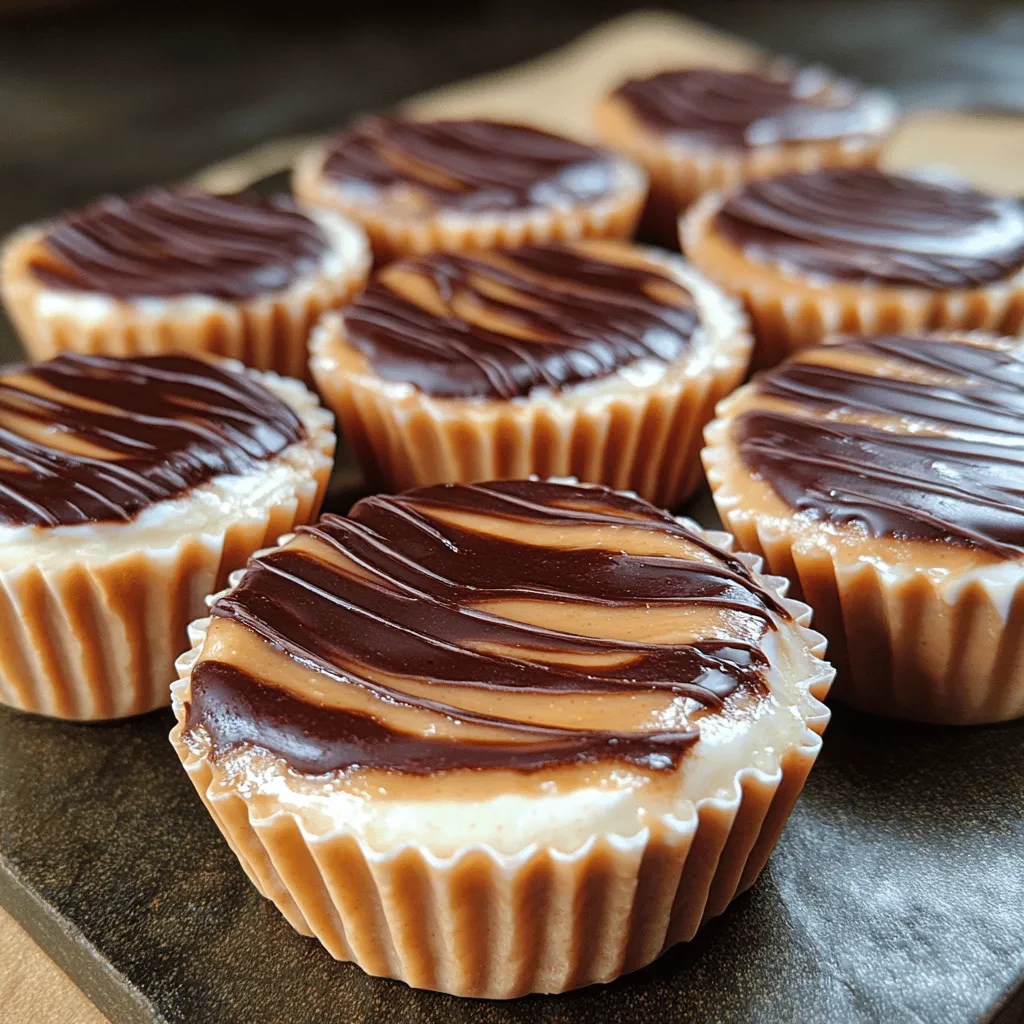
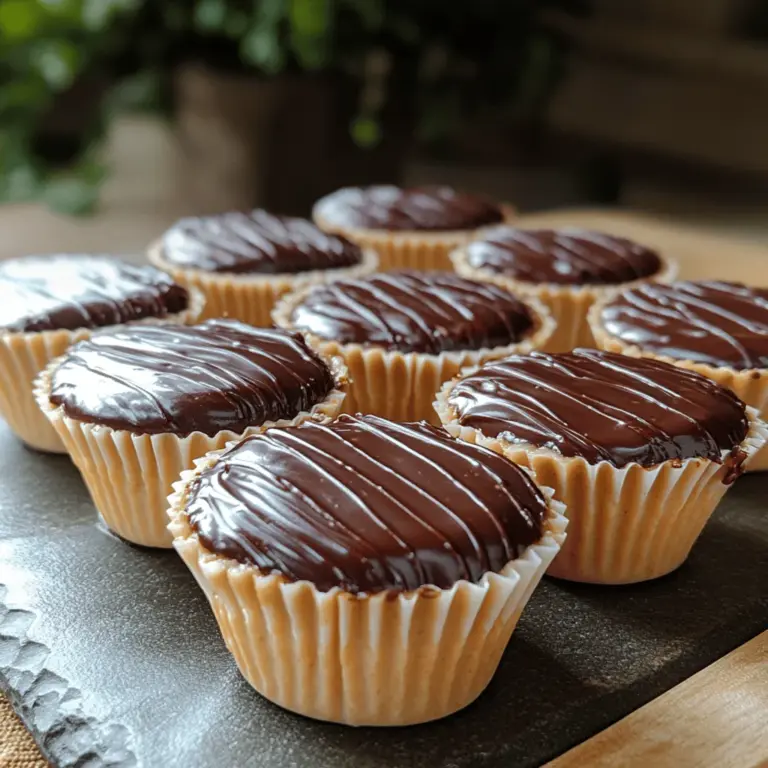
Now comes the fun part—layering your Frozen Yogurt Peanut Butter Cups! Start by spooning a layer of the yogurt mixture into the bottom of each mold, filling them about halfway. Next, add a layer of the warmed peanut butter on top of the yogurt, smoothing it out to create an even layer. Finally, spoon the remaining yogurt mixture over the peanut butter layer, filling the molds to the top. This layering technique not only enhances the visual appeal of your cups but also ensures that each bite offers a delightful combination of flavors.

With these steps, you are well on your way to creating delicious Frozen Yogurt Peanut Butter Cups that will impress your family and friends. The combination of creamy yogurt and rich peanut butter, along with a hint of sweetness, makes for a delectable dessert that feels indulgent while still being a healthier choice. Stay tuned for the next part of our recipe, where we will discuss the finishing touches and how to serve these delightful treats!

When it comes to satisfying your sweet tooth while maintaining a health-conscious approach, <strong>Frozen Yogurt Peanut Butter Cups</strong> emerge as an extraordinary choice. These delightful treats combine the rich creaminess of Greek yogurt with the nutty flavor of peanut butter, creating a dessert that is not only indulgent but also packed with nutritional benefits. This recipe is perfect for anyone looking to enjoy a sweet fix without veering off their healthy eating path.” /></p>
</p>
<h3>Tips for Achieving the Ideal Marbled Effect with the Peanut Butter Mixture</h3>
</p>
<p>To create a visually appealing marbled effect in your Frozen Yogurt Peanut Butter Cups, the key lies in the technique used for combining the yogurt and peanut butter. Here are some tips to help you achieve that perfect swirl:</p>
</p>
<p>1. <strong>Temperature Control</strong>: Ensure that both the yogurt and peanut butter are at similar temperatures. If either is too cold or too warm, they may not blend smoothly. You can either slightly warm the peanut butter in the microwave (10-15 seconds) or let it sit at room temperature for a while.</p>
</p>
<p>2. <strong>Layering Technique</strong>: Start by spooning a layer of yogurt into the bottom of each mold. Then add a dollop of peanut butter on top. Use a toothpick or a skewer to gently swirl the peanut butter into the yogurt. Be careful not to over-mix; you want distinct swirls rather than a fully blended mixture.</p>
</p>
<p>3. <strong>Consistency Matters</strong>: For a better marbled effect, consider using a creamy peanut butter rather than a chunky variety. This ensures that the peanut butter integrates well without breaking the yogurt’s texture.</p>
</p>
<h3>Step-by-Step Instructions for Filling the Molds Properly</h3>
</p>
<p>Properly filling the molds is crucial to prevent air pockets, which can lead to uneven textures and a less enjoyable eating experience. Follow these steps for optimal results:</p>
</p>
<p>1. <strong>Prepare Your Molds</strong>: If using silicone molds, they typically do not require greasing. For paper liners, ensure they are well-fitted in the mold cavities.</p>
</p>
<p>2. <strong>Spoon in the Yogurt</strong>: Using a tablespoon, fill each mold about one-third full with the yogurt mixture. Be careful not to overfill; you’ll need room for the peanut butter.</p>
</p>
<p>3. <strong>Add Peanut Butter</strong>: Take a small spoonful of the prepared peanut butter mixture and drop it into the center of each yogurt-filled mold.</p>
</p>
<p>4. <strong>Swirl the Mixtures</strong>: Using a toothpick or skewer, gently swirl the peanut butter into the yogurt, creating a marbled appearance. Make sure to go deep enough to blend the layers slightly, but avoid stirring too much.</p>
</p>
<p>5. <strong>Top with Yogurt</strong>: After swirling, add more yogurt to fill the molds until they’re nearly full. Leave a small space at the top to avoid overflow during freezing.</p>
</p>
<p>6. <strong>Smooth the Top</strong>: Use the back of a spoon to smooth the tops of each cup. This will help create an even surface for the chocolate drizzle if you choose to add it later.</p>
</p>
<h3>Optional Chocolate Drizzle: Flavor Enhancement and Presentation</h3>
</p>
<p>While the peanut butter cups are delicious on their own, a chocolate drizzle can elevate both the flavor and presentation. Here’s how to do it:</p>
</p>
<p>1. <strong>Melt the Chocolate</strong>: Use dark, milk, or white chocolate based on your preference. Melt the chocolate in a microwave-safe bowl in 20-30 second intervals, stirring in between, until smooth.</p>
</p>
<p>2. <strong>Drizzle Technique</strong>: Once the cups are frozen solid, remove them from the molds. Using a fork or a piping bag, drizzle the melted chocolate over the tops of the cups. The aim is to create a decorative pattern that enhances visual appeal.</p>
</p>
<p>3. <strong>Set the Chocolate</strong>: Place the cups back in the freezer for a few minutes to allow the chocolate to set.</p>
</p>
<h3>Freezing and Serving</h3>
</p>
<p>Freezing your Frozen Yogurt Peanut Butter Cups properly is essential for achieving the desired texture. Here are some tips:</p>
</p>
<p>1. <strong>Proper Freezing Time</strong>: Freeze the cups for at least 4-6 hours or until they are completely solid. If you can, leave them in the freezer overnight to ensure they are thoroughly frozen.</p>
</p>
<p>2. <strong>Removing from Molds</strong>: To safely remove the cups, gently press the bottom of the silicone mold. If using paper liners, you can simply peel them away from the sides. If you encounter resistance, let them sit at room temperature for a few minutes.</p>
</p>
<p>3. <strong>Storage Suggestions</strong>: To keep your cups fresh, store them in an airtight container in the freezer. Layer parchment paper between each cup to prevent them from sticking together. They can be kept frozen for up to two months.</p>
</p>
<h3>Nutrition Breakdown</h3>
</p>
<p>Understanding the nutritional value of your treats can help you make informed decisions. Here’s a breakdown per serving (assuming 12 cups):</p>
</p>
<p>– <strong>Calories</strong>: Approximately 120</p>
<p>– <strong>Protein</strong>: 5g</p>
<p>– <strong>Fats</strong>: 8g (mainly from peanut butter)</p>
<p>– <strong>Sugars</strong>: 6g (natural sugars from yogurt)</p>
</p>
<p>When compared to traditional desserts like chocolate peanut butter cups or ice cream, these homemade treats provide a healthier alternative. Traditional desserts can often contain upwards of 200-300 calories per serving with higher sugar and fat contents. By making your own, you control the ingredients, reducing added sugars and unhealthy fats.</p>
</p>
<h3>Creative Variations and Customizations</h3>
</p>
<p>The beauty of Frozen Yogurt Peanut Butter Cups lies in their versatility. Here are some creative variations to inspire your next batch:</p>
</p>
<p>1. <strong>Ingredient Swaps</strong>: Experiment with flavored yogurts such as vanilla, strawberry, or even coconut. You can also try different nut butters like almond or cashew for a unique twist.</p>
</p>
<p>2. <strong>Add Toppings</strong>: Before freezing, sprinkle toppings such as crushed nuts, granola, or fresh fruit into the mixture for added texture and flavor. These not only enhance taste but also boost nutritional value.</p>
</p>
<p>3. <strong>Seasonal Variations</strong>: Incorporate seasonal flavors by adding cinnamon or nutmeg for fall, peppermint extract for winter, or fresh berries in the summer. Each season can inspire a new take on this delightful treat.</p>
</p>
<h3>Conclusion</h3>
</p>
<p>Making Frozen Yogurt Peanut Butter Cups at home is not just a fun culinary project; it’s a rewarding way to enjoy a healthy snack or dessert. With their creamy texture, rich peanut butter flavor, and the ability to customize, these cups can easily become a staple in your kitchen.</p>
</p>
<p>Their versatility allows for endless experimentation, whether you’re accommodating dietary preferences or simply exploring new flavor profiles. We encourage you to try this recipe, make it your own, and share your creations with friends and family. There’s no better way to indulge in a treat that satisfies both your sweet tooth and your health goals than with these delicious frozen yogurt cups. Enjoy your culinary adventure!</p>
</div>

When it comes to satisfying your sweet tooth while maintaining a health-conscious approach, Frozen Yogurt Peanut Butter Cups emerge as an extraordinary choice. These delightful treats combine the rich creaminess of Greek yogurt with the nutty flavor of peanut butter, creating a dessert that is not only indulgent but also packed with nutritional benefits. This recipe is perfect for anyone looking to enjoy a sweet fix without veering off their healthy eating path.

Frozen Yogurt Peanut Butter Cups

Looking for a healthier dessert option that still satisfies your sweet cravings? Try these Deliciously Decadent Frozen Yogurt Peanut Butter Cups! Combining the creamy goodness of Greek yogurt with the nutty richness of peanut butter, these treats are both indulgent and nutritious. Easy to make and customizable, they are perfect for any occasion. Plus, with options for natural sweeteners and delicious toppings, you can create a delightful dessert that everyone will love!

Ingredients
  

1 cup Greek yogurt (plain or vanilla)

1/2 cup creamy peanut butter

1/4 cup honey or maple syrup (adjust to taste)

1/2 teaspoon vanilla extract

1/4 teaspoon salt

1/2 cup dark chocolate chips (optional for topping)

Mini muffin liners or silicone molds

Instructions
 

Prepare the Molds: Line a mini muffin tin with mini liners or if using silicone molds, place them on a tray for easy handling.

    Mix the Yogurt Base: In a mixing bowl, combine the Greek yogurt, honey (or maple syrup), vanilla extract, and salt. Stir well until the mixture is smooth and creamy.

      Peanut Butter Swirl: In a separate bowl, warm the peanut butter slightly in the microwave (about 10-15 seconds) to make it easier to work with. Add 2 tablespoons of the yogurt mixture to the peanut butter and stir until combined.

        Fill the Molds: Spoon about 2 tablespoons of the yogurt mixture into each of the prepared muffin liners or molds. Use the back of a spoon to spread it smoothly across the bottom.

          Add the Peanut Butter Layer: Next, add a teaspoon of the peanut butter mixture on top of the yogurt layer in each cup, allowing it to swirl into the yogurt slightly for a marbled effect.

            Finish with More Yogurt: Top each cup with another tablespoon of the yogurt mixture, fully covering the peanut butter layer. Tap the tray gently on the counter to help remove any air bubbles.

              Melt Chocolate (Optional): If using chocolate chips, melt them in the microwave in 30-second increments, stirring in between until smooth. Drizzle the melted chocolate over each cup, if desired.

                Freeze: Carefully place the tray in the freezer and let the cups freeze for at least 4 hours, or until completely solid.

                  Remove and Serve: Once frozen, pop the cups out of the liners or molds. Enjoy immediately, or store in an airtight container in the freezer for up to a month.

                    Prep Time: 20 minutes | Total Time: 4 hours 20 minutes | Servings: 12 cups

                      WANT TO SAVE THIS RECIPE?

                      Leave a Comment

                      Recipe Rating