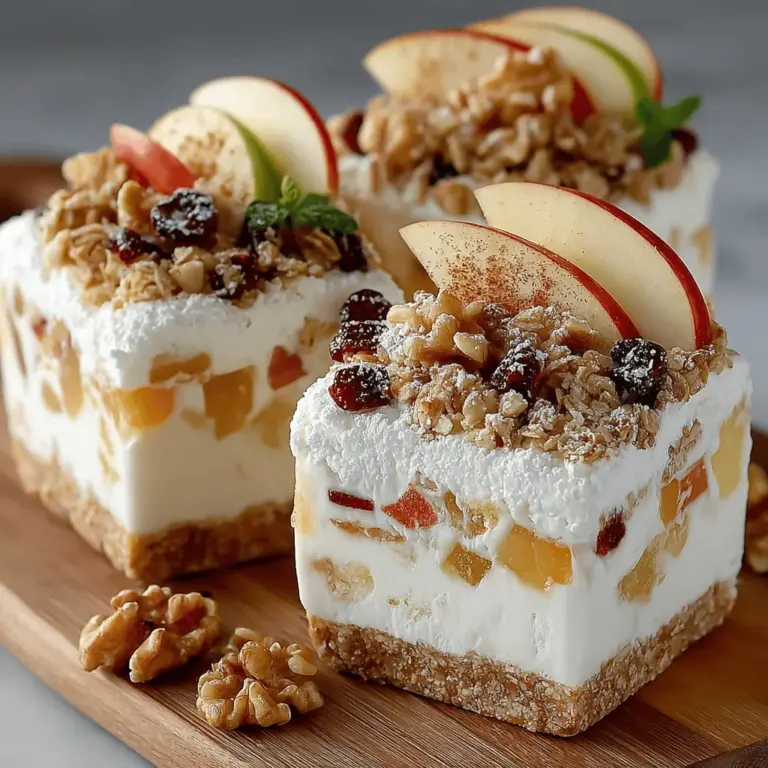
Crunchy Apple Bliss Frozen Yogurt Bars: A Refreshing Treat for Any Occasion
In the world of frozen desserts, frozen yogurt bars have emerged as a popular choice for those seeking a delicious yet healthier alternative to traditional ice cream. These delightful treats combine the creamy goodness of yogurt with a variety of flavors and textures, making them a versatile snack that can be enjoyed any time of the year. Among the myriad of options available, the Crunchy Apple Bliss Frozen Yogurt Bars stand out for their refreshing taste and wholesome ingredients, making them the perfect indulgence for summer or a nutritious snack for any day.
The Crunchy Apple Bliss Frozen Yogurt Bars are not only a delightful way to cool off but also a smart choice for health-conscious individuals. Packed with protein from Greek yogurt, natural sweetness from apples and honey or maple syrup, and a satisfying crunch from granola and nuts, these bars provide a balanced mix of nutrients. Whether you’re looking for a post-workout snack, a mid-afternoon pick-me-up, or a dessert that won’t derail your healthy eating goals, this recipe appeals to a wide audience. Best of all, it’s incredibly easy to prepare, allowing you to whip up a batch in no time.
Understanding the Ingredients
To create the Crunchy Apple Bliss Frozen Yogurt Bars, it’s essential to understand the role each ingredient plays in achieving the perfect balance of flavor and texture. Let’s delve into the key components:
Greek Yogurt: The Creamy Base
At the heart of this recipe is Greek yogurt, which serves as the base ingredient. Greek yogurt is a fantastic source of protein, probiotics, and calcium, making it a nutritious choice for those looking to maintain a healthy diet. Its thick and creamy texture not only provides a satisfying mouthfeel but also helps bind the ingredients together, ensuring that each bite is packed with flavor. When selecting Greek yogurt, opt for plain varieties to avoid added sugars, allowing you to control the sweetness of your frozen yogurt bars.
Sweeteners: Honey vs. Maple Syrup
To enhance the natural sweetness of the yogurt and apples, this recipe calls for a sweetener. Both honey and maple syrup are excellent options, but they each bring unique flavors and benefits. Honey is a natural sweetener that provides a distinct floral taste and has antibacterial properties. On the other hand, maple syrup offers a rich, caramel-like flavor and contains essential minerals such as manganese and zinc. Depending on your personal preference or dietary restrictions, you can choose the sweetener that best suits your needs, or even experiment with a combination of both for a more complex flavor profile.
Apples: A Crunchy Addition
Apples are not only a primary ingredient in this recipe but also add a refreshing crunch and natural sweetness. When selecting apples, consider using varieties such as Honeycrisp, Fuji, or Granny Smith, as these types provide a perfect balance of sweetness and tartness. The nutritional benefits of apples are substantial; they are rich in dietary fiber, vitamin C, and various antioxidants, all of which contribute to a healthy diet. Dice the apples into small pieces to ensure even distribution throughout the yogurt mixture, ensuring that every bar delivers a delightful burst of flavor.
Granola: The Perfect Crunch
Granola is a crucial element of the Crunchy Apple Bliss Frozen Yogurt Bars, providing a satisfying crunch that contrasts beautifully with the creamy yogurt and tender apples. The choice of granola can elevate the overall experience; look for varieties that are low in added sugars and high in whole grains. Alternatively, you can make your own granola at home, allowing you to customize flavors and ingredients to your liking. For those with dietary restrictions, gluten-free granola is widely available and can be used without compromising texture or taste.
Nuts: Optional Crunch
While nuts are an optional ingredient in this recipe, they can add an extra layer of flavor and nutrition. Walnuts and pecans are both excellent choices, offering healthy fats, protein, and essential vitamins and minerals. Walnuts have a slightly bitter flavor and are rich in omega-3 fatty acids, while pecans provide a sweeter taste and are high in antioxidants. If you prefer a nut-free option, consider substituting with seeds like sunflower or pumpkin seeds, which will still provide a satisfying crunch without the allergens.
Step-by-Step Recipe Instructions
Now that we have a solid understanding of the ingredients, it’s time to dive into the step-by-step instructions for making Crunchy Apple Bliss Frozen Yogurt Bars. Follow these detailed steps to ensure a successful and delicious outcome.
Step 1: Prepare the Baking Dish
Begin by preparing your baking dish, which will serve as the mold for your frozen yogurt bars. Line an 8×8-inch or a similar-sized baking dish with parchment paper, allowing some overhang on the sides. This will make it easier to remove the bars once they are frozen, ensuring a clean and hassle-free presentation. The parchment paper creates a non-stick surface, preventing the yogurt from adhering to the dish.
Step 2: Mix the Yogurt Base
In a large mixing bowl, combine the Greek yogurt with your chosen sweetener. For a smooth consistency, use a whisk or spatula to mix thoroughly until the sweetener is completely incorporated. If desired, you can add a splash of vanilla extract to enhance the flavor profile. Achieving a smooth and creamy texture is crucial, as it will affect the overall mouthfeel of the finished bars.
Step 3: Add the Apples
Once the yogurt base is well-mixed, it’s time to fold in the diced apples. Gently stir the apple pieces into the yogurt mixture, ensuring they are evenly distributed. This step is vital for achieving a consistent flavor throughout the bars, so take your time to ensure that each spoonful contains a delightful combination of yogurt and apples.
Step 4: Layering the Dish
Pour the yogurt-apple mixture into the prepared baking dish, using a spatula to spread it evenly across the bottom. Aim for a uniform layer to ensure that the bars freeze evenly. If desired, you can create a marbled effect by swirling the mixture with a spoon, but be careful not to over-mix, as you want to keep the chunks of apple intact.
Step 5: Topping with Granola and Nuts
Before placing the dish in the freezer, it’s time to add the final touches. Sprinkle your chosen granola and nuts evenly over the top of the yogurt mixture. To ensure the toppings adhere well, gently press them down into the yogurt using the back of a spoon. This will help them stay in place once the bars are frozen, providing that desired crunch with each bite.
Step 6: Freezing Process
Finally, place the baking dish in the freezer and allow the mixture to freeze for at least 4-6 hours, or until completely solid. The key to achieving the perfect texture is to ensure that the bars freeze thoroughly. If possible, let them freeze overnight for best results. Once fully frozen, remove the dish from the freezer and lift the bars out using the parchment paper overhang.
With these initial steps complete, you will have laid the foundation for the delightful Crunchy Apple Bliss Frozen Yogurt Bars. The combination of refreshing flavors, creamy texture, and crunchy toppings makes for a treat that is sure to please both kids and adults alike. As you prepare to cut the bars into perfect squares, anticipate the deliciousness that awaits, knowing you’ve created a snack that is not only tasty but also nutritious.
Serving Suggestions: Creative Ways to Present the Bars
When it comes to serving your Crunchy Apple Bliss Frozen Yogurt Bars, presentation is key to enhancing the overall experience. Here are some creative ideas to elevate your serving game:
1. Layered Desserts: Create a visually appealing layered dessert by cutting the yogurt bars into smaller pieces and alternating layers with fresh fruit or granola in a clear glass. This not only looks beautiful but also adds extra textures and flavors.
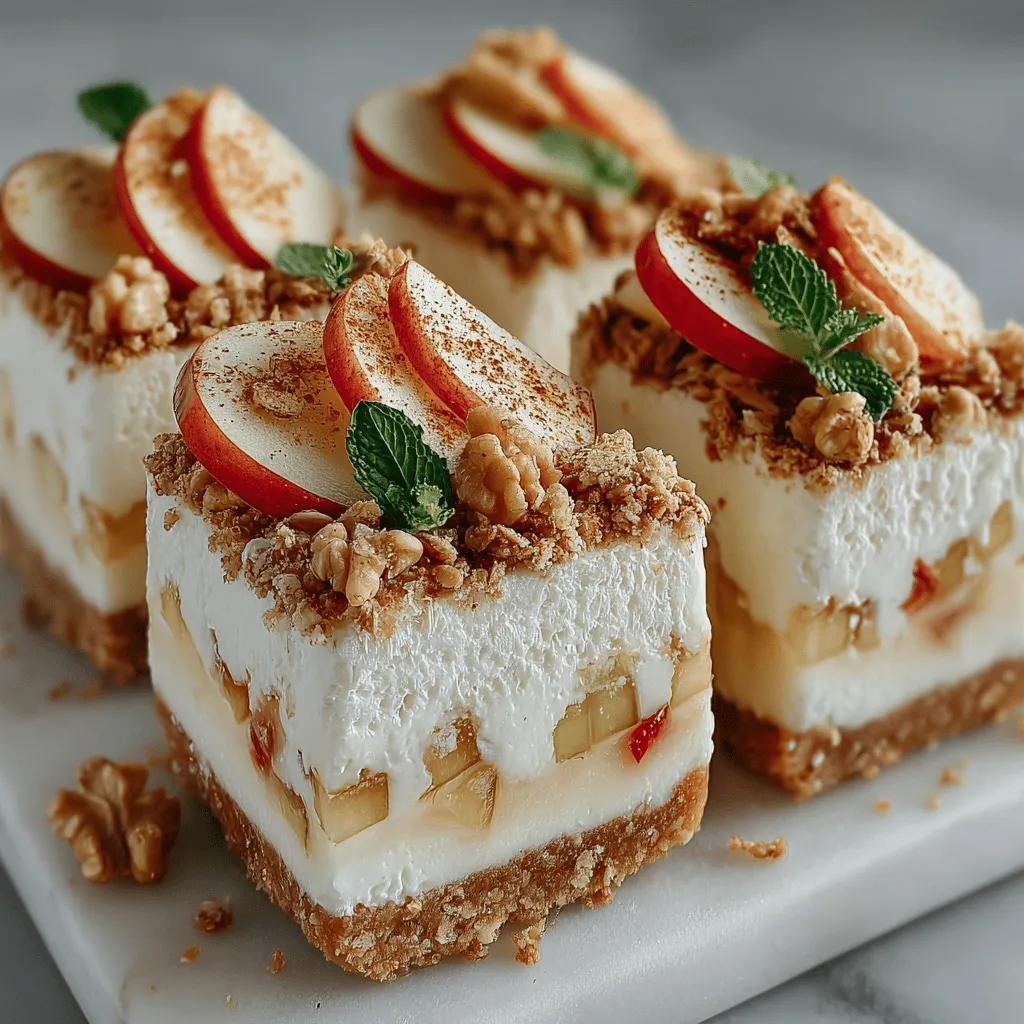
2. Fruit Garnish: Serve the bars on a colorful platter, garnished with slices of fresh apples, berries, or mint leaves. This adds a splash of color and freshness that complements the flavors of the bars.
3. Chocolate Drizzle: For a decadent twist, drizzle melted dark chocolate over the frozen yogurt bars just before serving. This pairs wonderfully with the apple and adds an indulgent touch.
4. Yogurt Dipping Sauce: Create a yogurt dipping sauce by mixing Greek yogurt with a bit of honey and cinnamon. Serve the bars with this sauce on the side for a delightful dipping experience.
5. Ice Cream Cone Presentation: For a fun twist, cut the bars into triangles and serve them in ice cream cones. This makes for an easy-to-hold treat that kids and adults alike will enjoy.
Nutritional Benefits of Frozen Yogurt Bars
Homemade Crunchy Apple Bliss Frozen Yogurt Bars are not only a delicious treat but also packed with nutritional benefits that make them a smart choice for health-conscious individuals.
Analysis of the Health Benefits of Main Ingredients
1. Protein Content from Greek Yogurt: Greek yogurt is a fantastic source of protein, which helps to keep you feeling full and satisfied. A single serving can provide around 15 grams of protein, making these bars a perfect post-workout snack.
2. Antioxidants and Vitamins from Apples: Apples are rich in essential vitamins such as vitamin C, which boosts the immune system. They also contain antioxidants that help combat oxidative stress in the body, promoting overall health.
3. Healthy Fats from Nuts: If you choose to add nuts, such as walnuts or almonds, you’re incorporating healthy fats that are beneficial for heart health. Nuts are also a good source of magnesium, vitamin E, and fiber.
4. Fiber from Granola: The granola used in these bars provides dietary fiber, which is essential for digestive health. Fiber helps regulate blood sugar levels and keeps you feeling full longer, making it a vital part of a balanced diet.
Comparison to Store-Bought Frozen Treats: Why Homemade is Healthier
Store-bought frozen treats often contain added sugars, preservatives, and unhealthy fats that can detract from their nutritional value. By making your own Crunchy Apple Bliss Frozen Yogurt Bars, you have full control over the ingredients, allowing you to create a healthier alternative. Not only can you limit the sugar content, but you can also avoid artificial additives, making your homemade bars a wholesome choice.
Flavor Variations and Customization
One of the most enjoyable aspects of making your own frozen yogurt bars is the ability to customize the flavors to suit your preferences. Here are some suggestions for alternative flavors and mix-ins:
1. Other Fruits: While apples are the star of this recipe, feel free to experiment with other fruits. Berries, such as strawberries or blueberries, add a burst of flavor and color. Peaches and bananas also pair beautifully with yogurt for a refreshing taste.
2. Different Spices: Don’t hesitate to explore different spices to enhance the flavor profile. A dash of nutmeg or ginger can add warmth and depth to the bars, making them even more delightful.
3. Vegan Options: For a vegan alternative, substitute Greek yogurt with a plant-based yogurt made from coconut, almond, or soy. You can also use maple syrup or agave nectar as a sweetener to keep it vegan-friendly.
4. Nut Butters: Adding a swirl of almond or peanut butter to the yogurt mixture can introduce a creamy texture and rich flavor, making the bars even more satisfying.
5. Chocolate Chips or Shredded Coconut: For those who enjoy a bit of indulgence, adding chocolate chips or shredded coconut can enhance the bars’ taste and texture, providing a delightful surprise in every bite.
Storing and Serving Ideas
To ensure your Crunchy Apple Bliss Frozen Yogurt Bars remain fresh and delicious, here are some best practices for storing leftovers:
1. Proper Storage: Store the bars in an airtight container in the freezer to prevent freezer burn. Wrapping each bar individually in plastic wrap before placing them in the container can also help maintain freshness.
2. Best Consumption Timeline: These yogurt bars can be enjoyed for up to two weeks when properly stored. However, for the best taste and texture, it’s recommended to consume them within the first week.
Creative Serving Ideas for Gatherings or Parties
When hosting a gathering or party, these frozen yogurt bars can be a hit. Consider setting up a DIY yogurt bar where guests can create their own combinations. Provide a selection of toppings like fresh fruit, granola, nuts, and drizzles like honey or chocolate syrup for a fun and interactive dessert experience.
Pairing Suggestions
For a well-rounded snack or dessert, consider pairing your Crunchy Apple Bliss Frozen Yogurt Bars with a refreshing fruit salad or a smoothie. A berry smoothie blended with spinach and a banana can complement the flavors of the bars and add extra nutrients to your snack time.
Conclusion
In conclusion, making Crunchy Apple Bliss Frozen Yogurt Bars is a delightful and healthy way to satisfy your sweet tooth while enjoying the numerous nutritional benefits of the ingredients. With their high protein content, antioxidants from apples, and healthy fats from nuts, these bars make for a perfect treat that aligns with a balanced diet.
Encouragement to enjoy these homemade treats should not be understated. Not only do they provide a healthier alternative to store-bought options, but they also allow you to get creative in the kitchen. The joy of creating homemade snacks extends beyond the kitchen; it fosters a sense of accomplishment and connection to the food we consume.
So, gather your ingredients, follow the recipe, and indulge in the wholesome goodness of Crunchy Apple Bliss Frozen Yogurt Bars. They are sure to become a staple in your kitchen, bringing joy and health to your snacking routine. Enjoy these bars as a refreshing treat any time of the day, and share the joy of homemade snacks with friends and family.
